Airtable for Bloggers
How Hannah Wiginton, of On2Air, used Airtable to build a content marketing pipeline.

Airtable for Bloggers
At Whalesync, we believe strongly in the principle of using the best tool for the job. For that reason, we're always on the lookout for new services that can improve our workflow. Despite this outlook, one tool we consistently come back to is Airtable. We use it to track experiments, organize operations, and even manage this blog.
As a content management tool specifically, Airtable has blown us away. Over the last few months, we've customized Airtable to track content creation and distribution channels, as well as SEO keywords. It now helps us manage hundreds of ideas, dozens of posts, and multiple important fields concurrently.
Our experience leads us to believe that Airtable is one of the best tools for bloggers and content creators. Instead of telling our own story, we wanted to go deeper, so we sat down with content marketing professional Hannah Wiginton who uses Airtable to manage the On2Air blog. She shared a wealth of knowledge with us including exactly how she set up her Airtable base to run a successful blog.
Hi there, you are reading the Whalesync blog. Whalesync is a workflow automation tool that makes editing Webflow CMS, Supabase, or HubSpot data directly from Notion or Airtable really easy. Try it today!
About Hannah
Before we get into the Airtable base, a little background on Hannah. Hannah is a SaaS content strategist and copywriter who's written articles for a number of companies including Elegant Themes, Vector, and New Horizons. Today she leads content marketing for On2Air where she used Airtable to build their content marketing pipeline from scratch.

How Hannah Uses Airtable for Blogging
The Airtable base Hannah created to manage their blog is a doozy! But when you break it down, you'll notice it's actually fairly approachable - even for newcomers to Airtable.
Amongst other things, Hannah uses this base to:
- Collect ideas
- Prioritize potential posts
- Add notes
- Collect important metadata (i.e. content brief, website link, social images)
- Link to Google Docs
- Track due dates and publication dates
- Manage distribution channels
- Monitor launches
Together this functions as a well organized content marketing pipeline that supports the On2Air blog. Below we'll go into more detail on each of the fields that make up this base.
About Airtable
If you're already familiar with Airtable, feel free to skip this section. If not, here's a quick overview as it pertains to content management.
Airtable is a highly flexible database tool that some describe as "Google Sheets on steroids". We actually have an article that compares Google Sheets and Airtable for different use cases.
Using a familiar spreadsheet UI, you can create and customize tables and fields to store your data. The two key features that differentiate Airtable from Google Sheets are "linked records" and "views".
"Linked records" gives the ability to create relations between data tables. For example, if you have a table called Blog Posts, you can create a linked record to a table called Authors. In this way you can cleanly separate your blog posts from your authors while still relating the two.

Airtable's other key feature is "Views". A view lets you see the same data in a different format. You can sort your data, filter it, or completely change its look. This makes it easier to work with your data and organize around your workflow. For example, if we add a status field to our Blog Posts table, we can create a Kanban view that lets us look at each blog post on a board.

Relations and views are key to Hannah's setup of her content marketing pipeline.
Setting Up Your Airtable Base for Blogging
Hannah's base is now chock full of features, but the initial version took only a few hours to set up. In order to use Airtable in the same way as Hannah, we'll first need to set up our base in a similar fashion. To build your own content marketing pipeline in Airtable you'll need to:
1. Create a new base in Airtable and call it "{Your Company} Content"
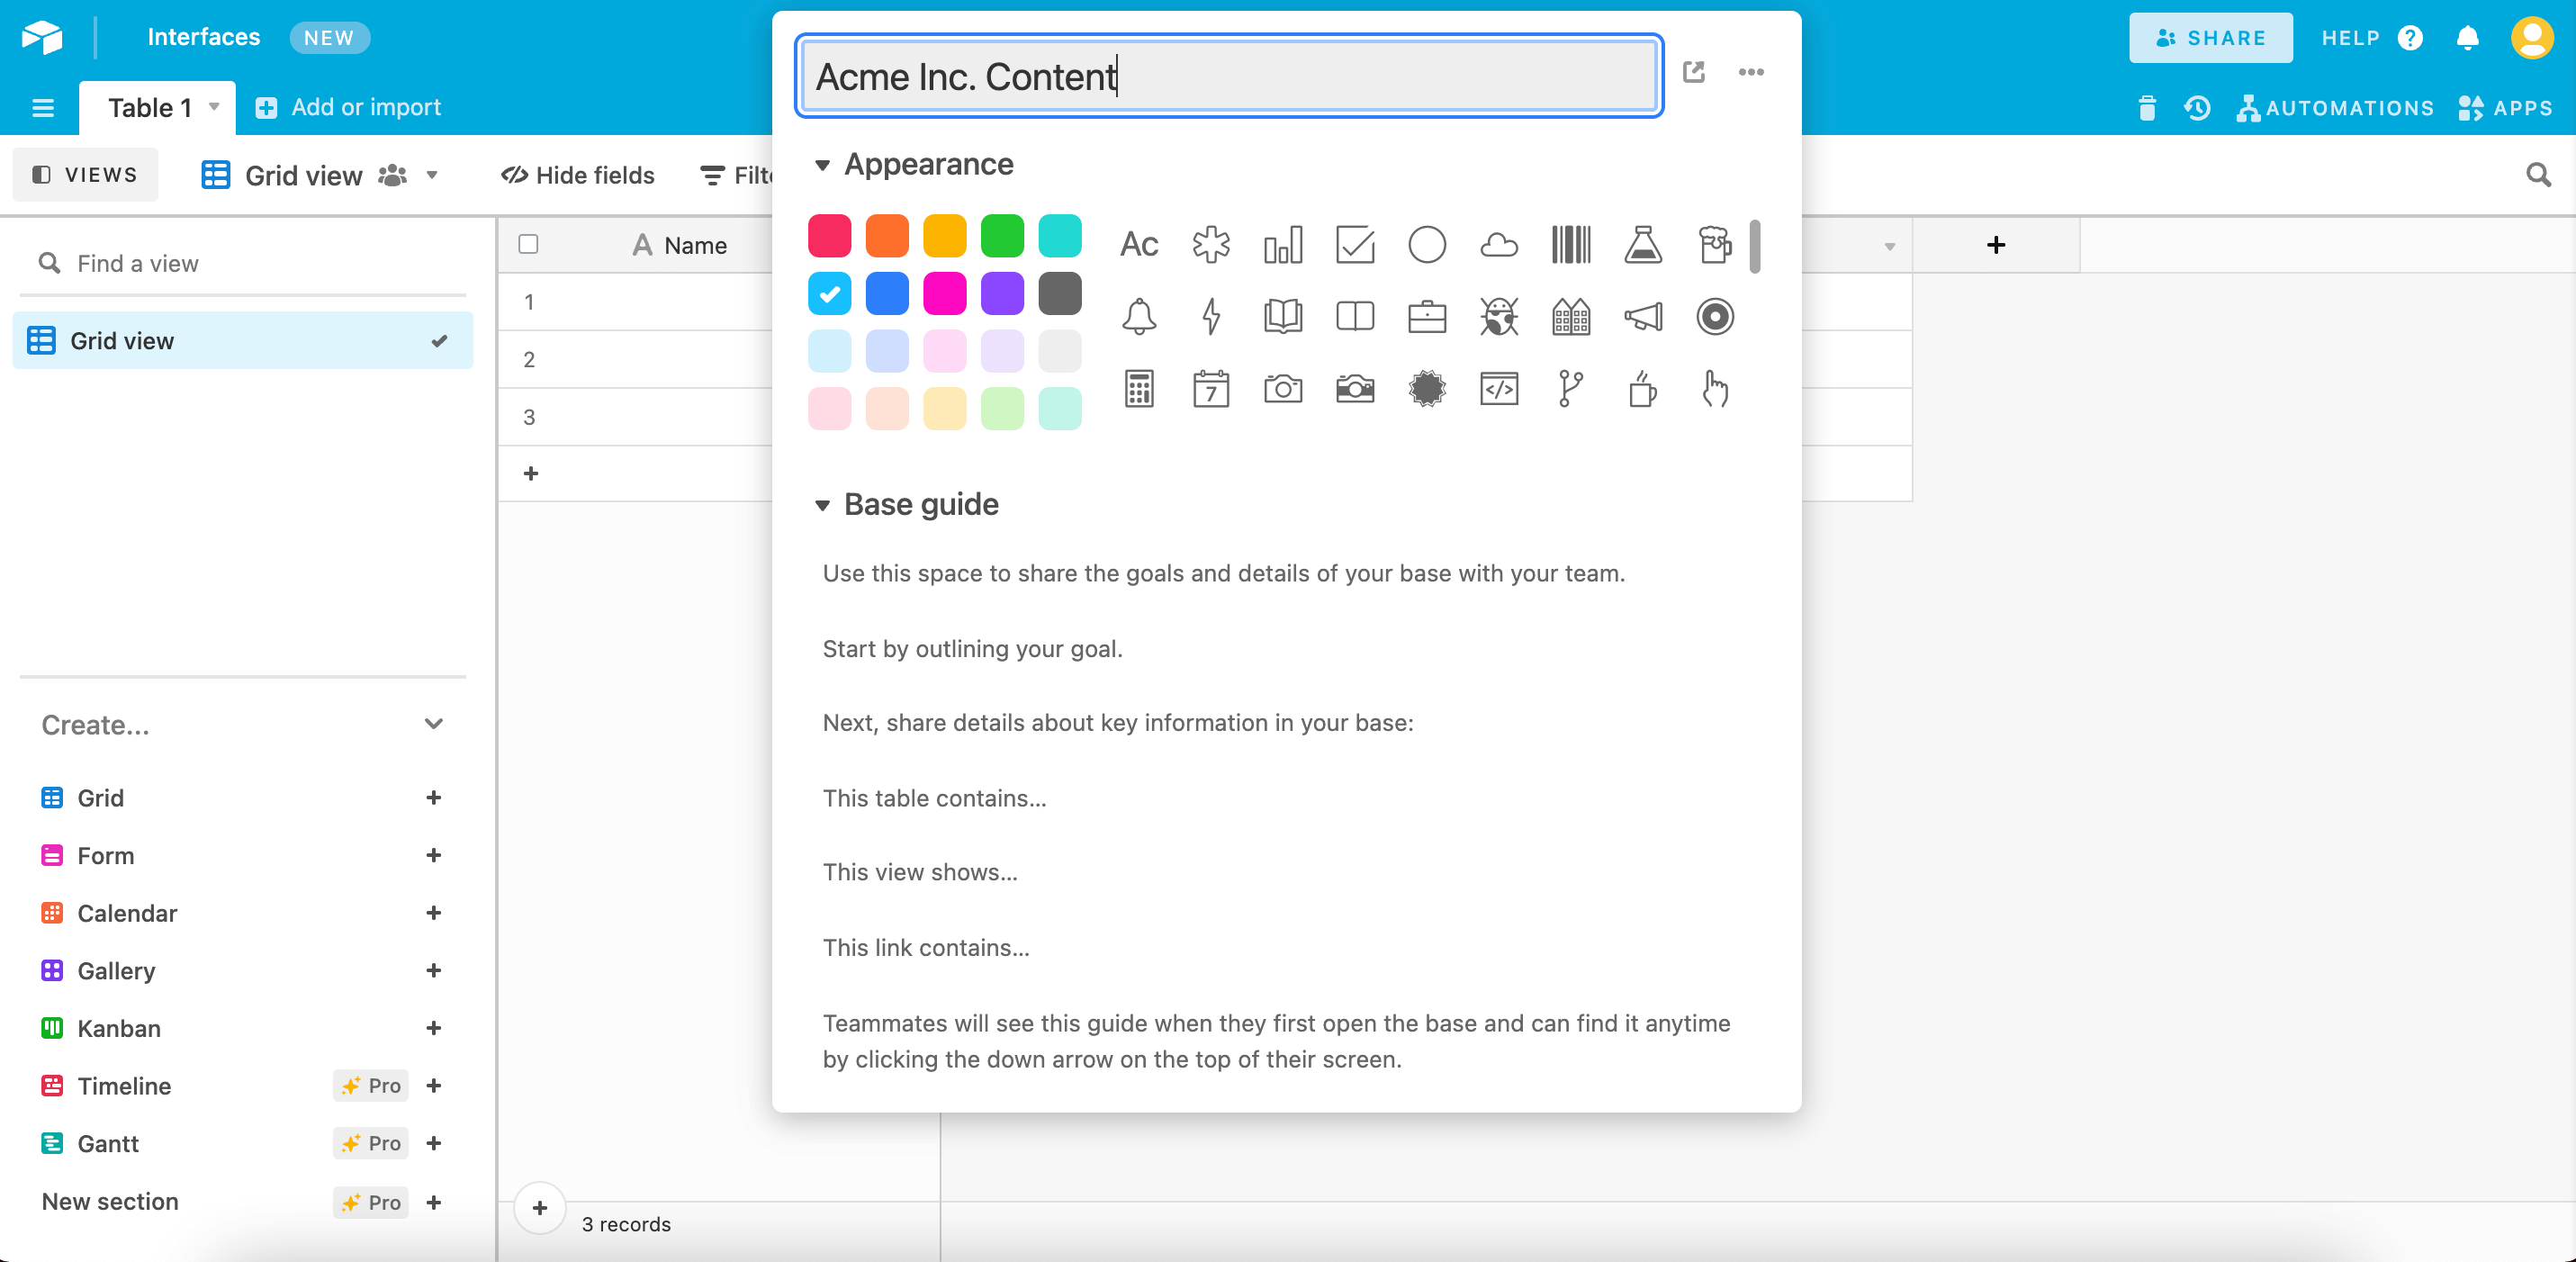
2. Create the following tables:
- Content
- Author
- Keywords
- Distribution Checklist

3. Add the following fields to your Content table:
- Title (single line text)
- Content Type (single select)
- Author (linked record)
- Date published (date)
- Category (multi-select)
- Type (single-select)
- Main Keyword (linked record)
- Featured Image (attachment)
- Distribution Checklist (linked record)
- Notes (long text)

Now that you have the same base structure as Hannah, we can take a look at how she uses it to manage content at On2Air.
How Hannah Uses Airtable to Manage the On2Air Blog
To better understand how Hannah utilizes Airtable, we'll walk through the key use cases she uses this base to solve.
1. Collect Ideas
First and foremost, the Content table serves as a place to collect ideas. Whenever Hannah or someone on her team has a content idea it gets added to this list. There are now over 100 articles and ideas collected here.

2. Categorize and Prioritize
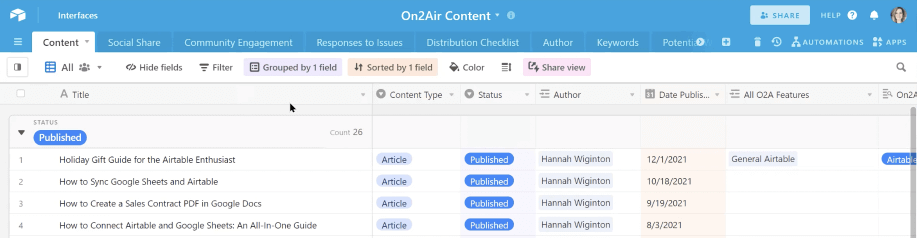
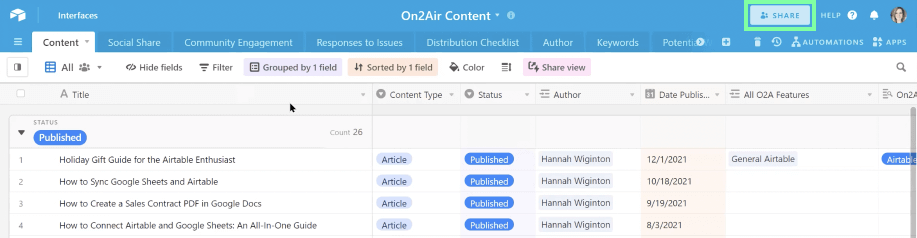
With this large list of ideas, it's imperative to keep it organized. Luckily, Airtable makes organizing your data extremely easy. Hannah uses the "Group By" feature to view all of her content grouped by Status. You'll notice that Published pieces of content are displayed at the top with Potential pieces grouped below.
Hannah also adds structure to her content pipeline using the Content Type field. Here she records whether the piece is an article, video, sales enablement, or social media post. Later she can use this field to create filtered views with only the content type that is relevant at the time.

3. Assign an Author and Due Date
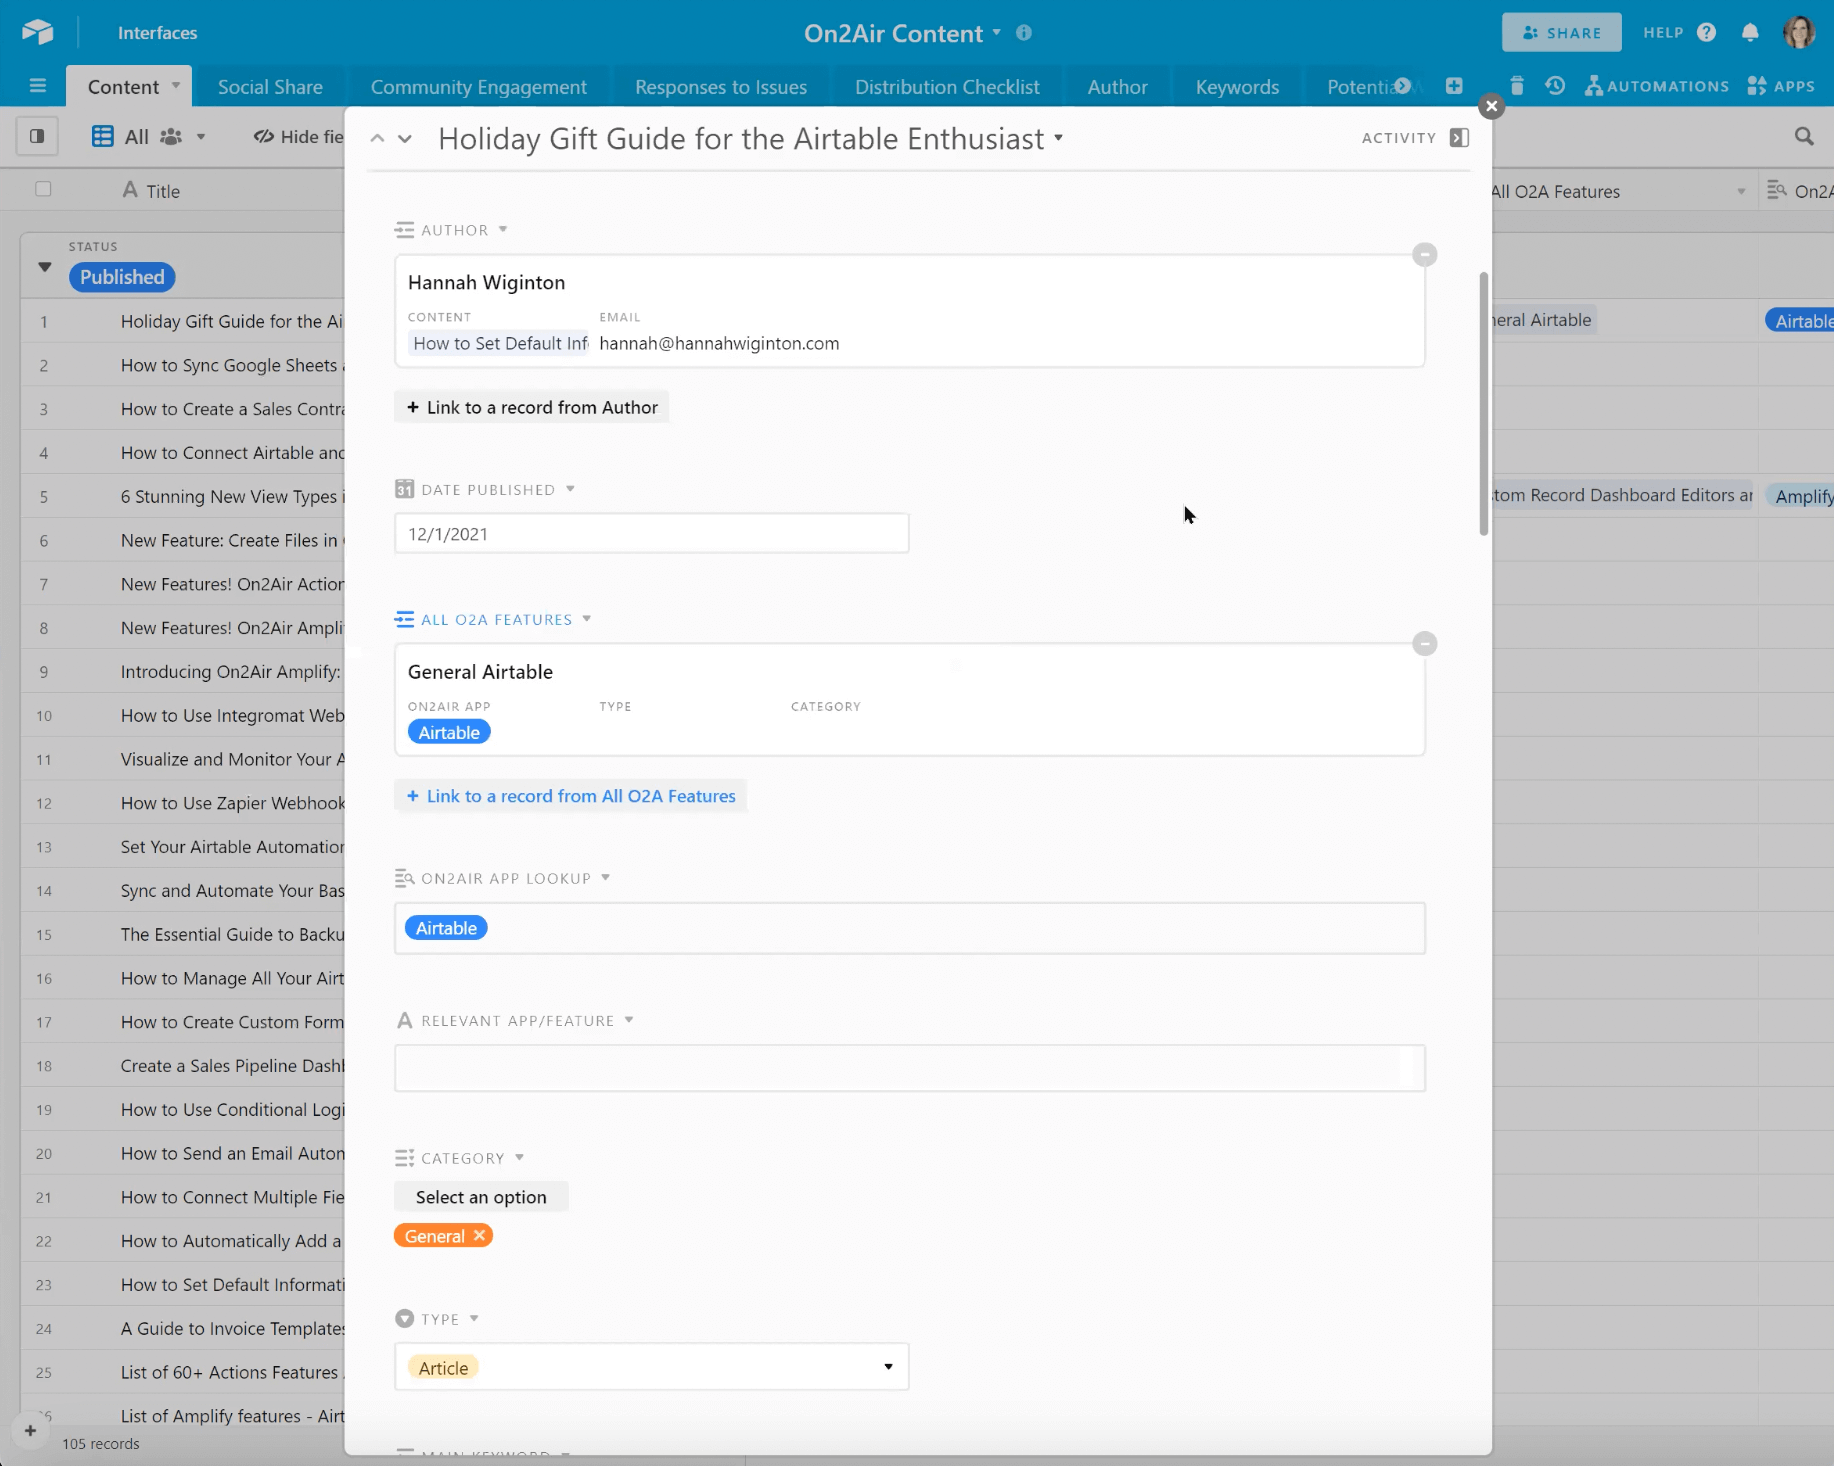
With her large list of ideas organized, Hannah can now start adding details to each one. The first order of business is assigning an Author and a Due Date. By using a linked record for the Authors field, she can reference the Authors table instead of re-writing the same name for every post.
The Due Date and Date Published fields are important for two reasons. First of all, it helps Hannah communicate deadlines to her team. Secondly, it enables her to create a Calendar view that lets her see all her posts in a more digestible format.
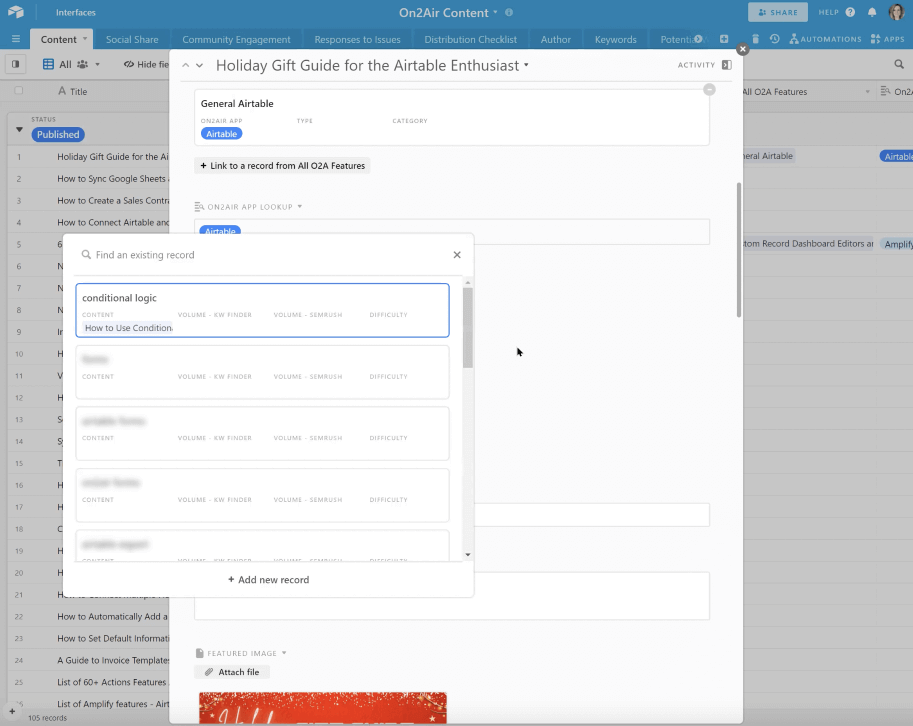
4. Link to SEO Keywords
Now the fun part - SEO 🙂. In the separate Keywords table, Hannah stores the keywords she's trying to rank for on Google. Because she previously set up a linked record in her Content table, she can reference the specific keyword in each piece of content. This is a perfect example of how useful linked records can be in a base.
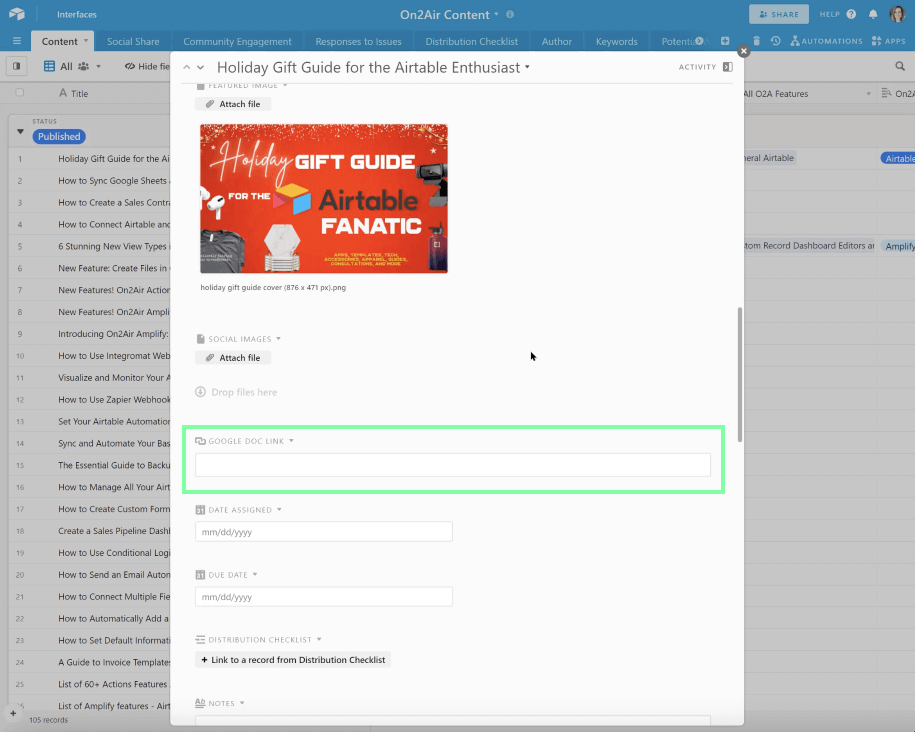
5. Link to Google Doc
Although Airtable is very powerful, one of its drawbacks is that it doesn't have a great document editor like Google Docs or Notion. Luckily, Hannah found a workaround with On2Air's Amplify app. Using the Amplify app, you can edit a Google doc directly from Airtable. Hannah writes her content in Google Docs and then links it to Airtable with a URL field called Google Doc Link. This was one of the more impressive "hacks" I'd seen for creating a true end-to-end system.
6. Add Notes and Other important info (eg. questions)
As any writer knows, dozens of thoughts will come up throughout the content creation process. Rather than jot these ideas down in a notebook, Hannah saves them in context using a Notes field in Airtable. Because her notes are saved in the base, she can easily come back to them at any time.

7. Track Pre-Launch Checklist
Before publishing there's always a few loose ends that need to be tied. Using a Pre-Publish Checklist, Hannah includes final steps to be completed. In the example below, this includes adding at lest 3-4 internal links into the post.

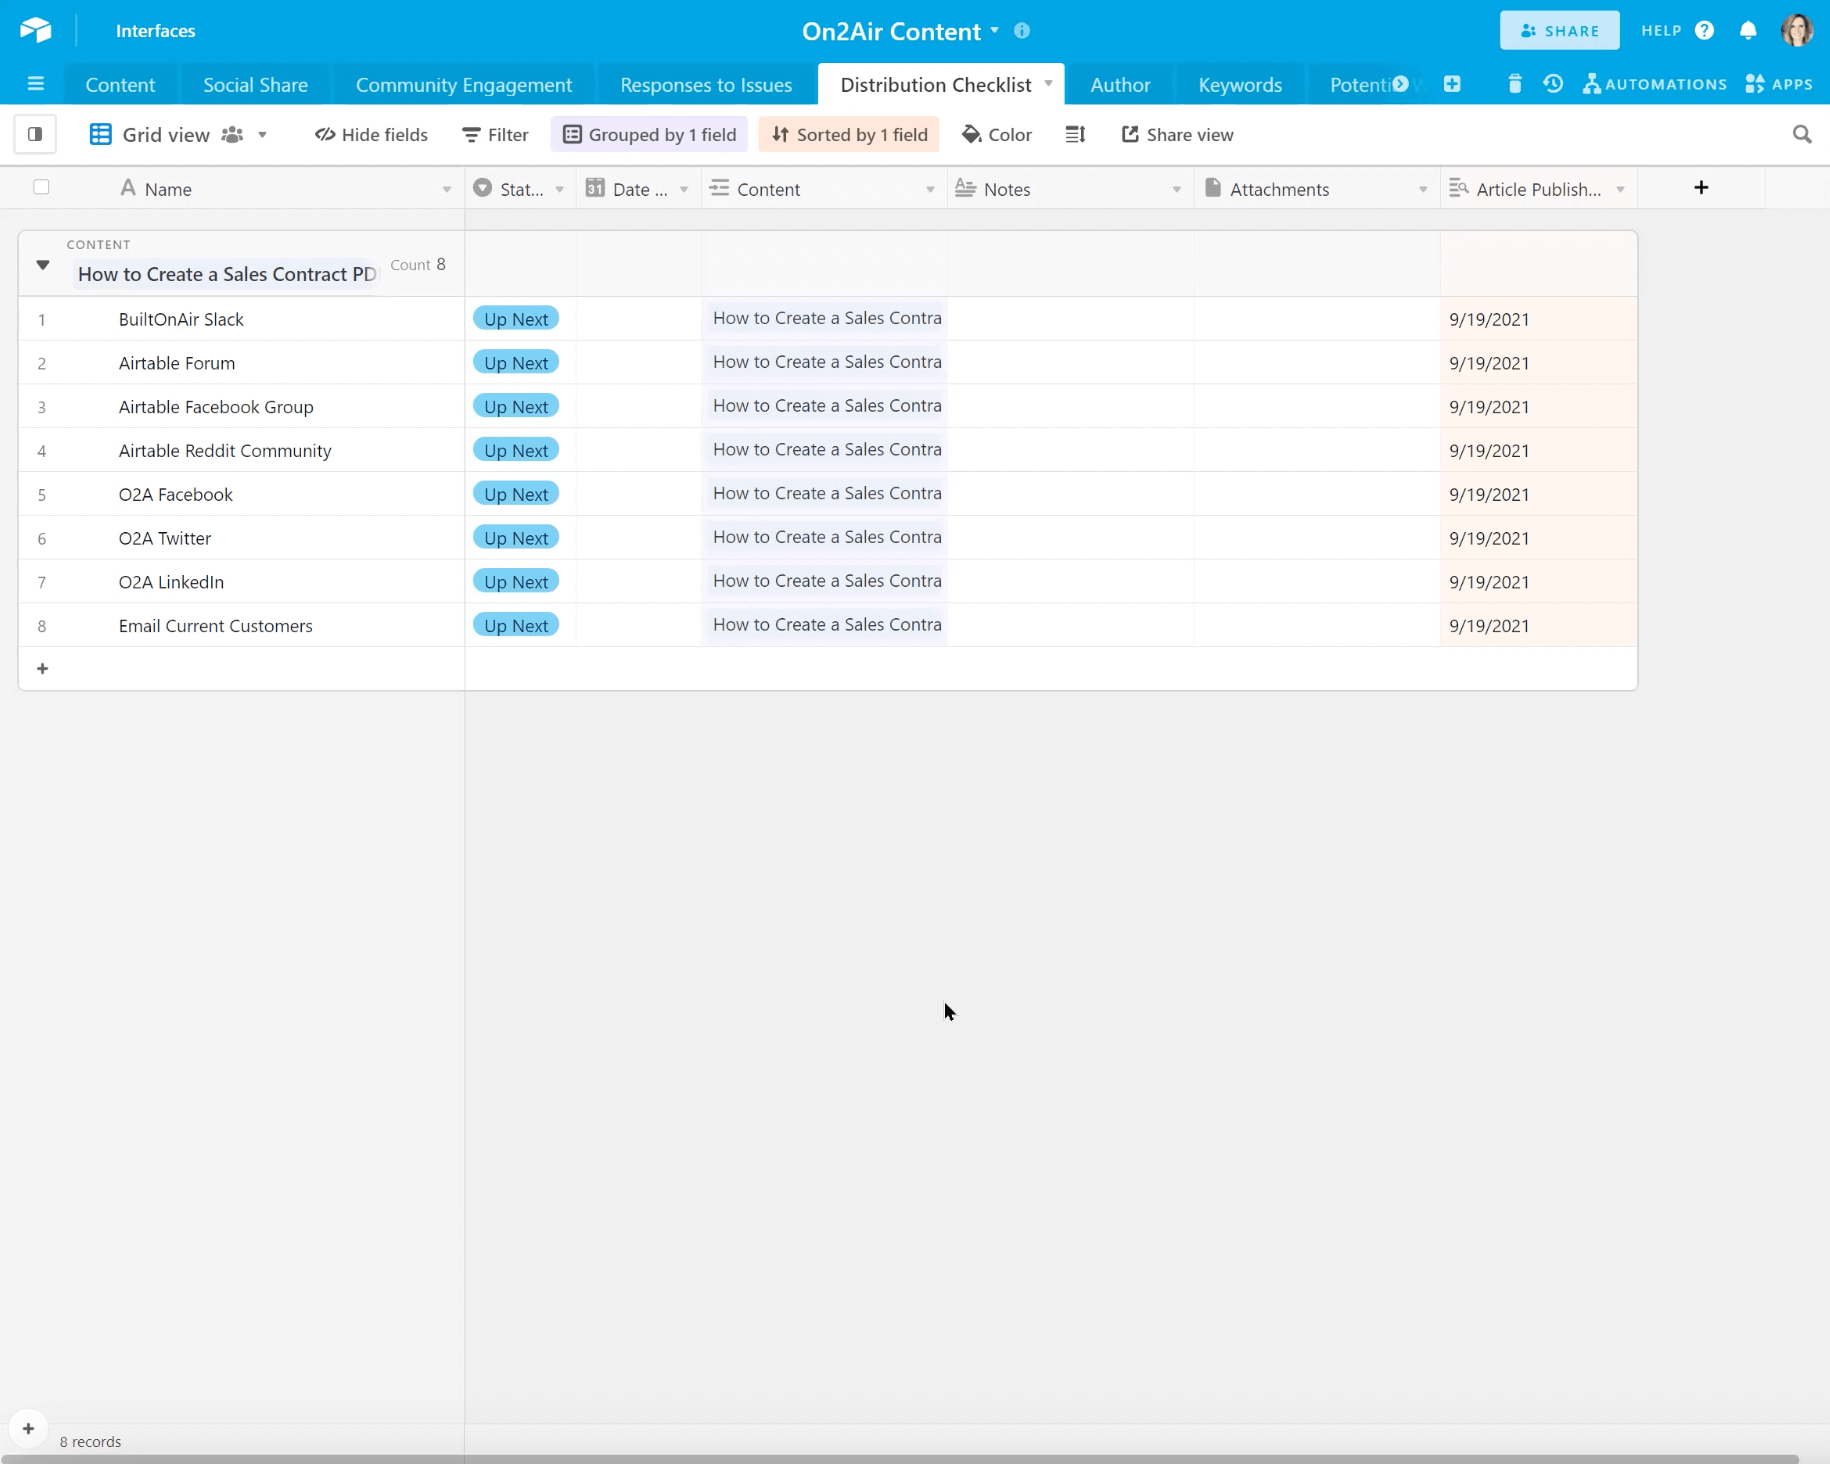
8. Track Distribution
Once Hannah's finished creating content, there's still work to be done in distributing that content to readers. This is where the Distribution Checklist table comes in. Hannah added all the places she might share a piece of content to this table. Using linked records once again, she adds each distribution channel to her post. Hannah can then track the status of of each channel and ensure that she distributes the content everywhere she intends.
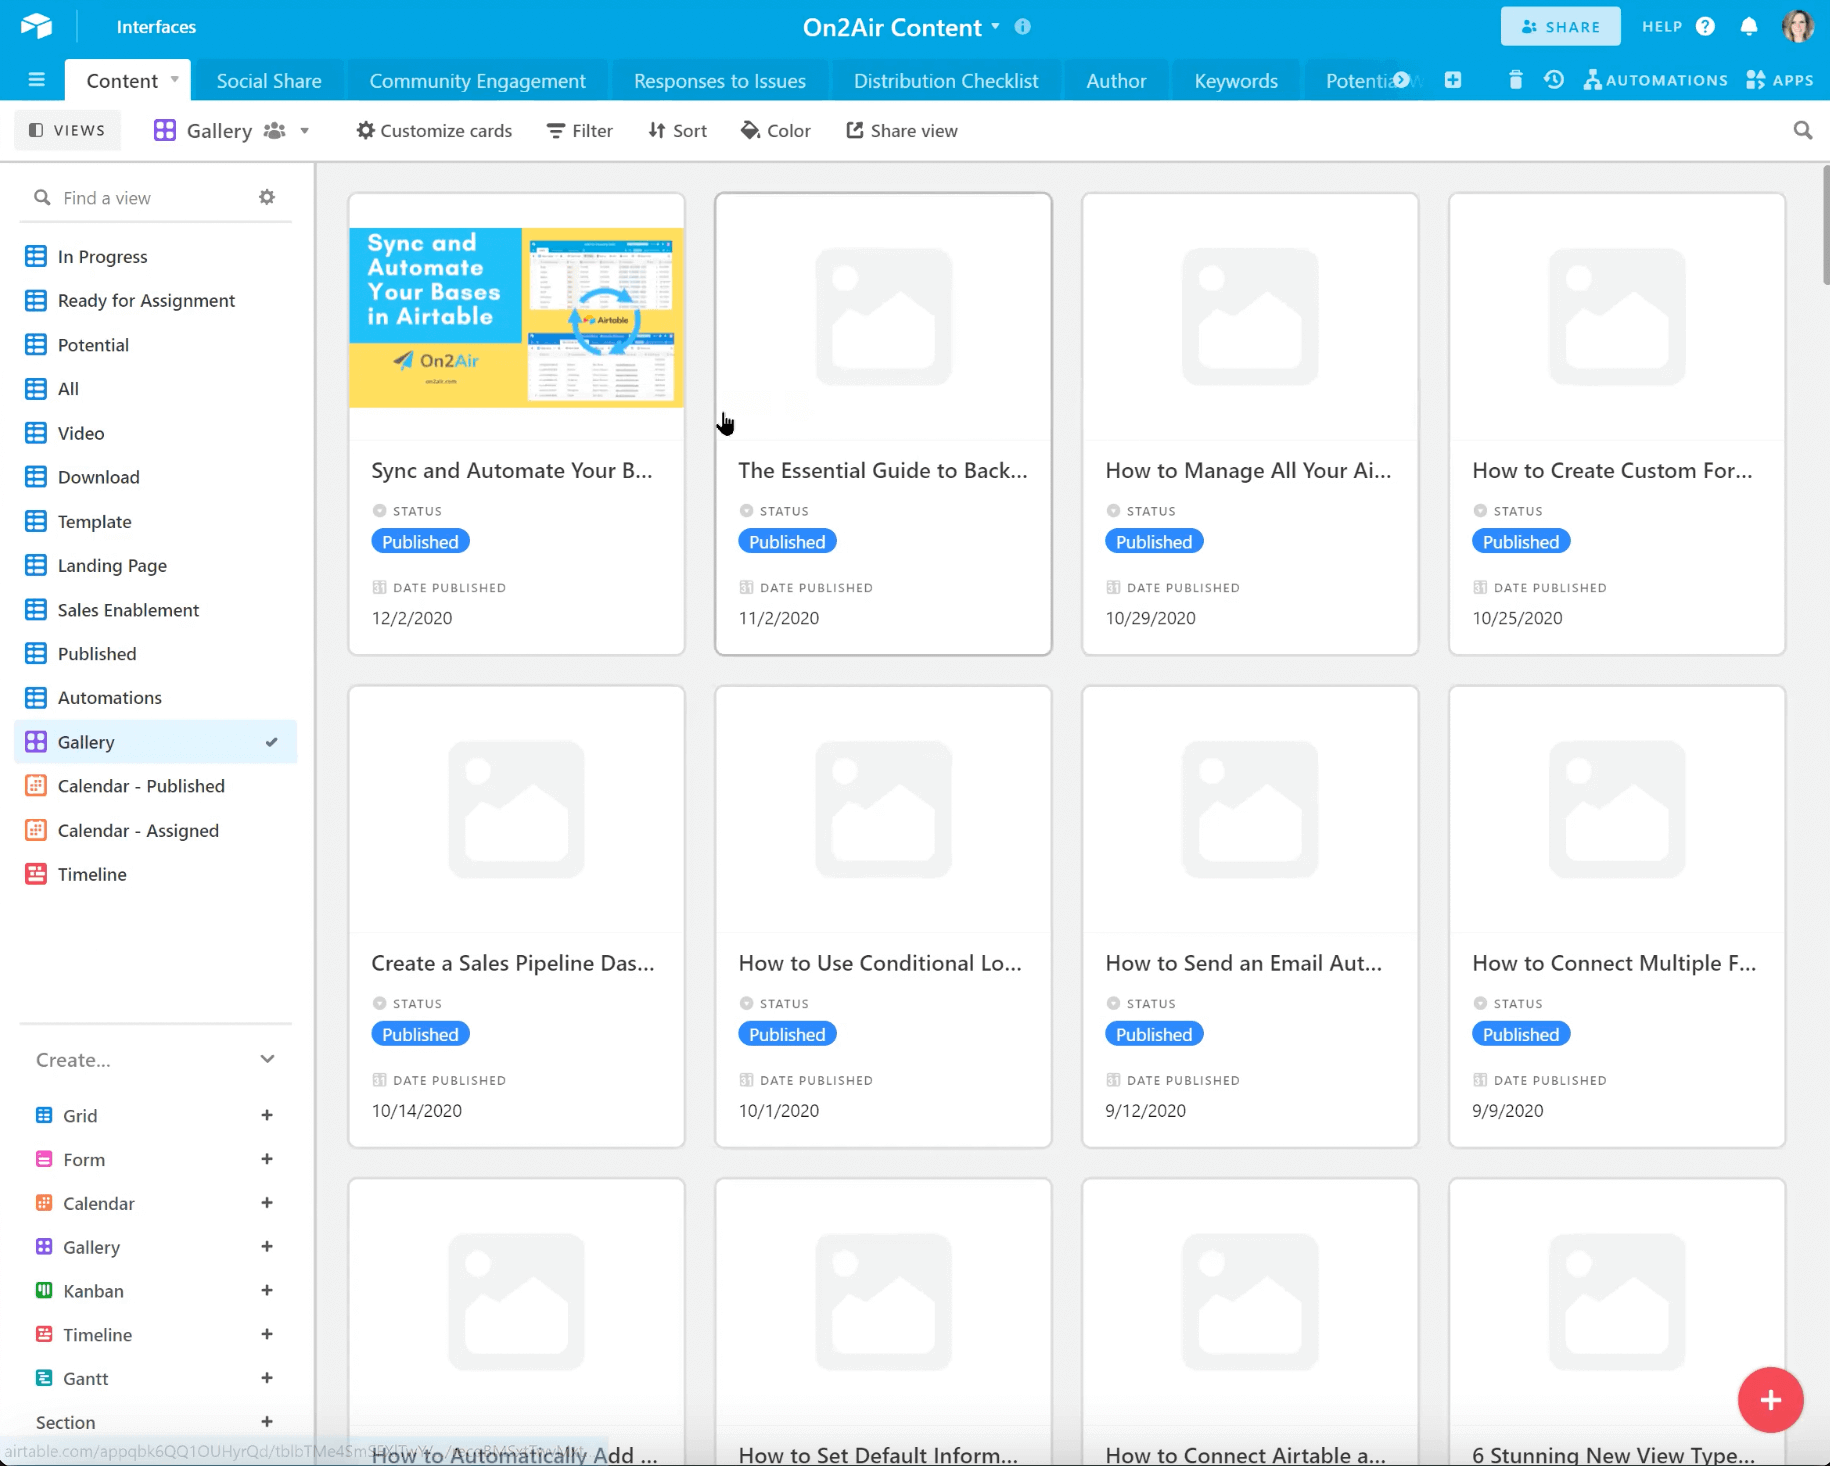
9. Organize Views
Let's not forget about views! Hannah has 15 pre-configured views that make it easier to work with her data. The Gallery view (shown below) is an easy way to see all published posts side-by-side. The Calendar view and Timeline view help the On2Air team measure their progress against their schedule.
10. Share with the Team
Finally, once all is ready, Hannah shares relevant views with the rest of her team using Airtable's native share feature. Although Hannah leads most of the content efforts today, her base is set up for the future to facilitate collaboration among a team.
Why Hannah Chose Airtable
Through the examples above, hopefully you've gotten a sense for just how powerful Airtable is for content marketers. There are other tools out there, but in Hannah's opinion nothing else really comes close.
Here's how Hannah described the difference between Airtable and Notion:
"Notion is great for some things, but its database is very simple. It doesn't have the depth that Airtable has in creating structured views of things. Of course the other difference is that Notion only allows you to use text as a primary field which is limiting. In Airtable you can make your primary field a formula, number, date or really anything you want."
And her comparison to Google Sheets:
"[With Google Sheets] you don't get the power of relational linking. It's technically possible to link things in spreadsheets, but it's just much more difficult to upkeep. Being able to quickly add linked records to my distribution checklist, keywords, and features makes all the difference in the world."
Hannah's Tips for Bloggers
As a final takeaway, Hannah shared her tips for anyone thinking about a similar setup for their content management:
"Stay on top of it because It can keep you extremely organized! It's impossible to remember all the articles you've published, when you've published, what the link is, etc. With Airtable you can track all of this, so you can easily reference it later on. Instead of having a single person try to maintain all the knowledge, it's all in Airtable and ready to be edited or shared. Ultimately, Airtable keeps you organized, which saves a lot of stress."
Subscribe for more
Stay up to date with the latest no-code data news, strategies, and insights sent straight to your inbox!


.svg)


.svg)

