How to Sync Airtable and Webflow (the Easy Way)

Connect Airtable base to your Webflow CMS in ten quick steps

Airtable + Webflow is one of the most powerful combinations in all of no-code. By syncing Airtable and Webflow, you can create job boards, automated SEO pages, resource lists, and more.
In this short tutorial, I’ll walk through how to sync data between Airtable and Webflow step-by-step. To do this, we’ll use Whalesync, which was purpose-built to sync these two tools. Whalesync handles things like multi-reference and rich text fields out of the box and syncs data in real-time.
The video tutorial, step-by-step guide, and interactive demo cover roughly the same steps, so feel free to pick the style you prefer 🙂.
Video Tutorial - Sync Airtable to Webflow
Step-By-Step Guide
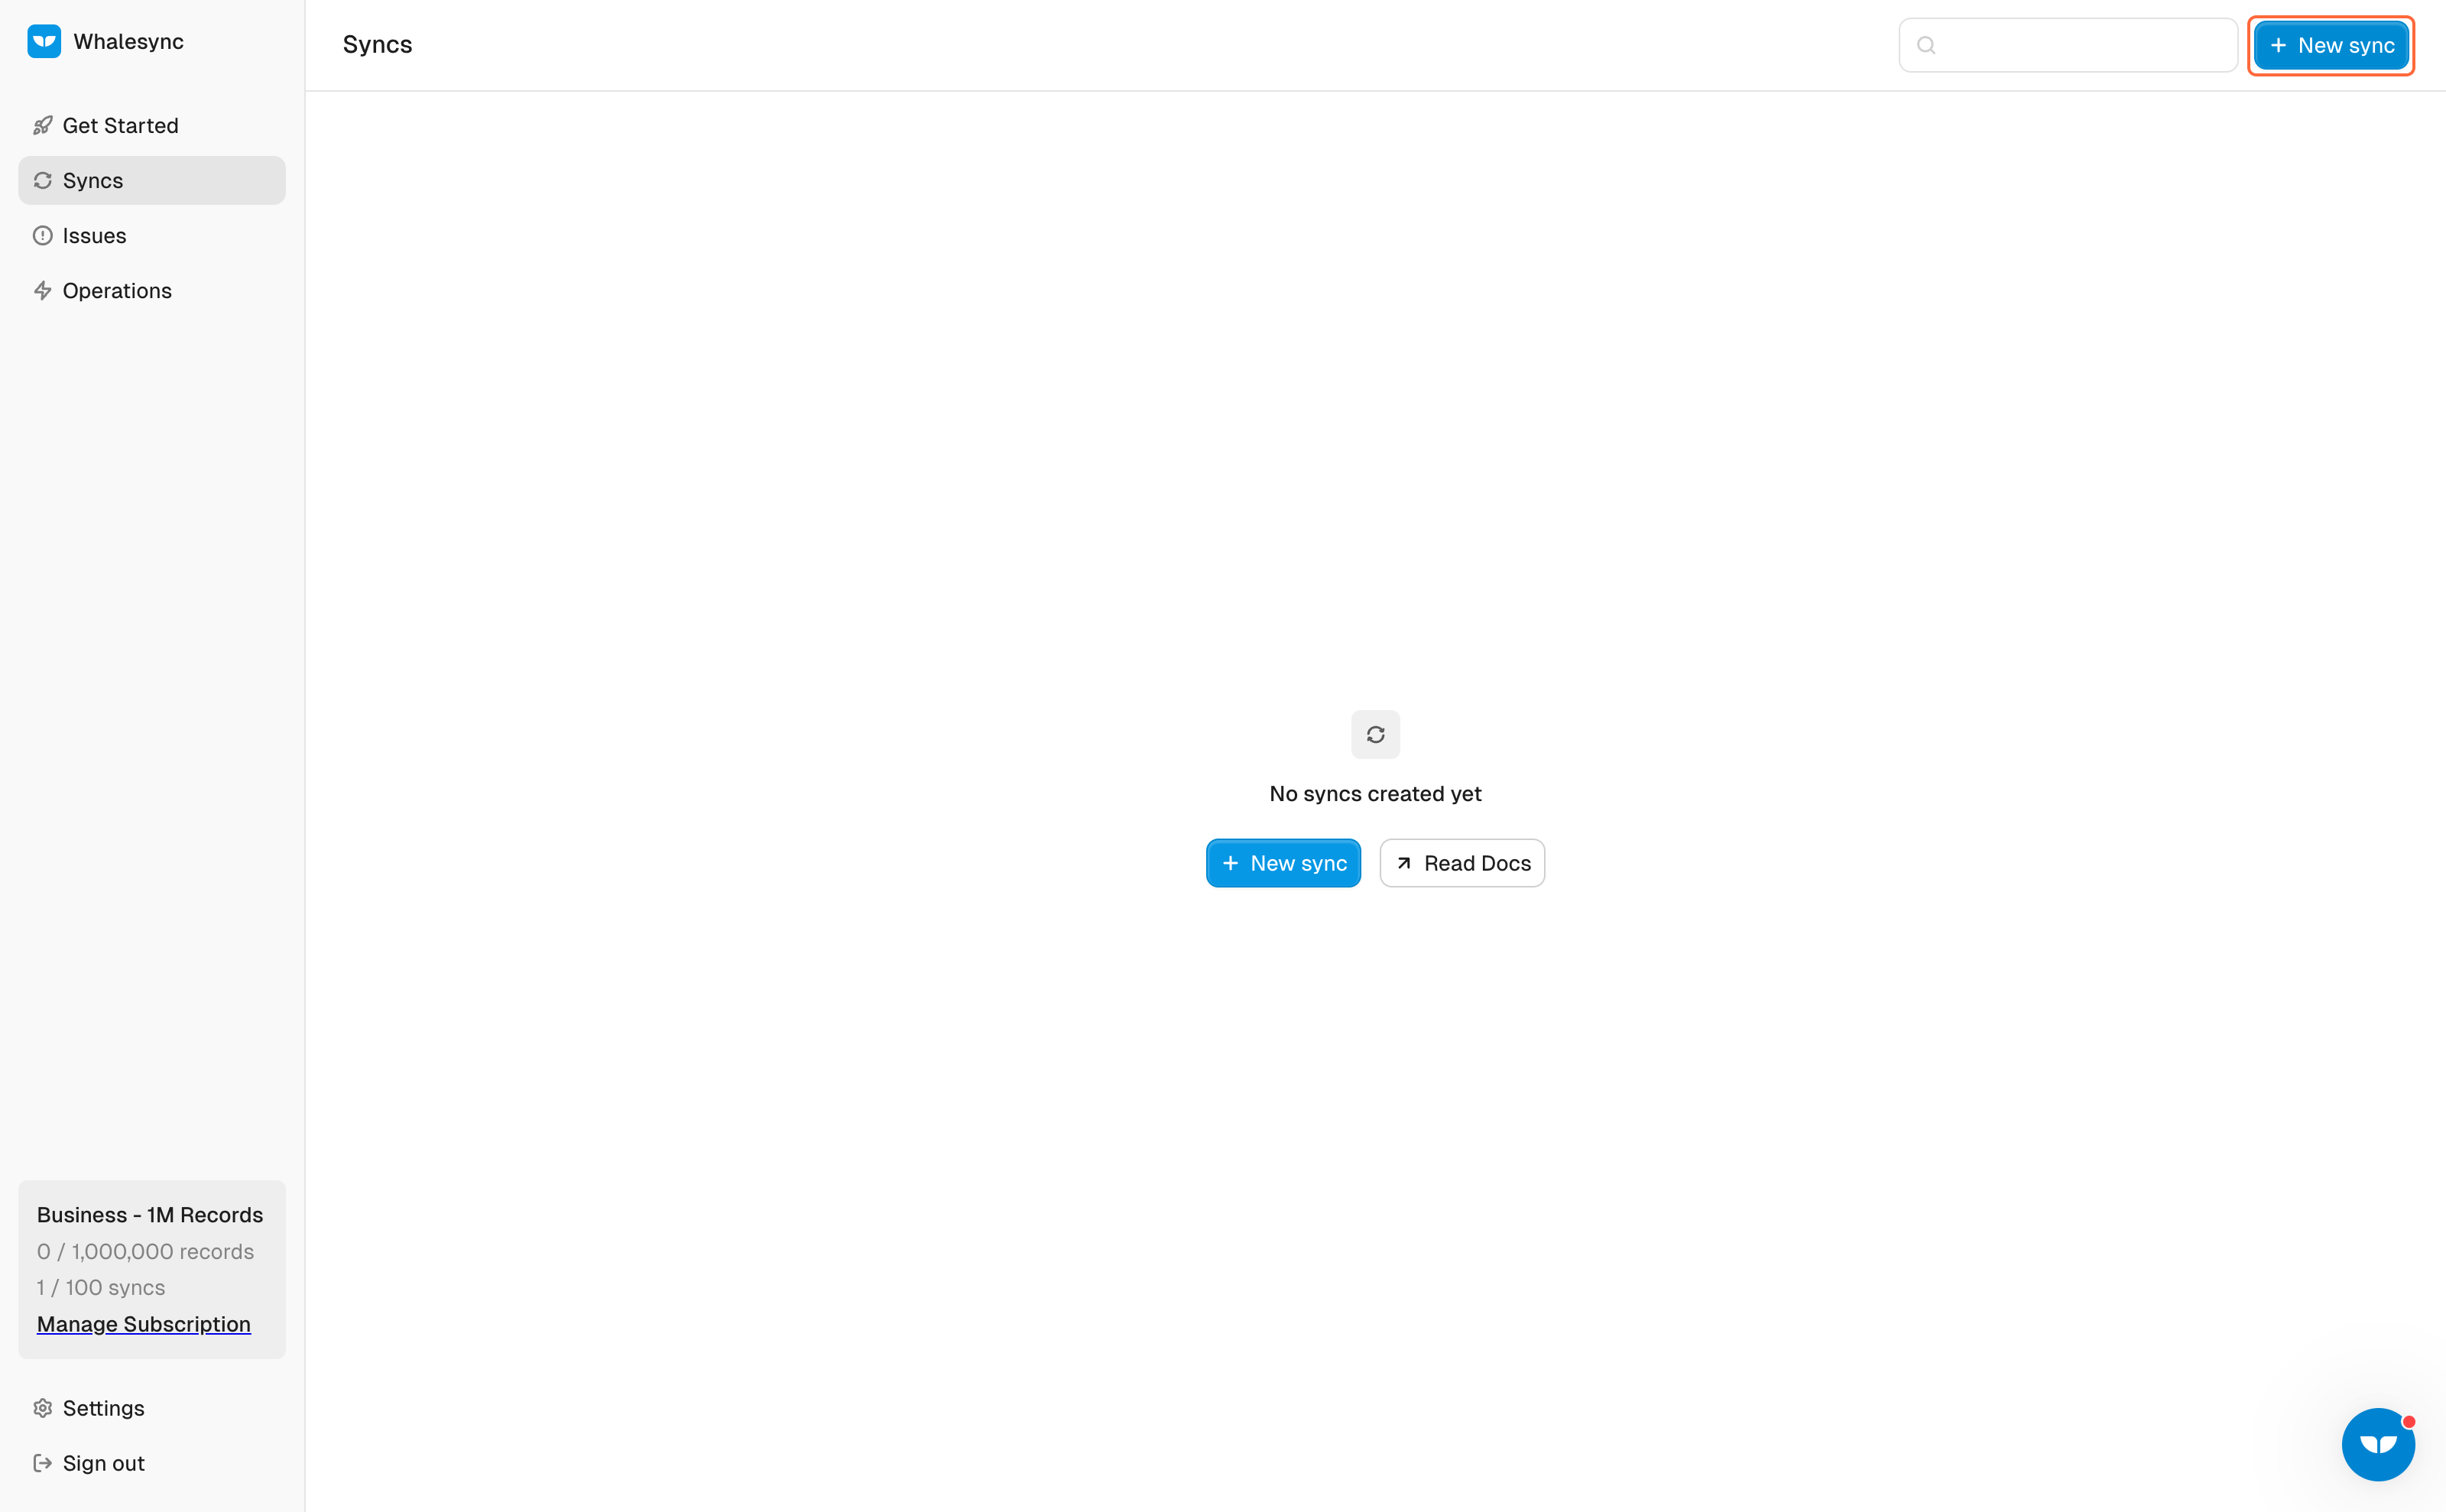
1. Create your Sync
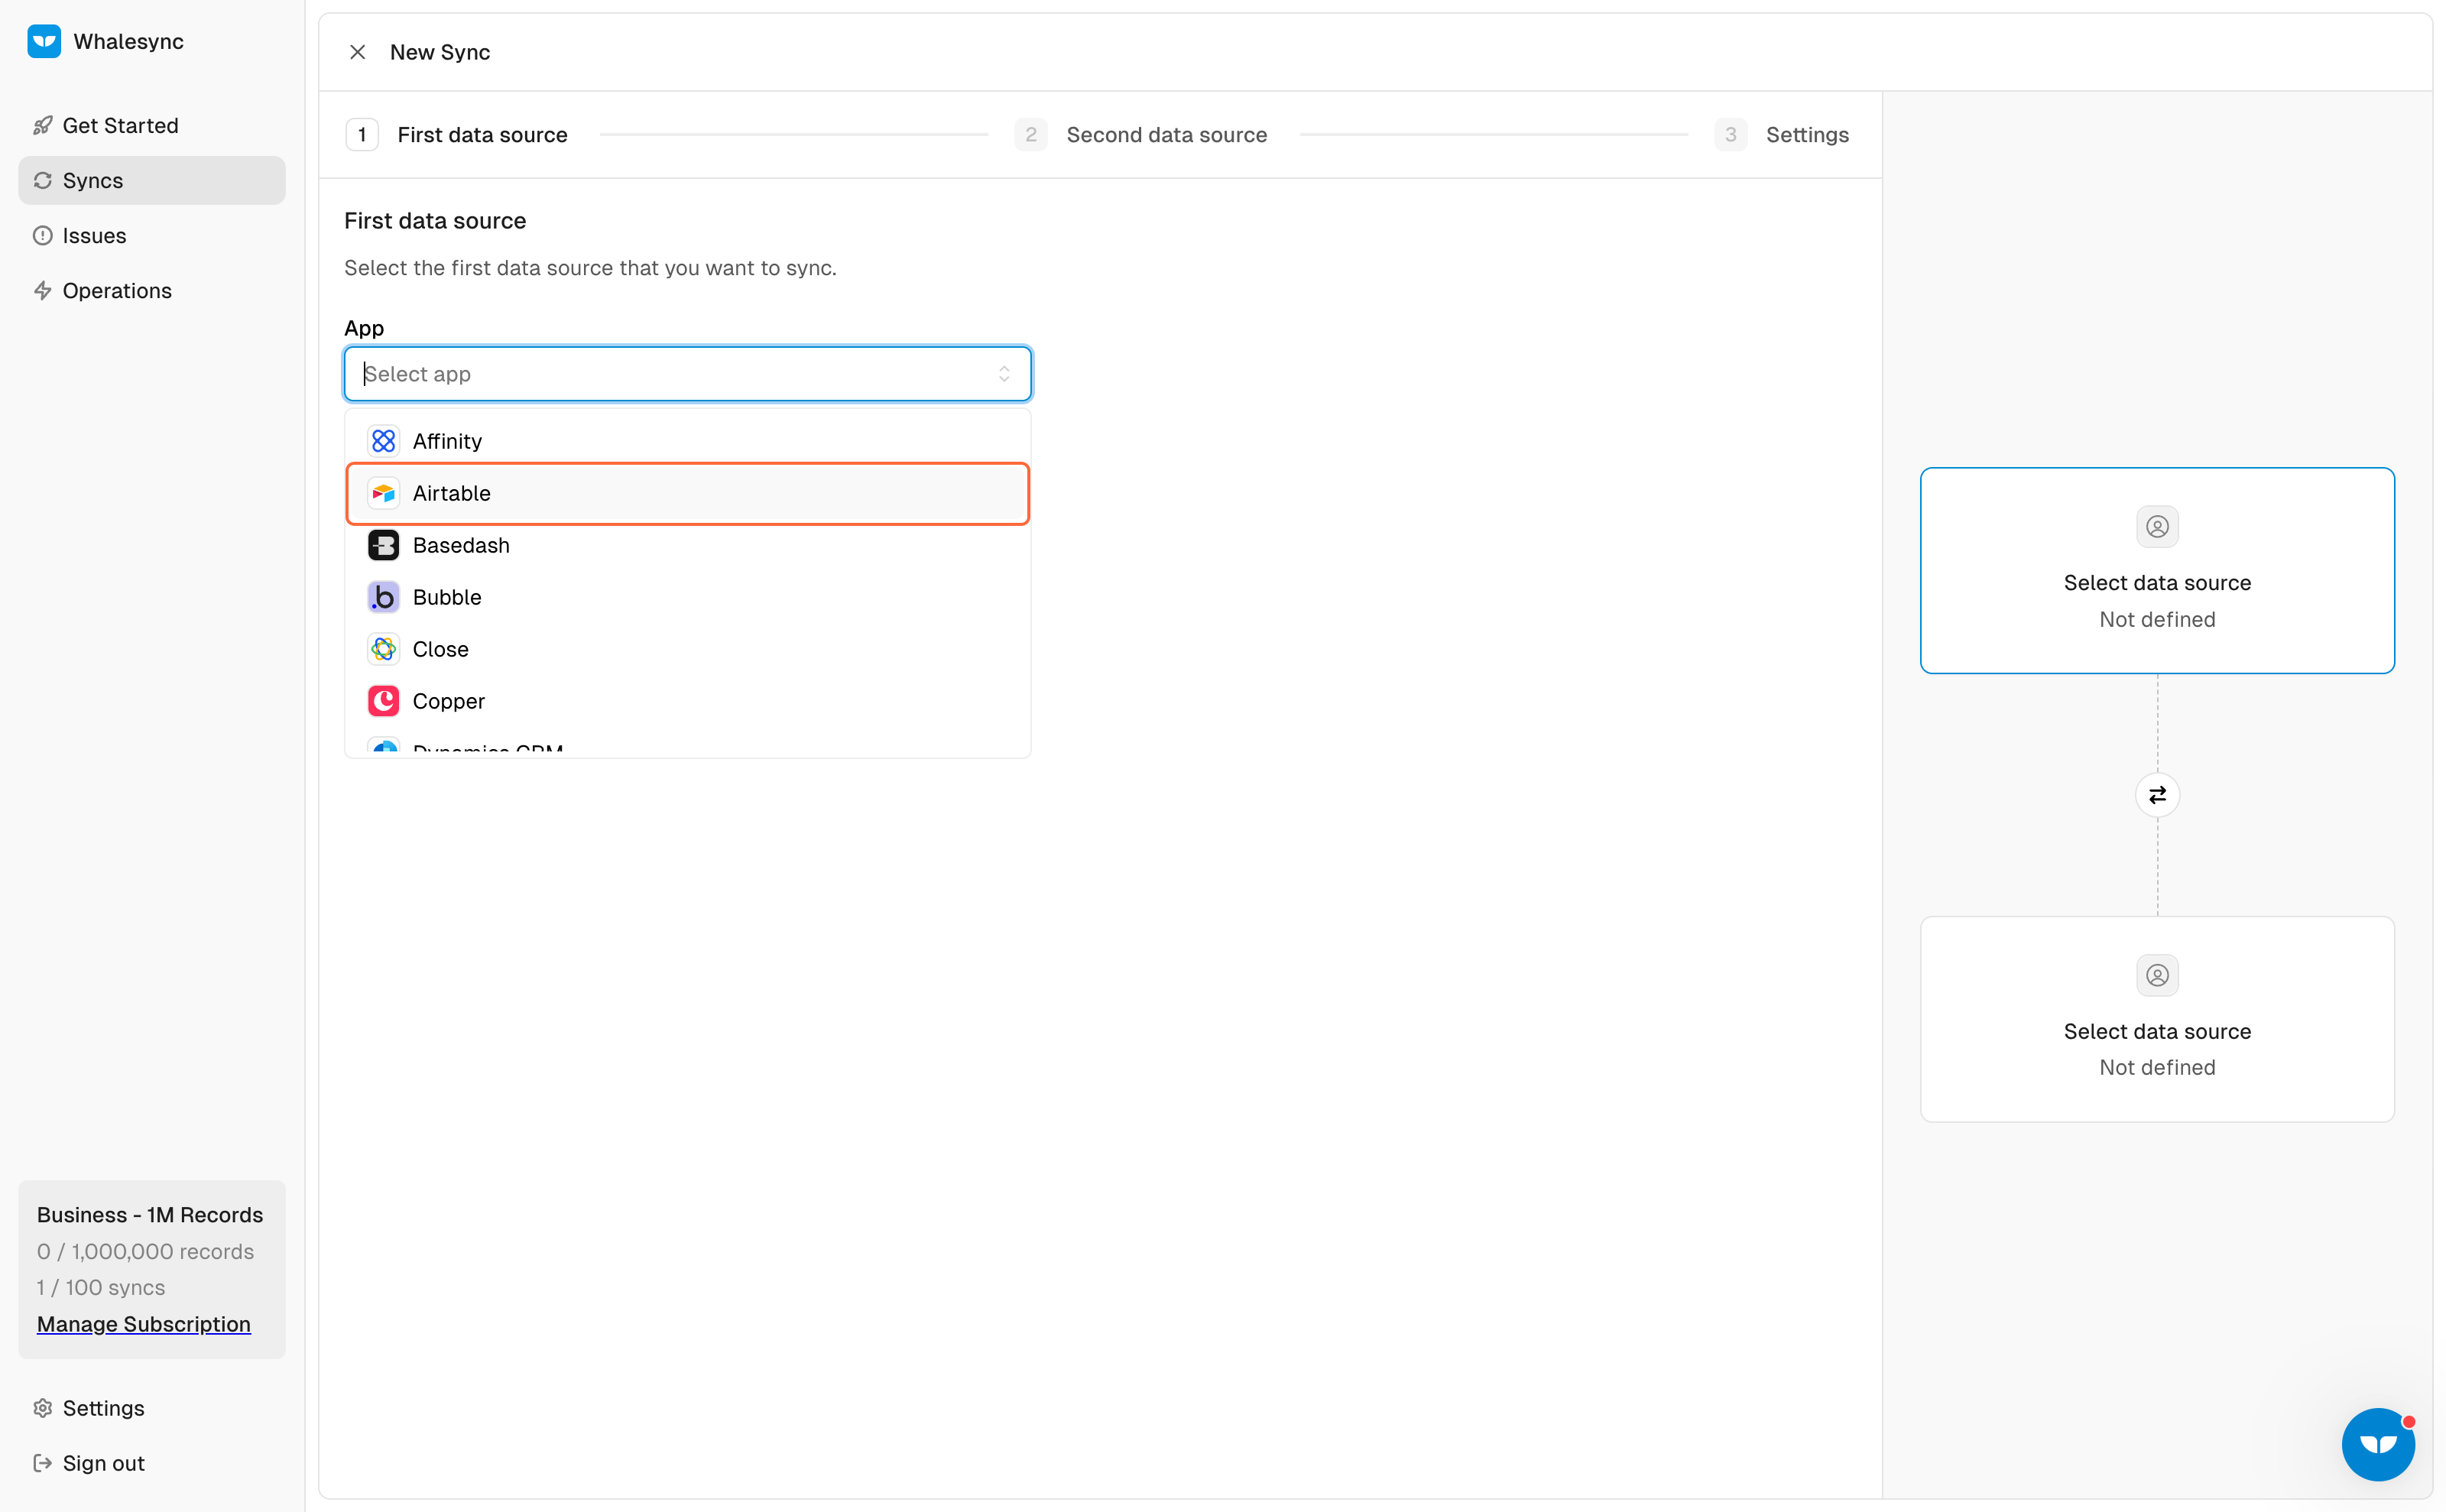
2. Select and Authorize your first app - Airtable
3. Paste your Airtable Base Sharing Link

4. Authorize your Airtable app

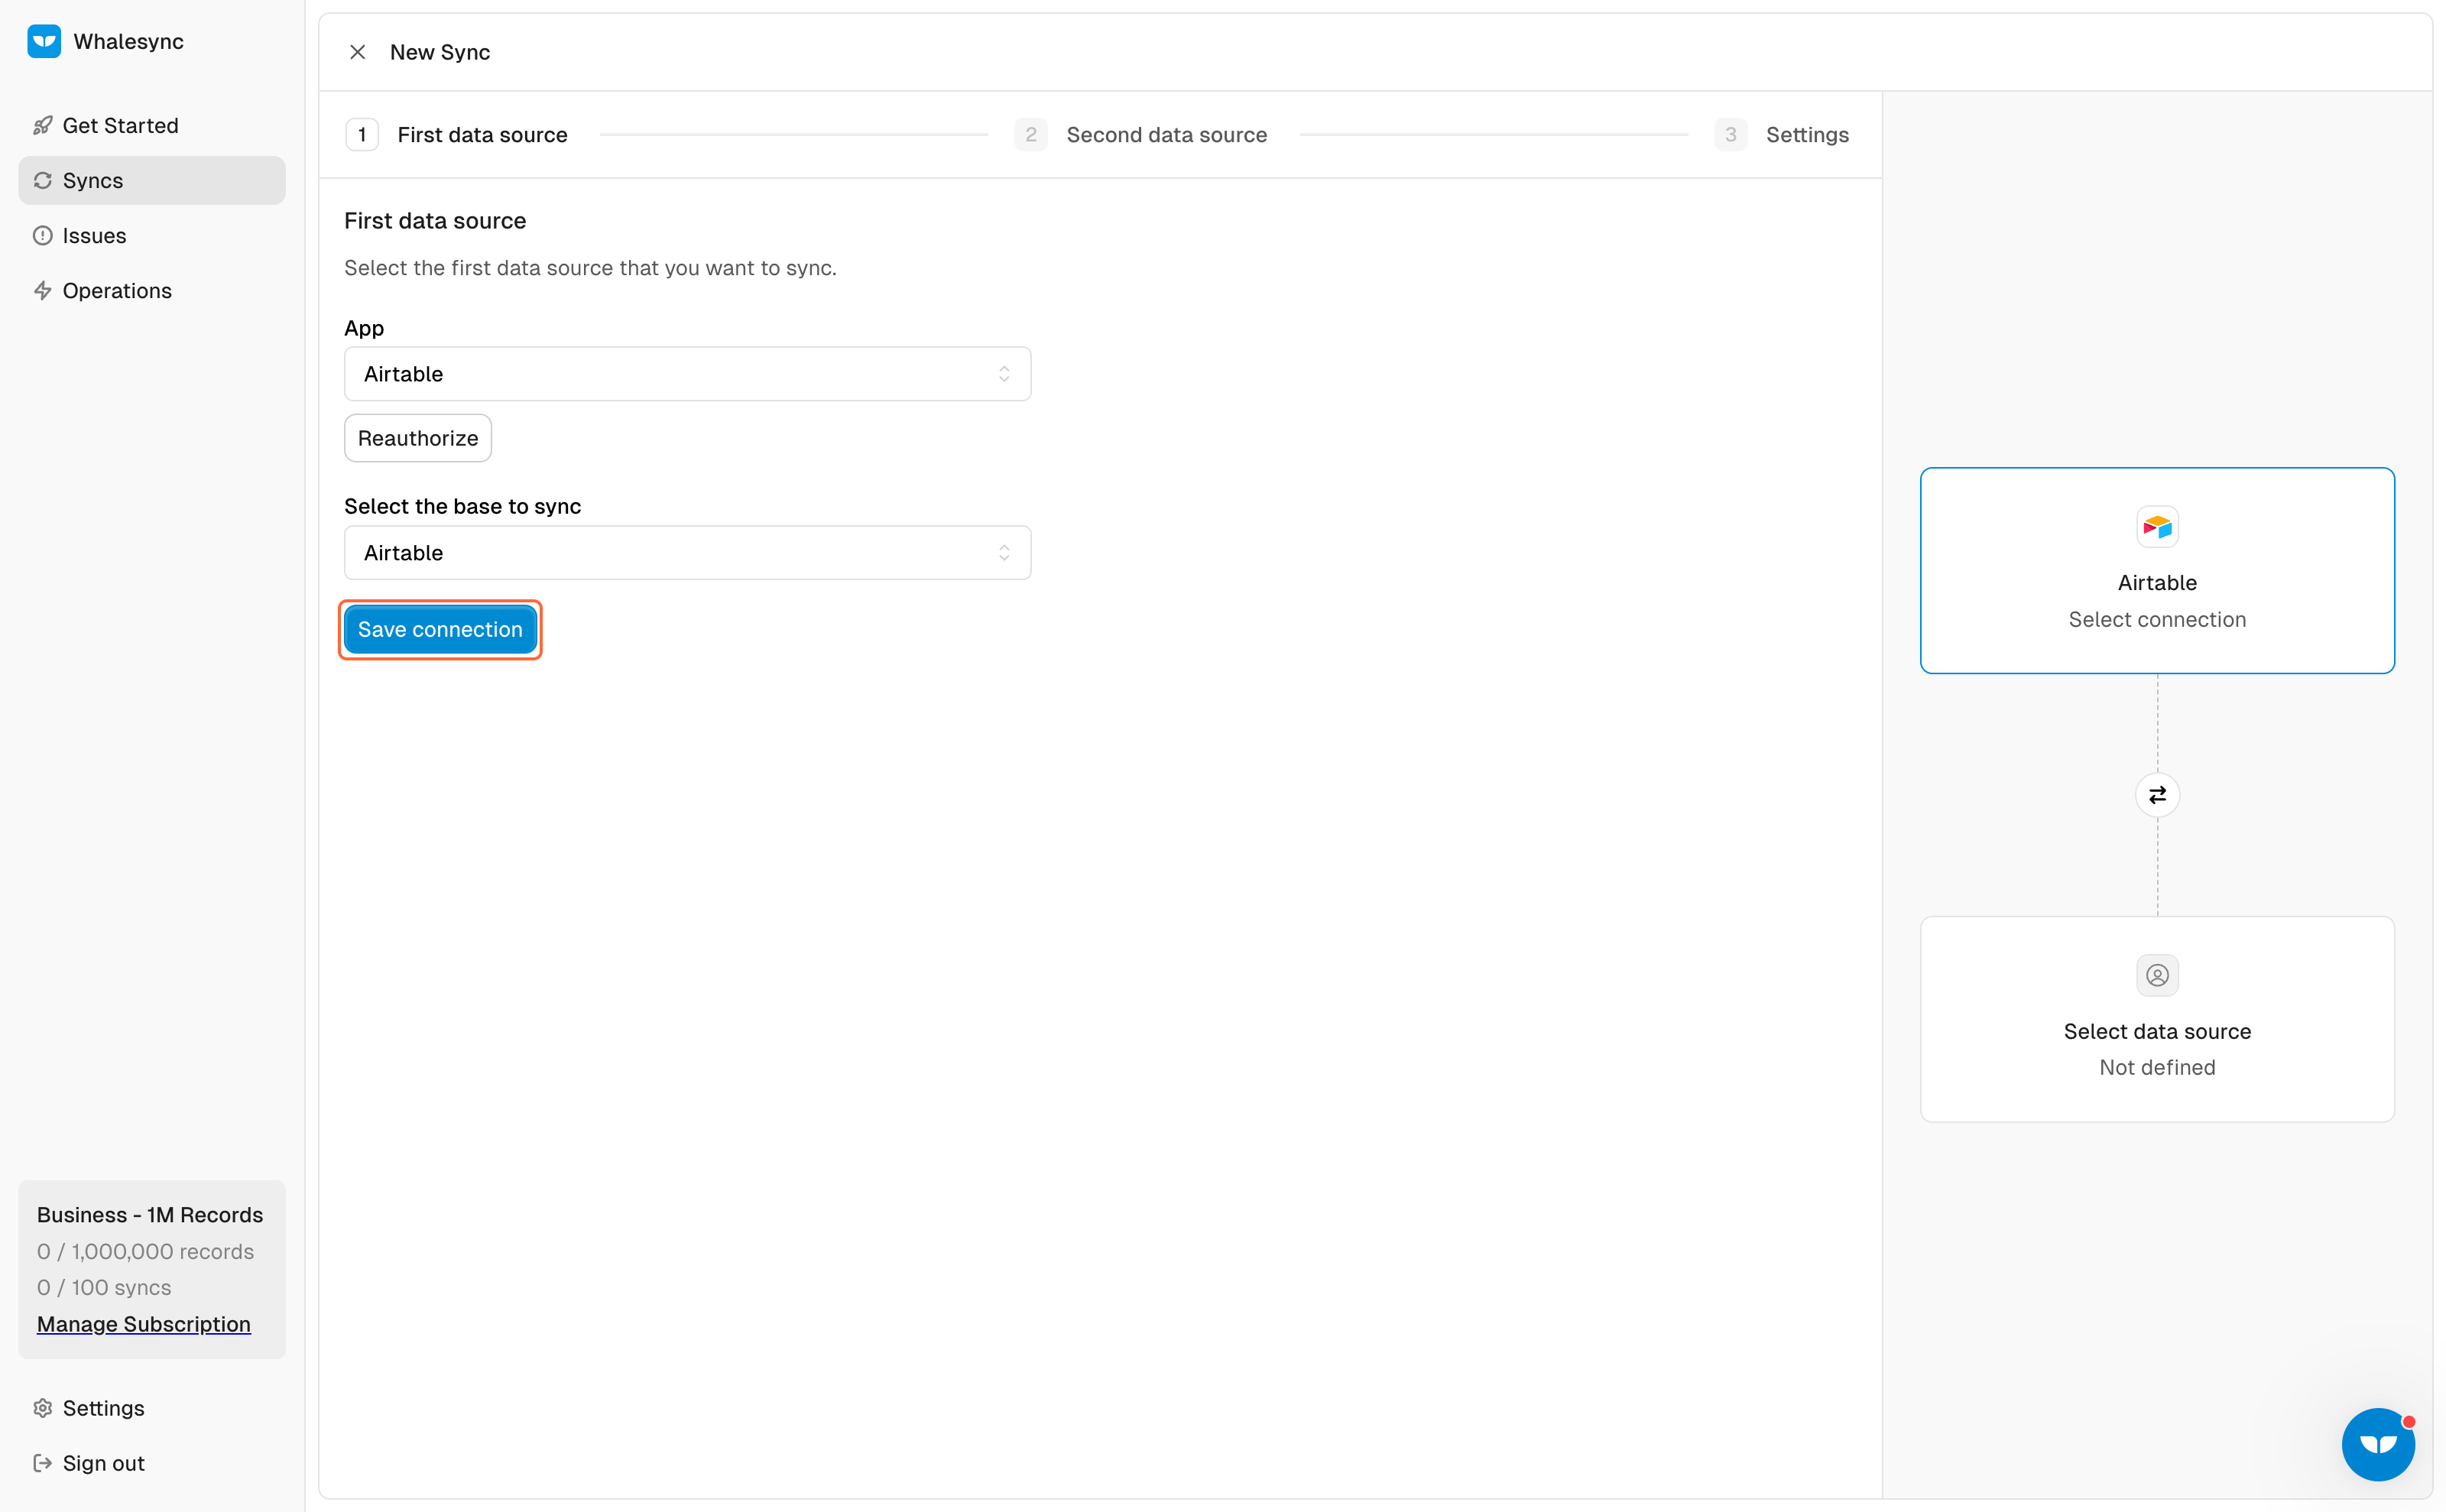
5. Save your connection
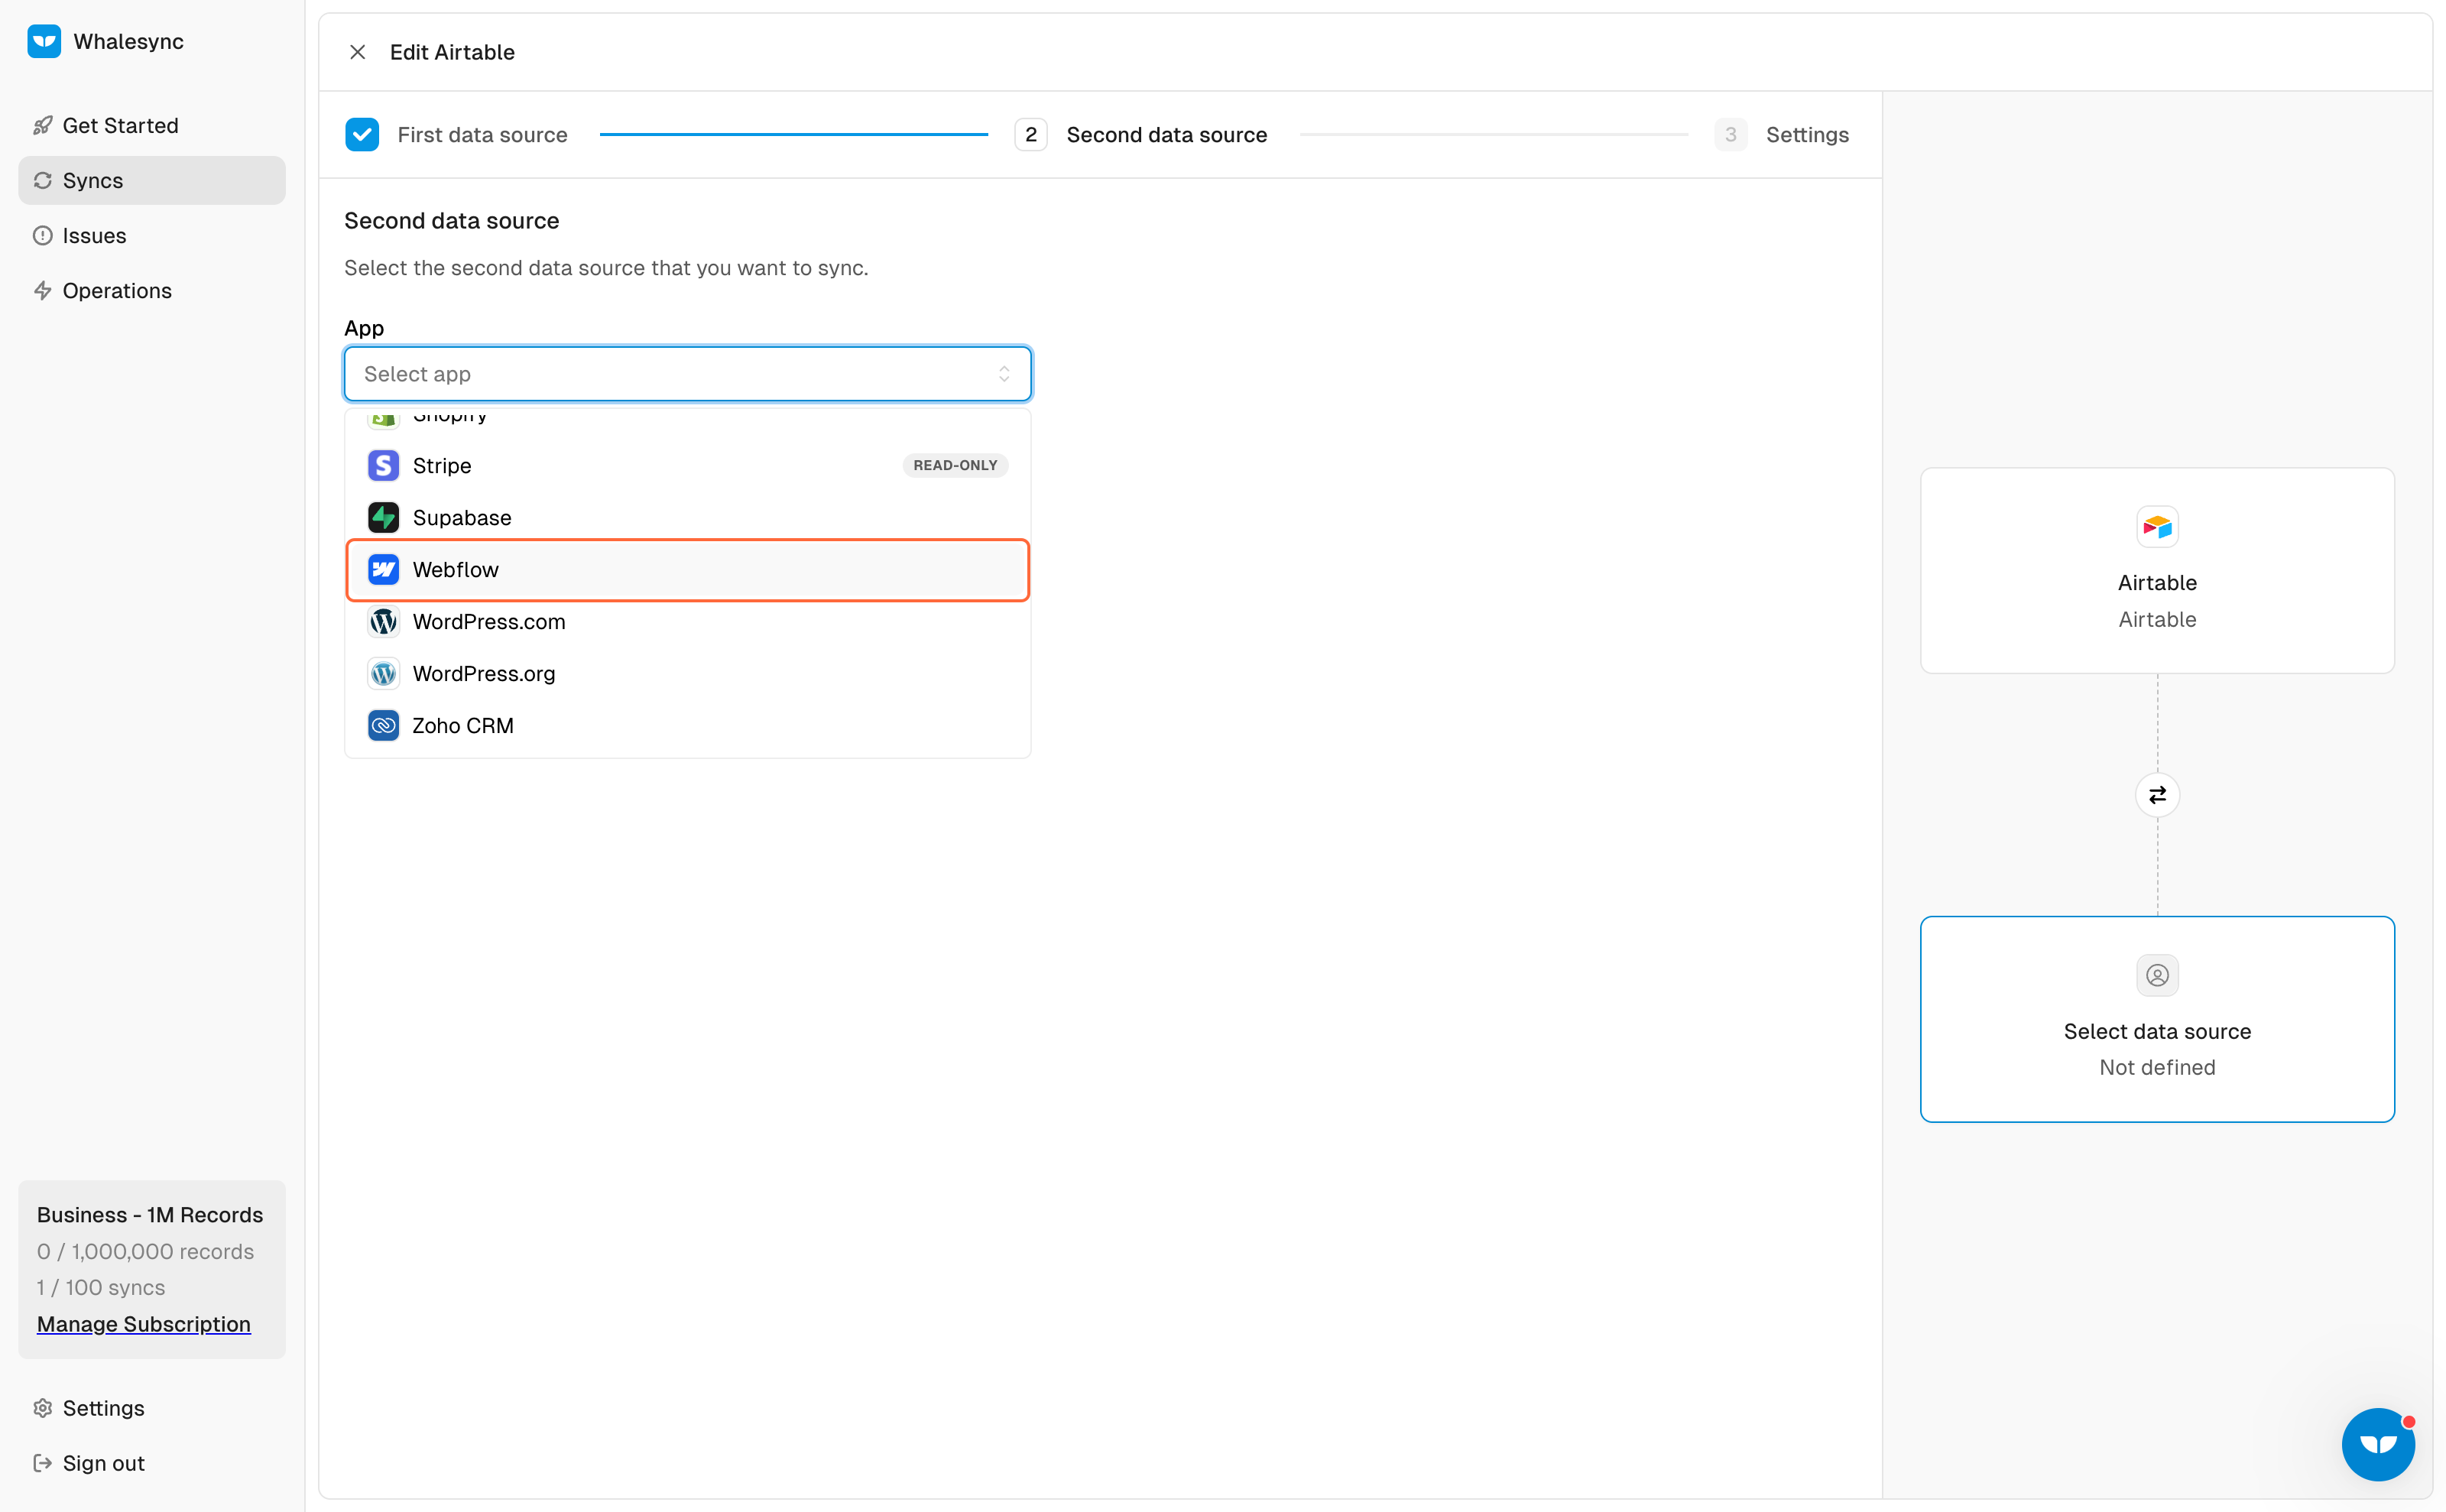
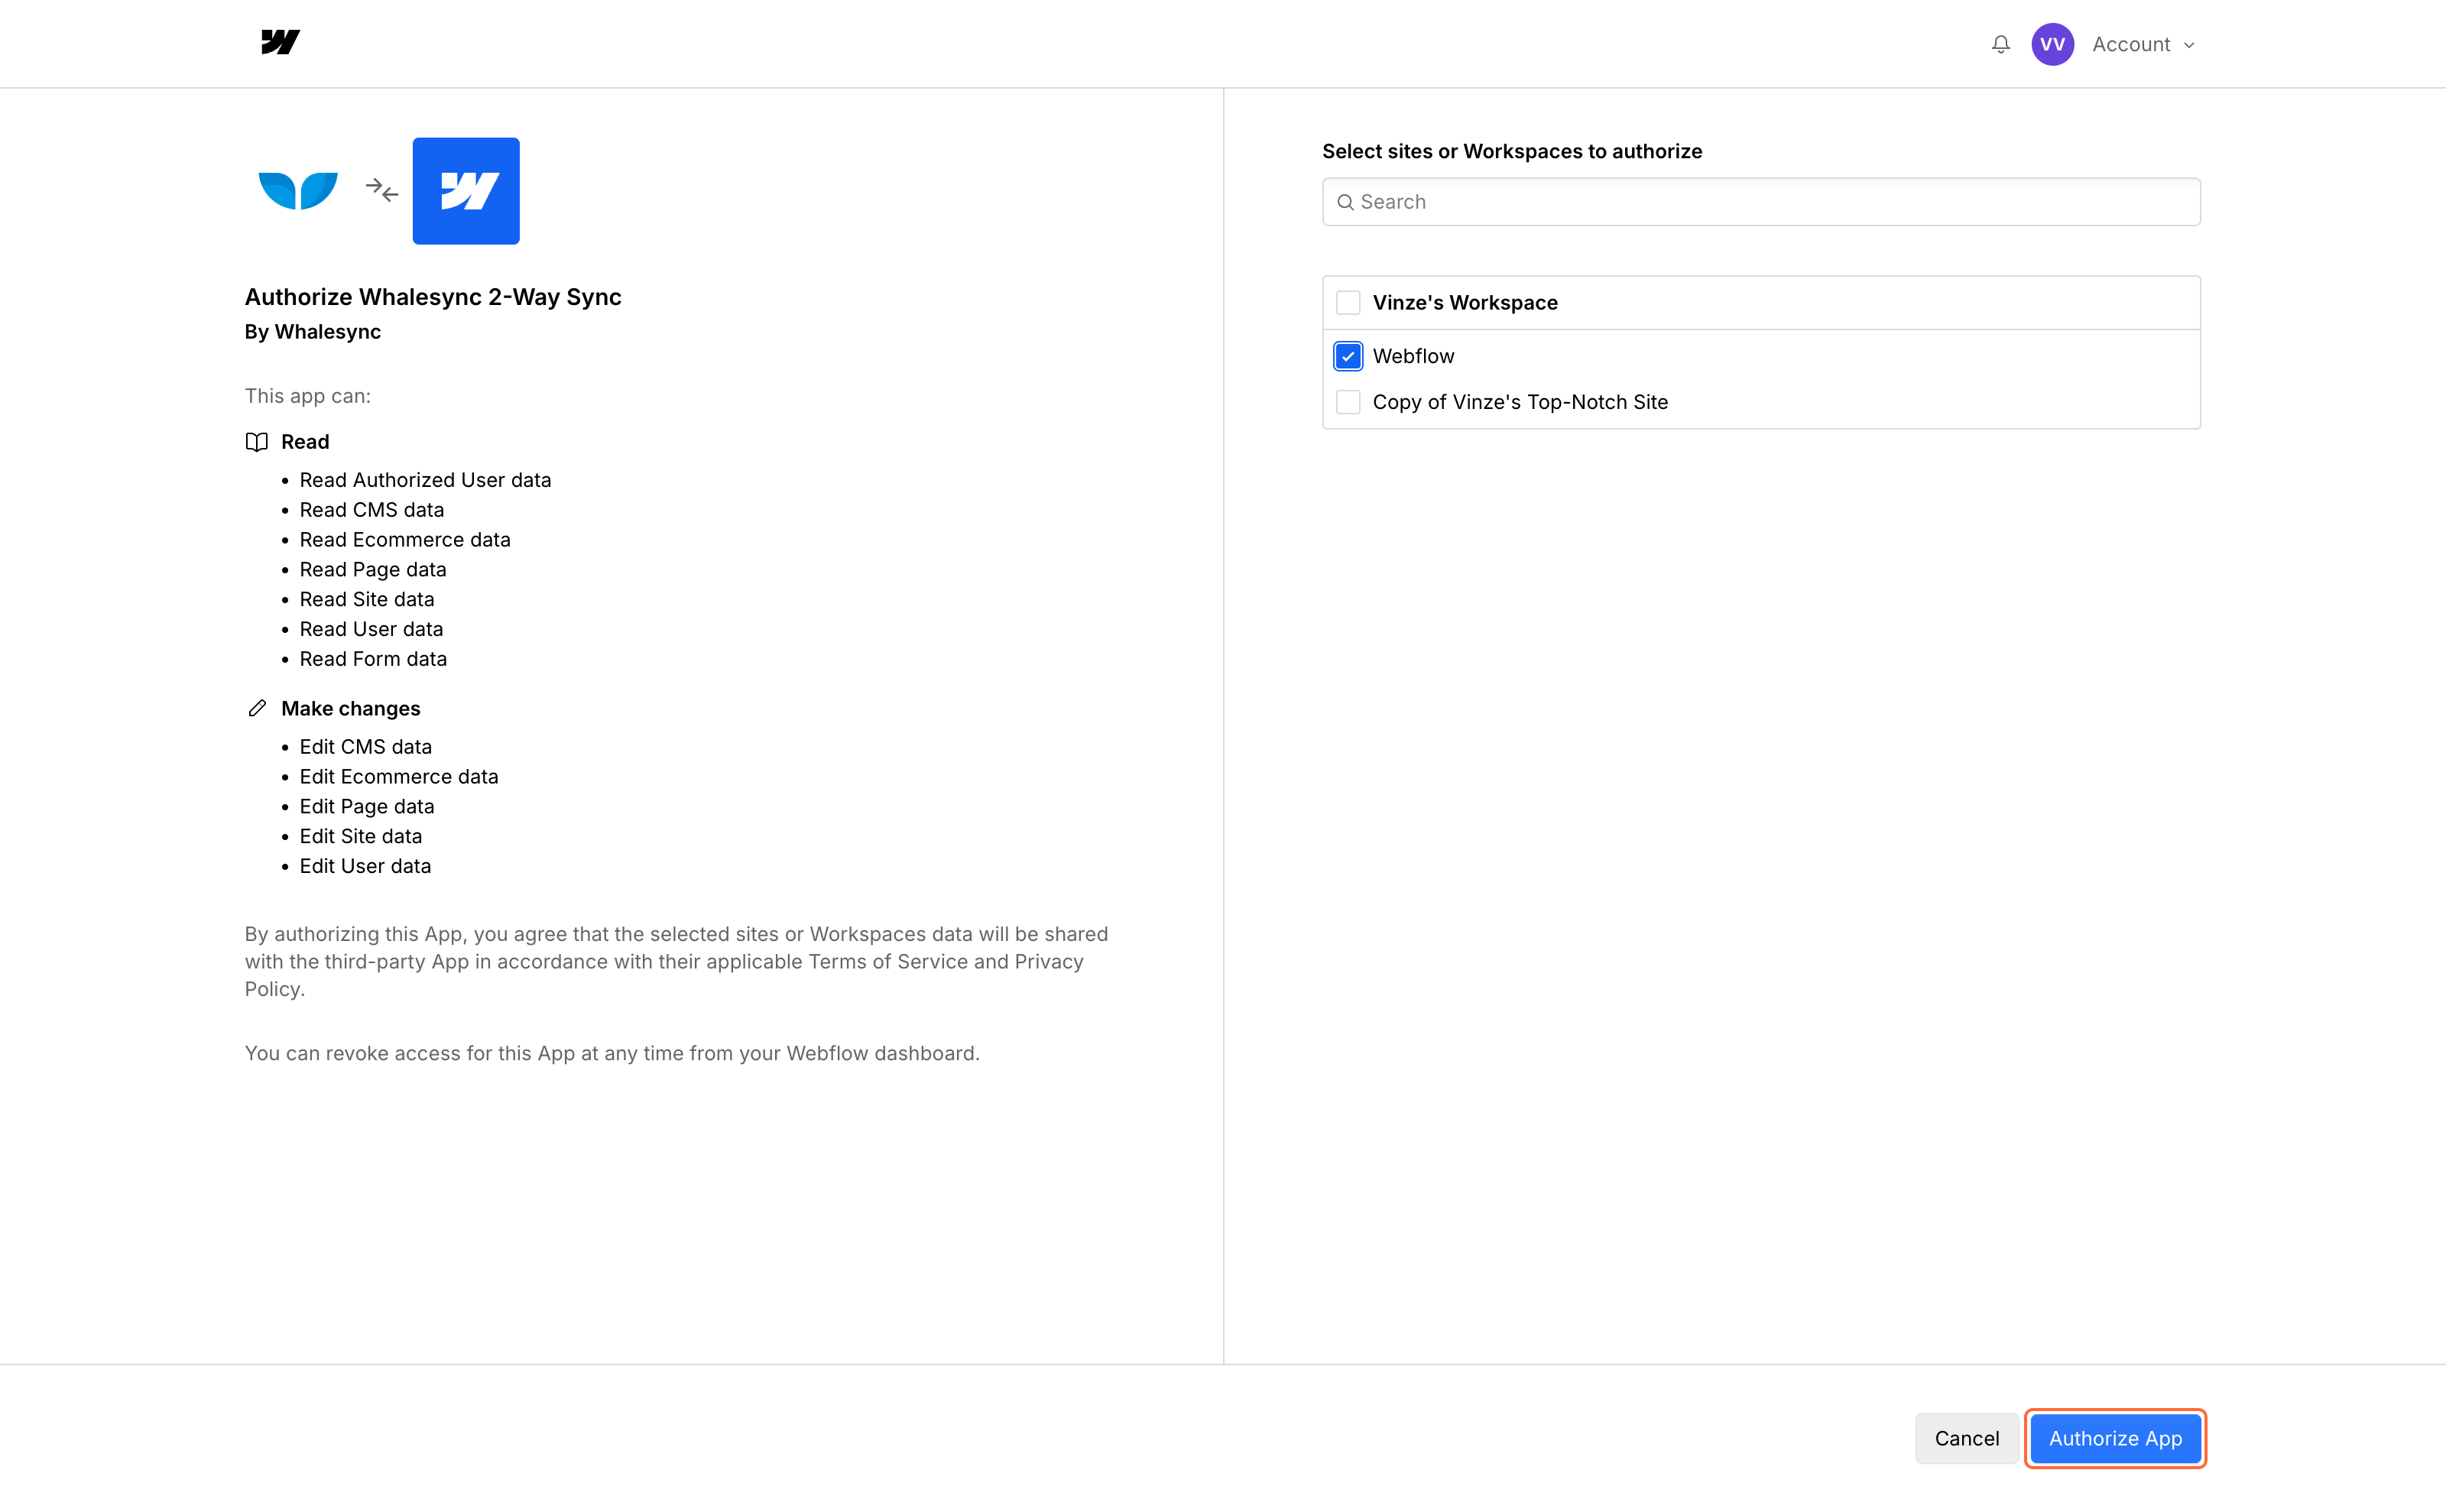
6. Select and Authorize your second app - Webflow
7. Authorize with Webflow OAuth
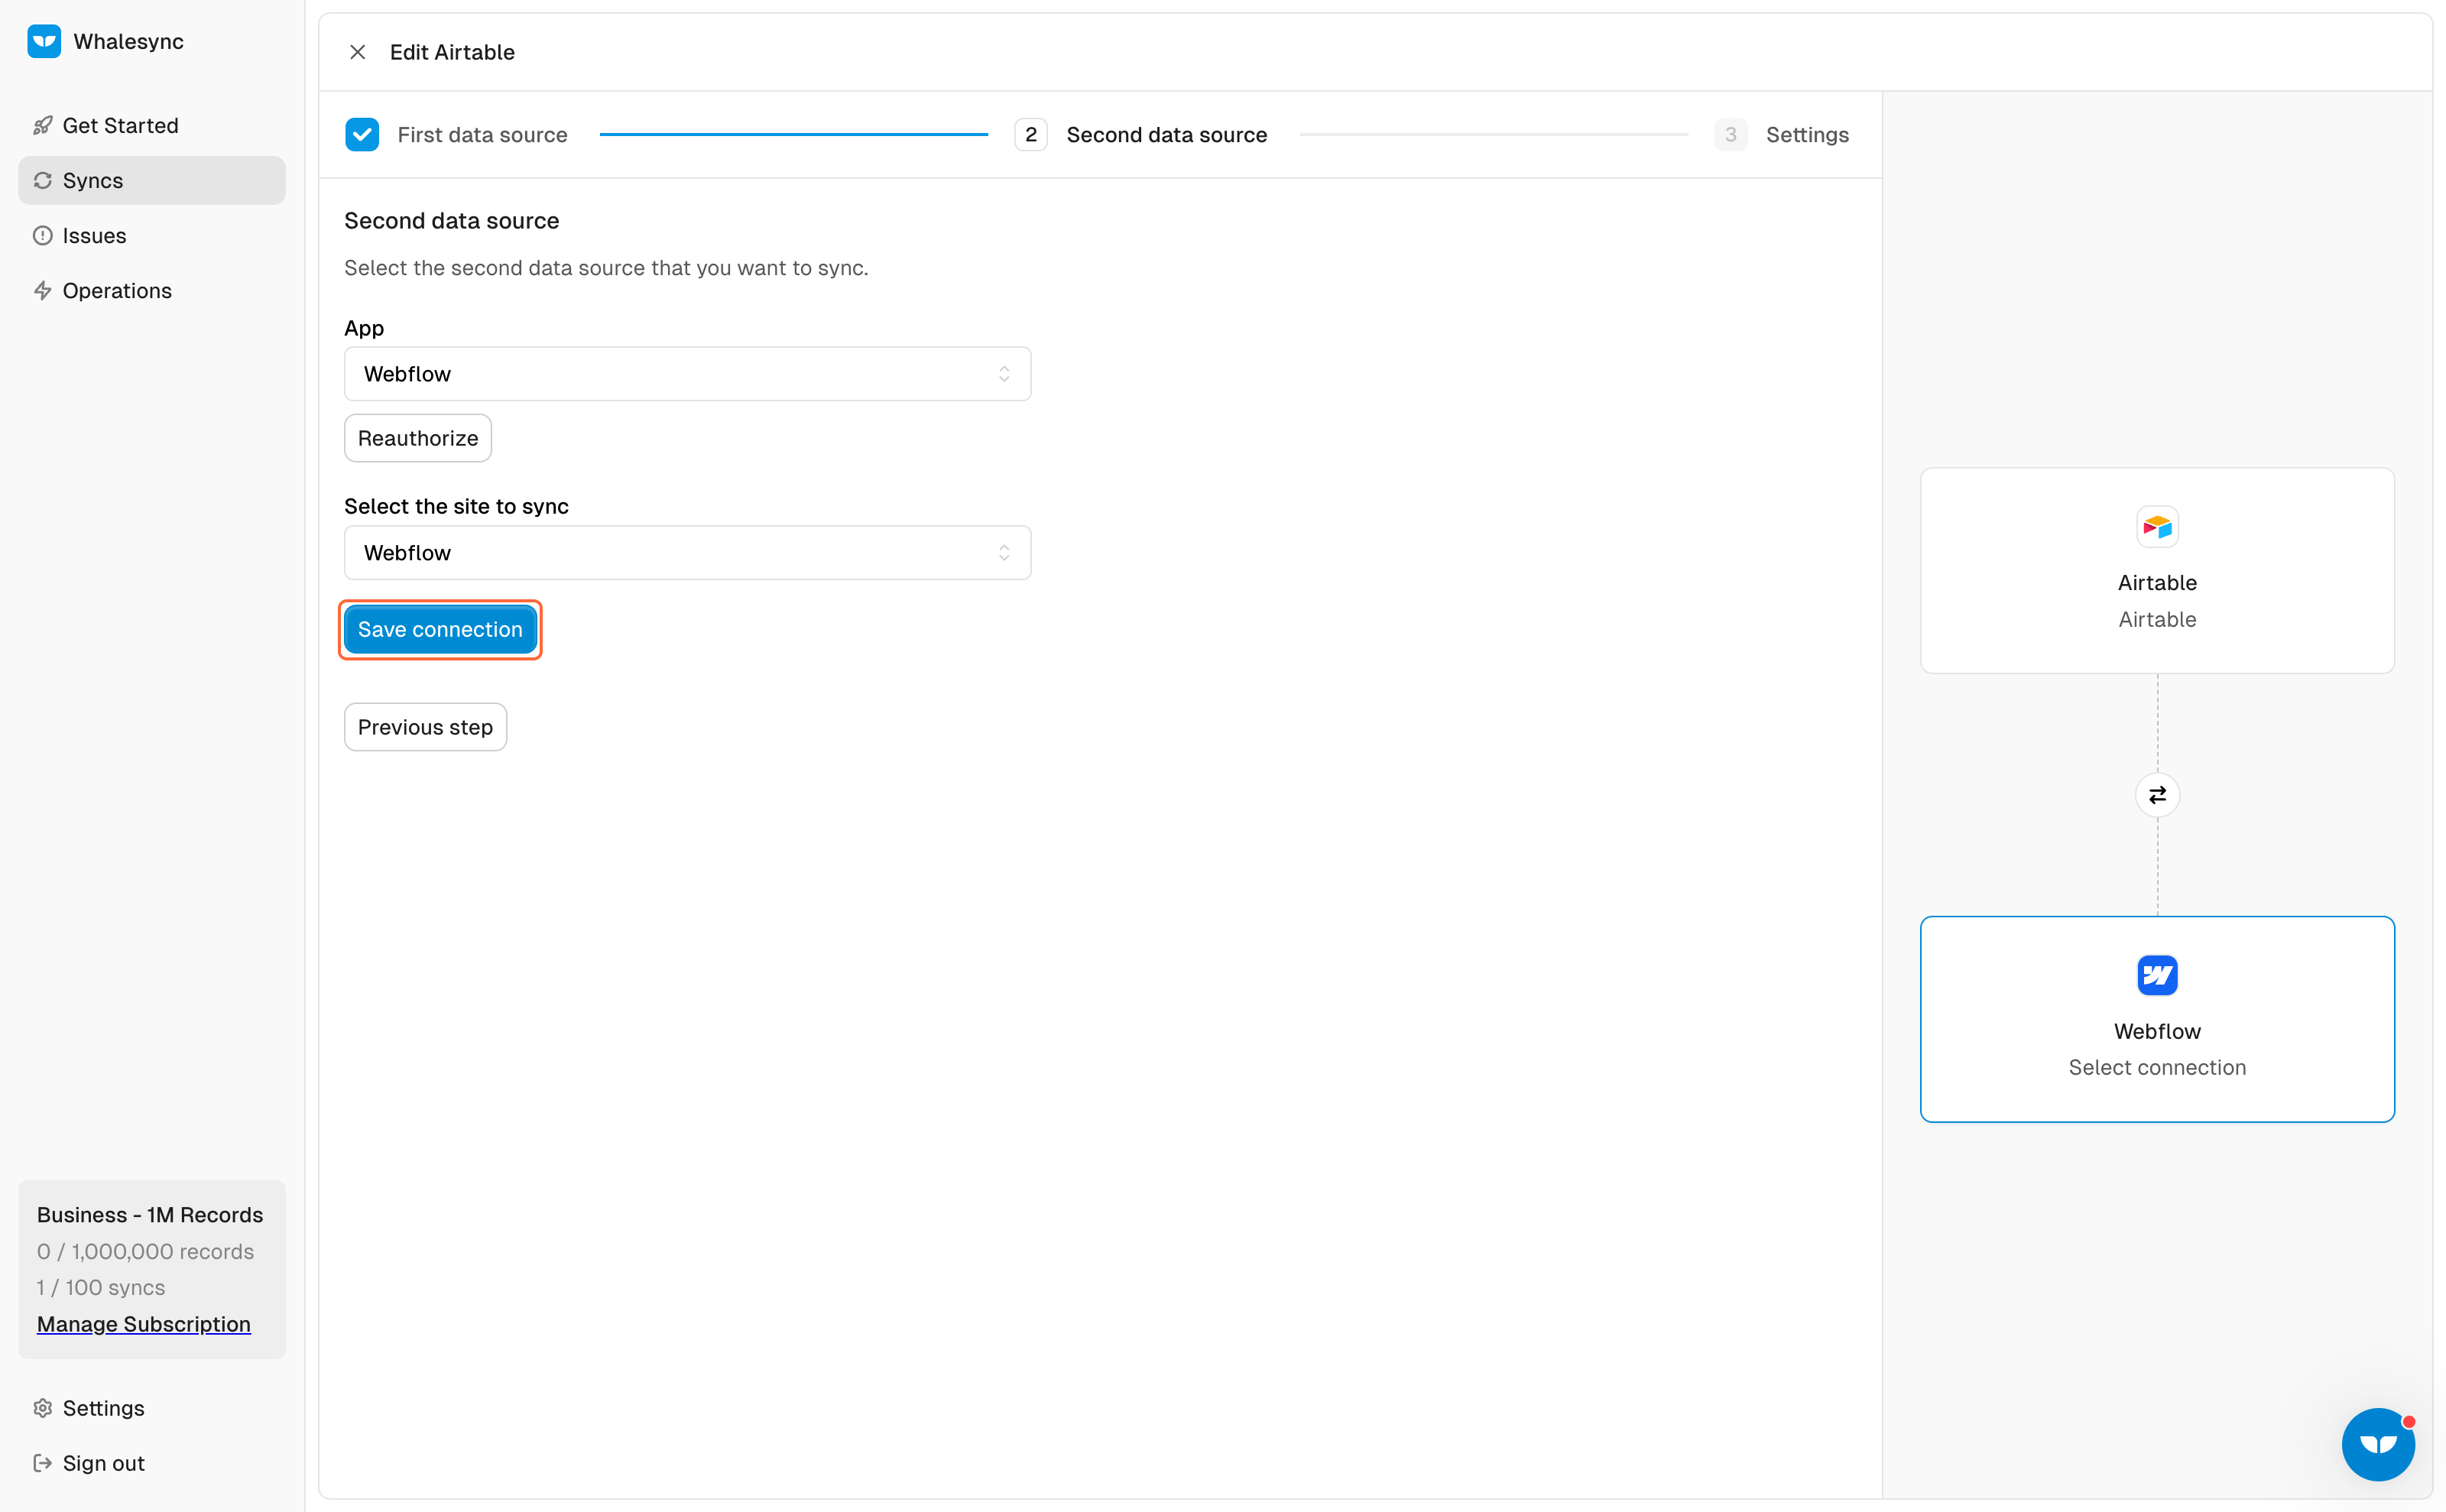
8. Save connection
9. Continue to table mapping
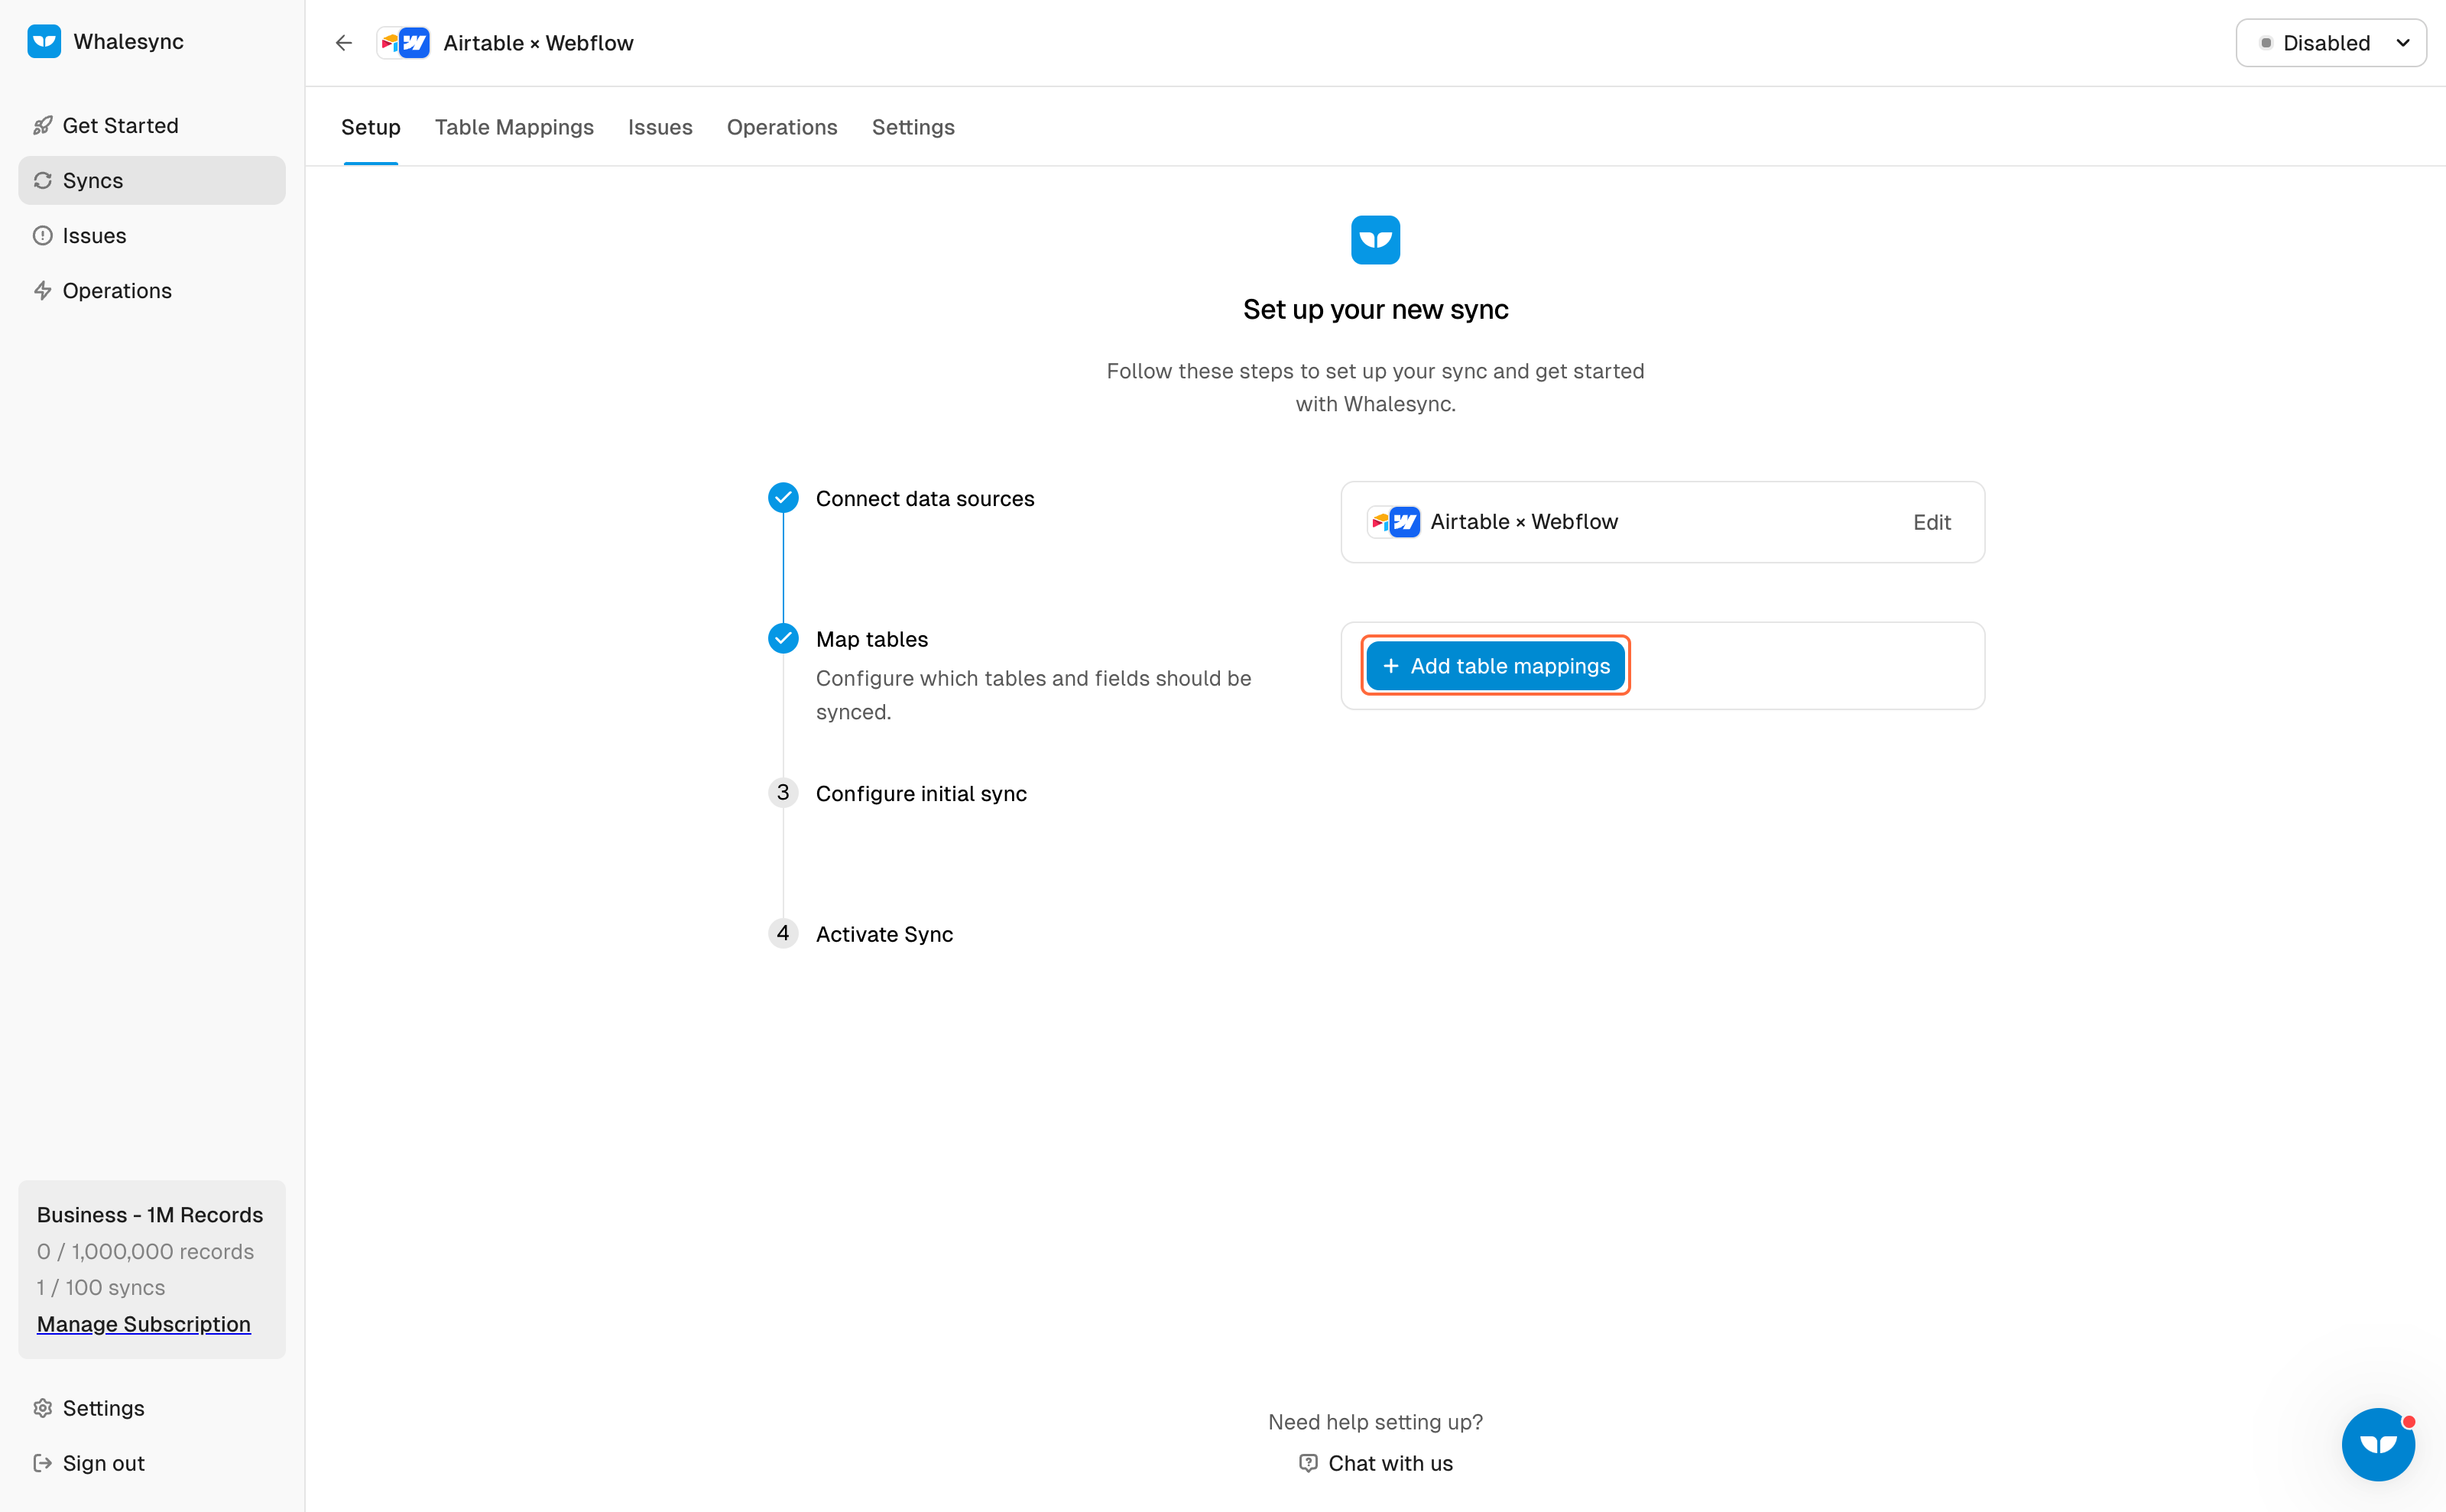
10. Create your table mappings
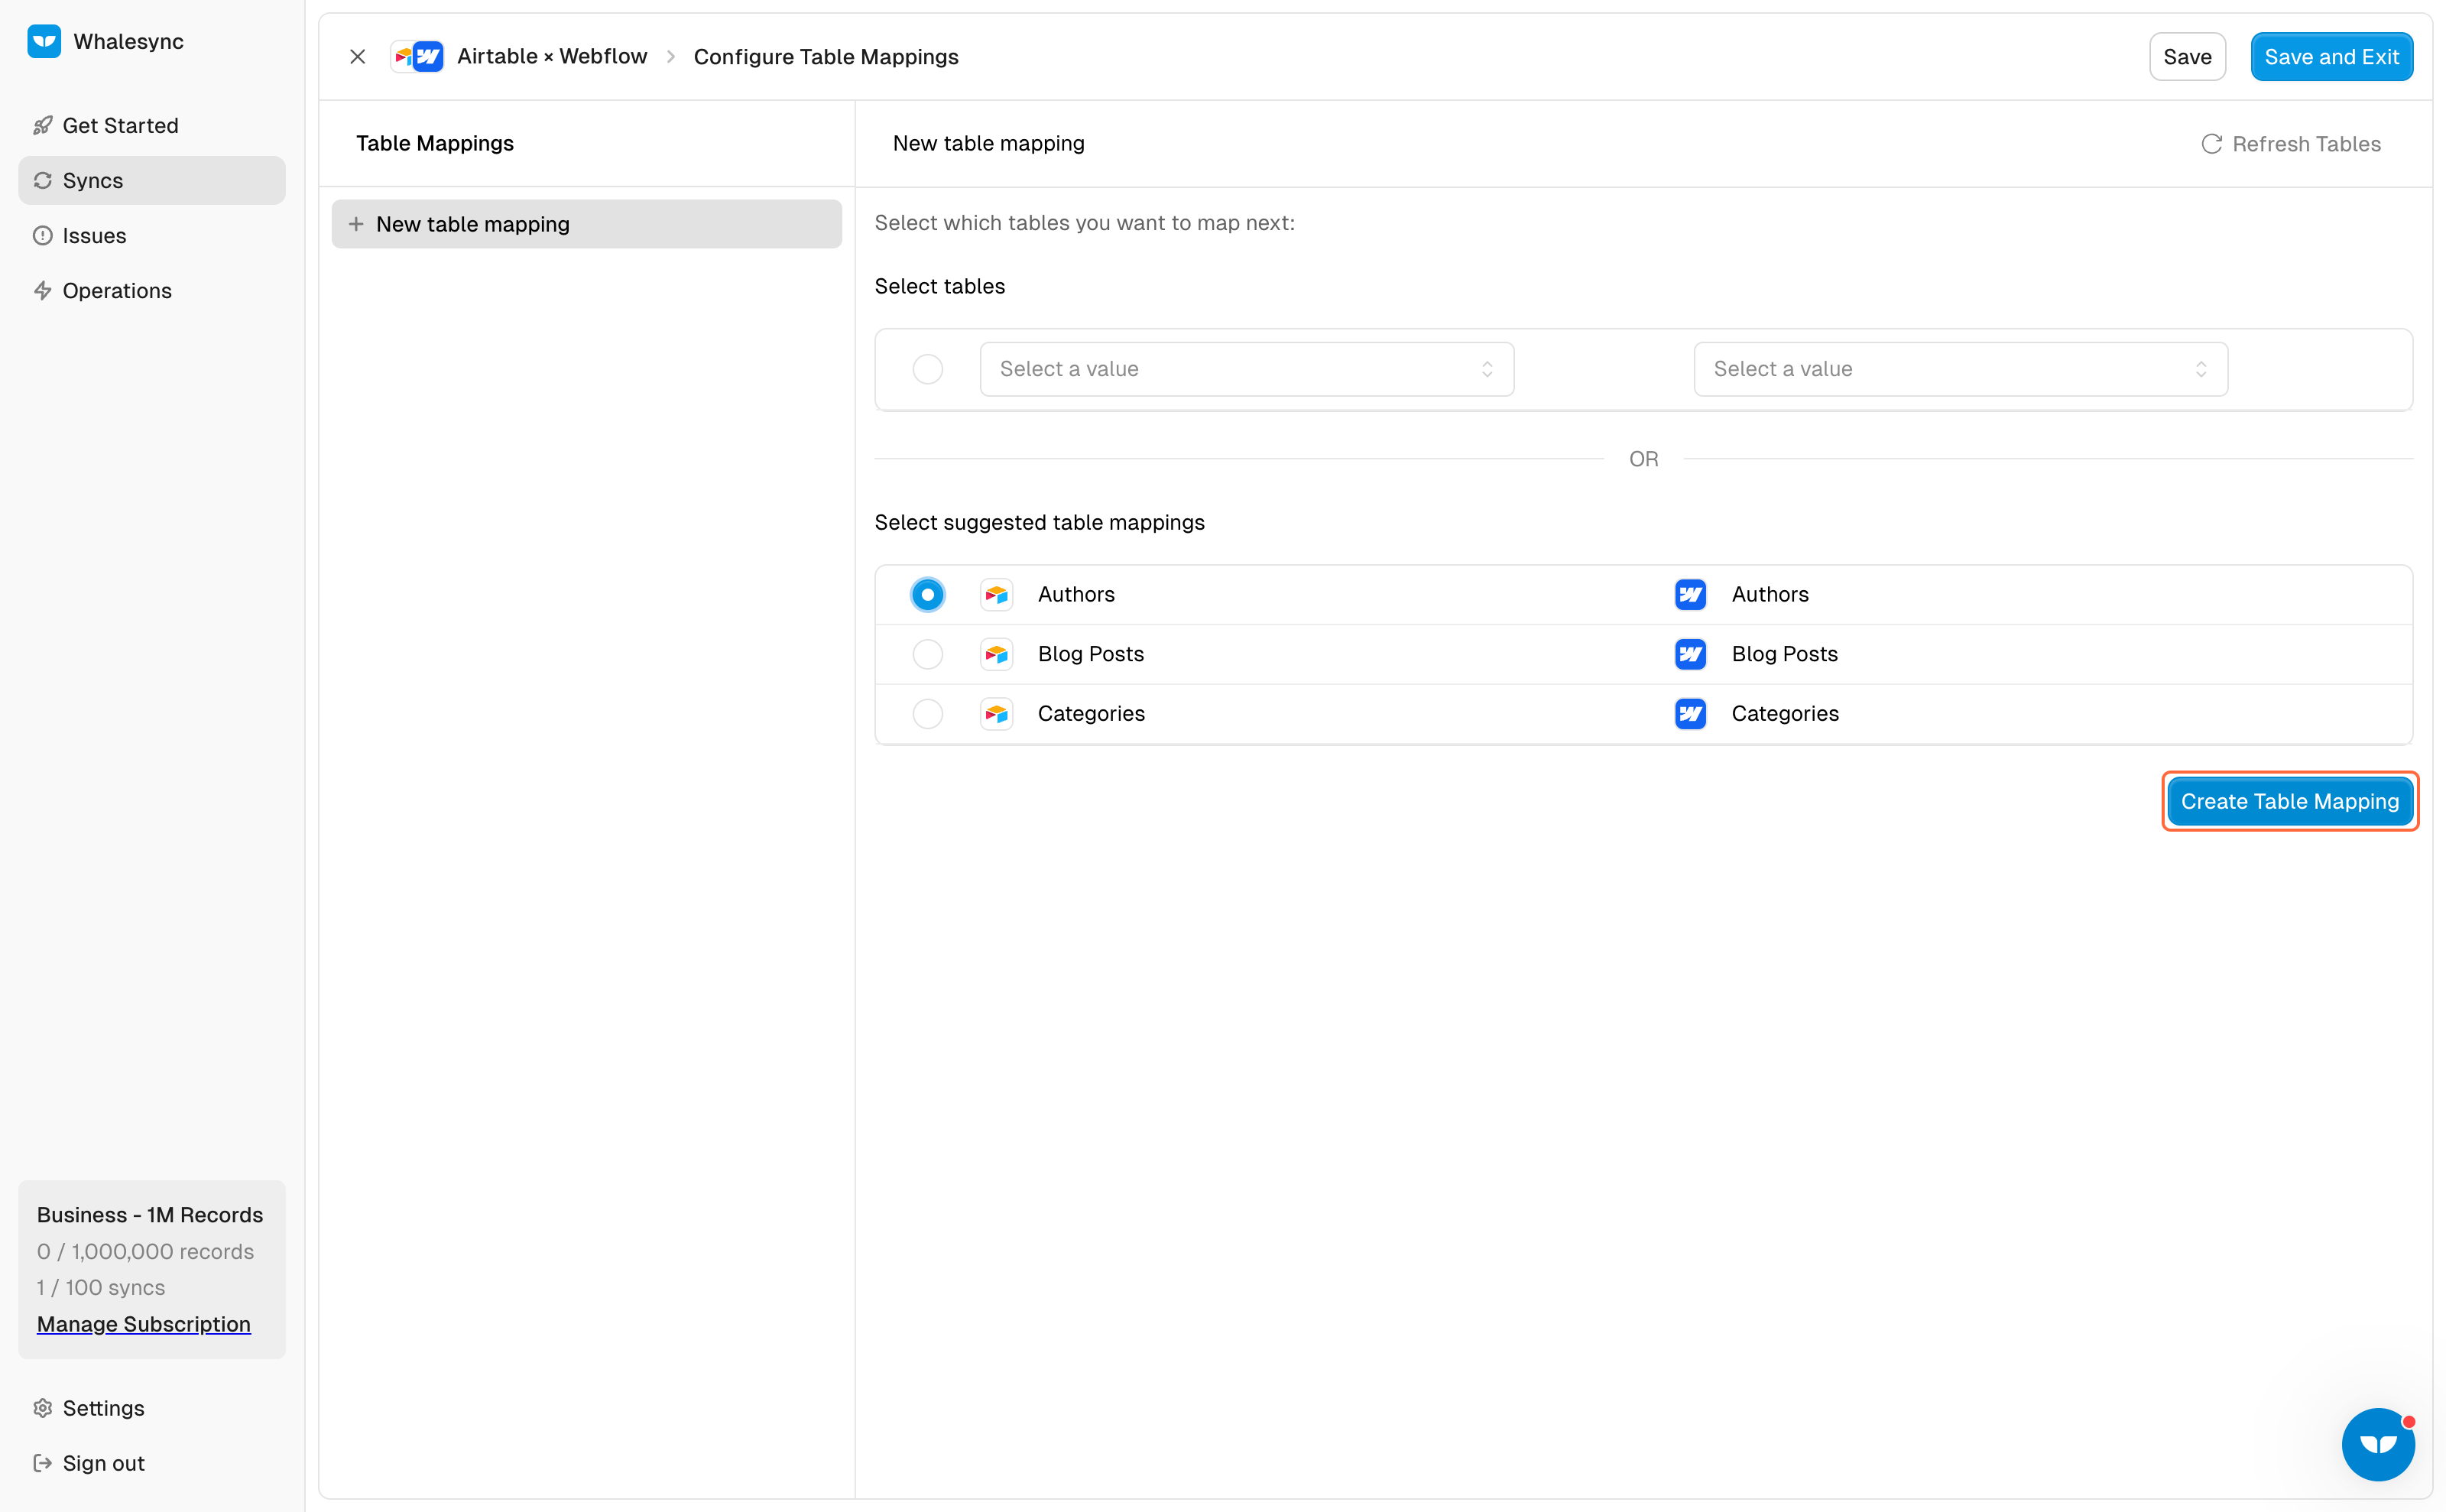
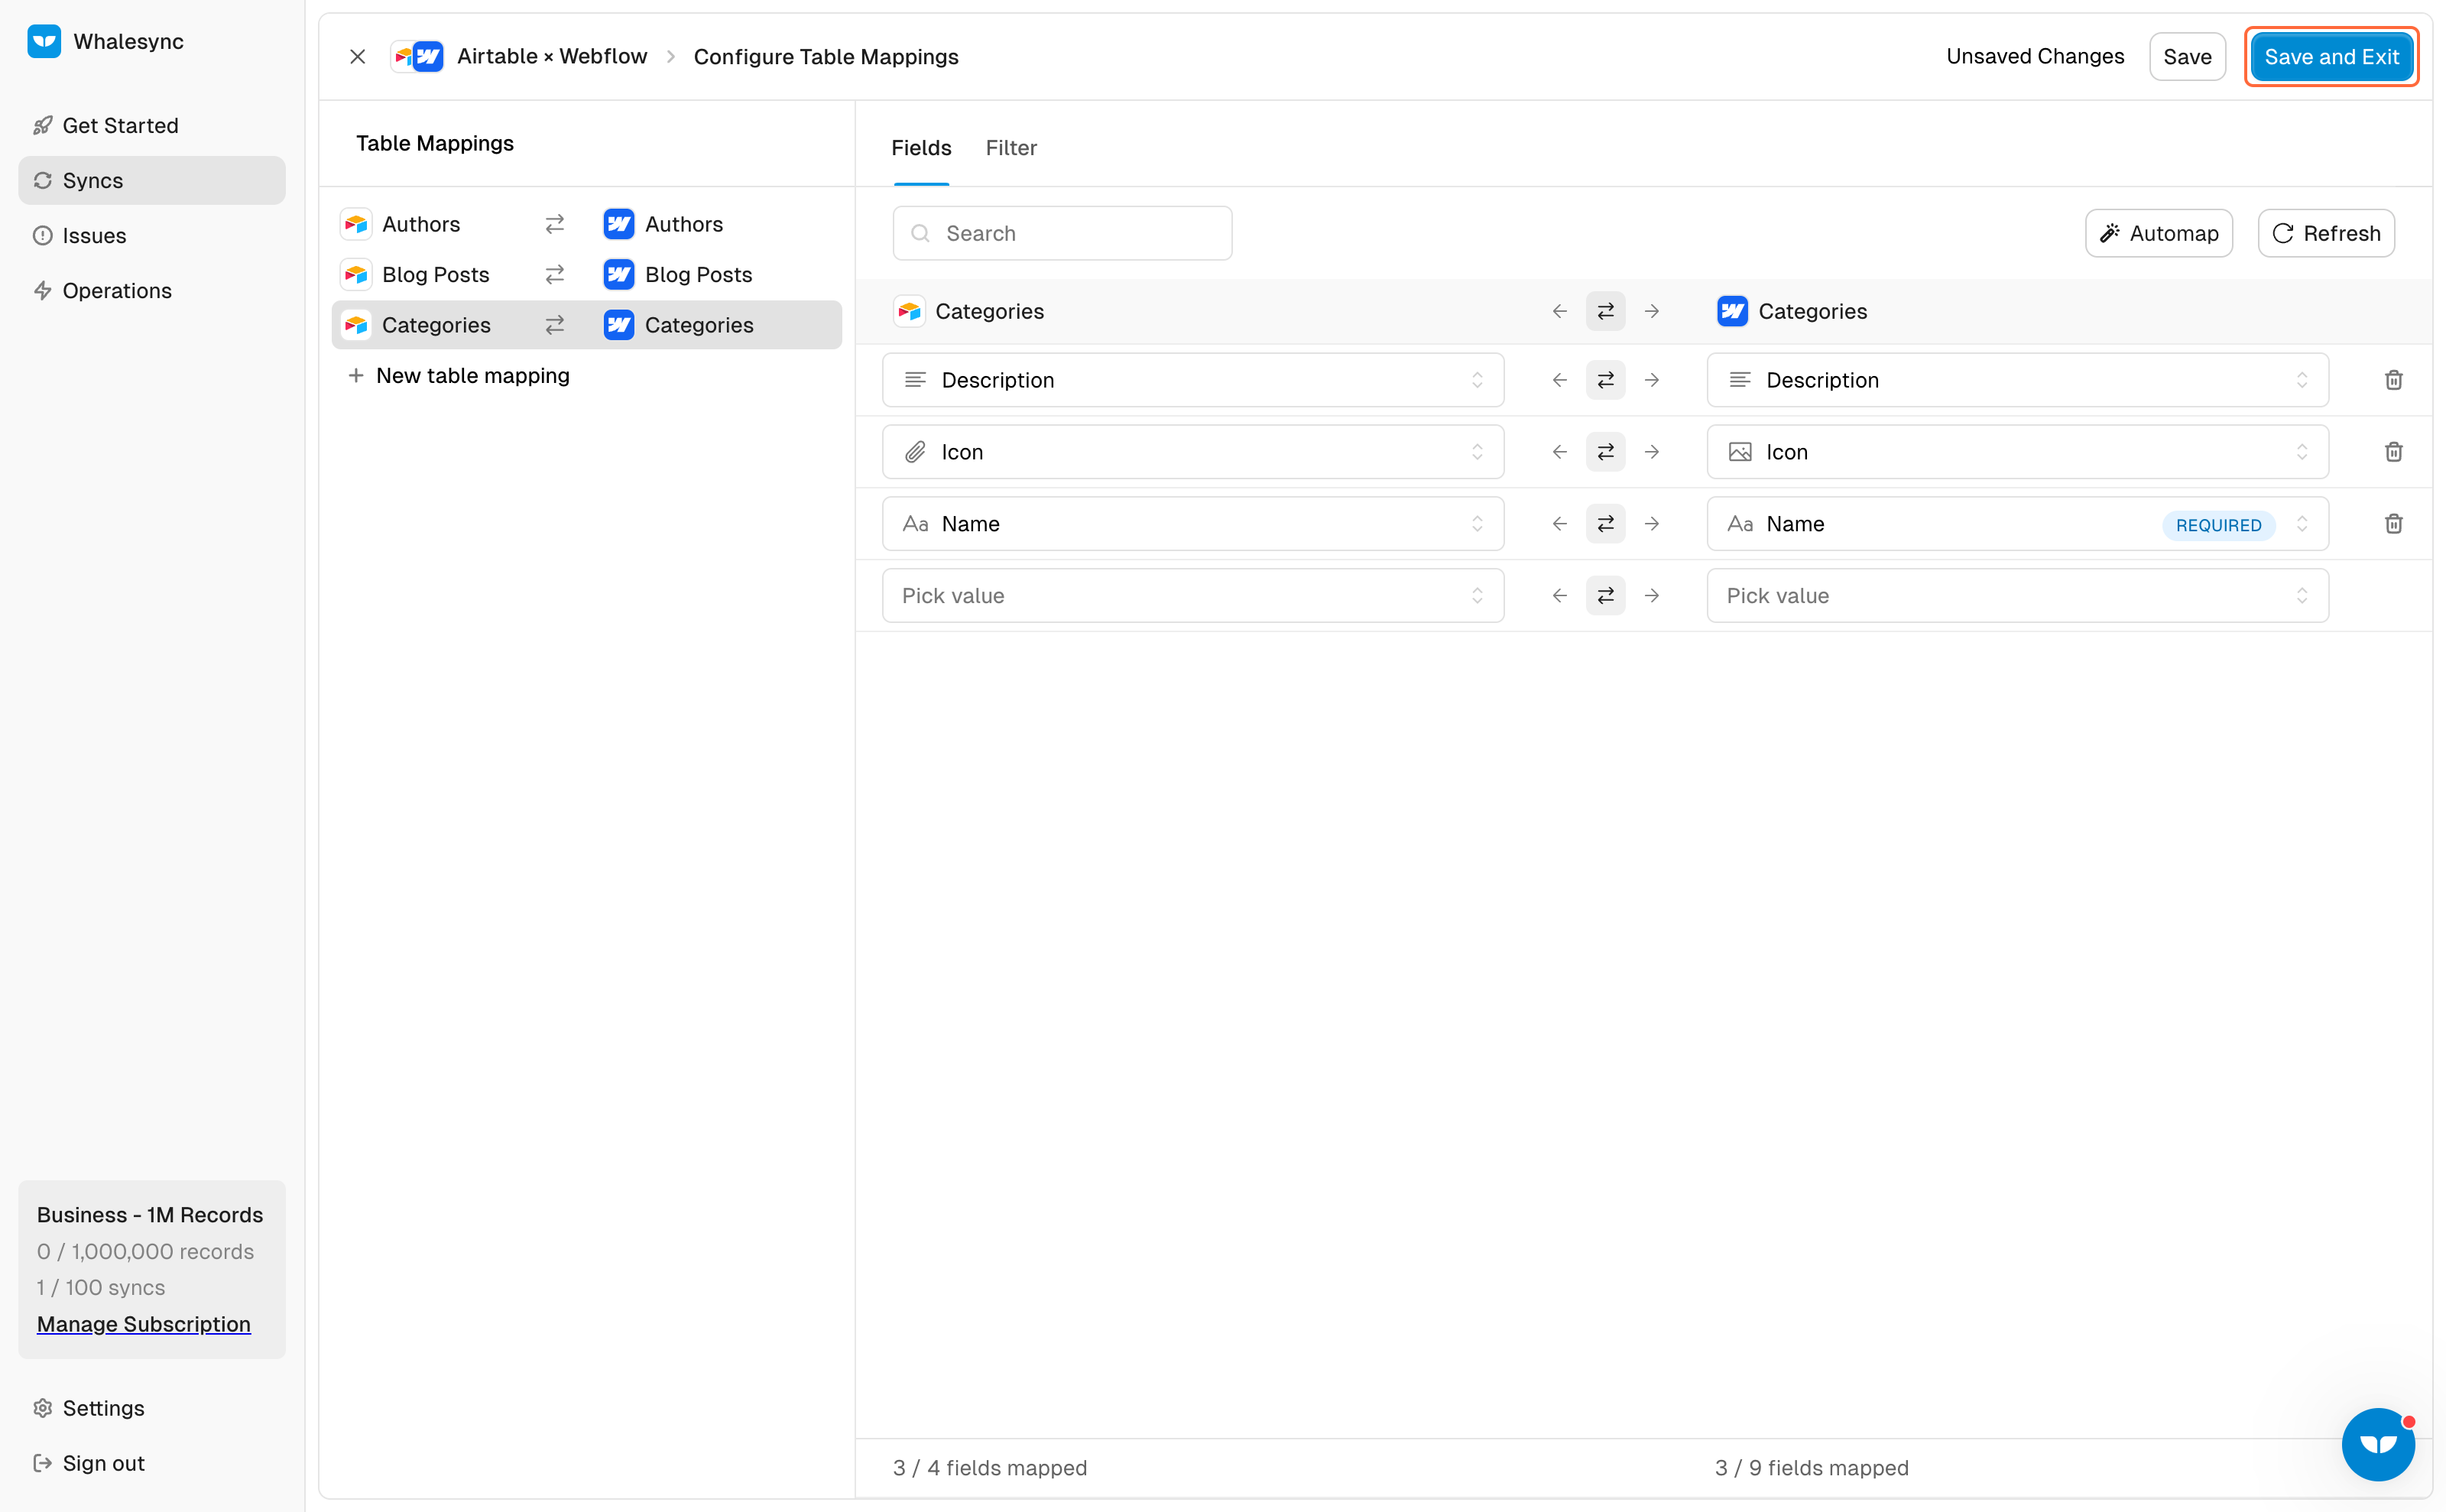
11. Map your fields

12. Save and Exit
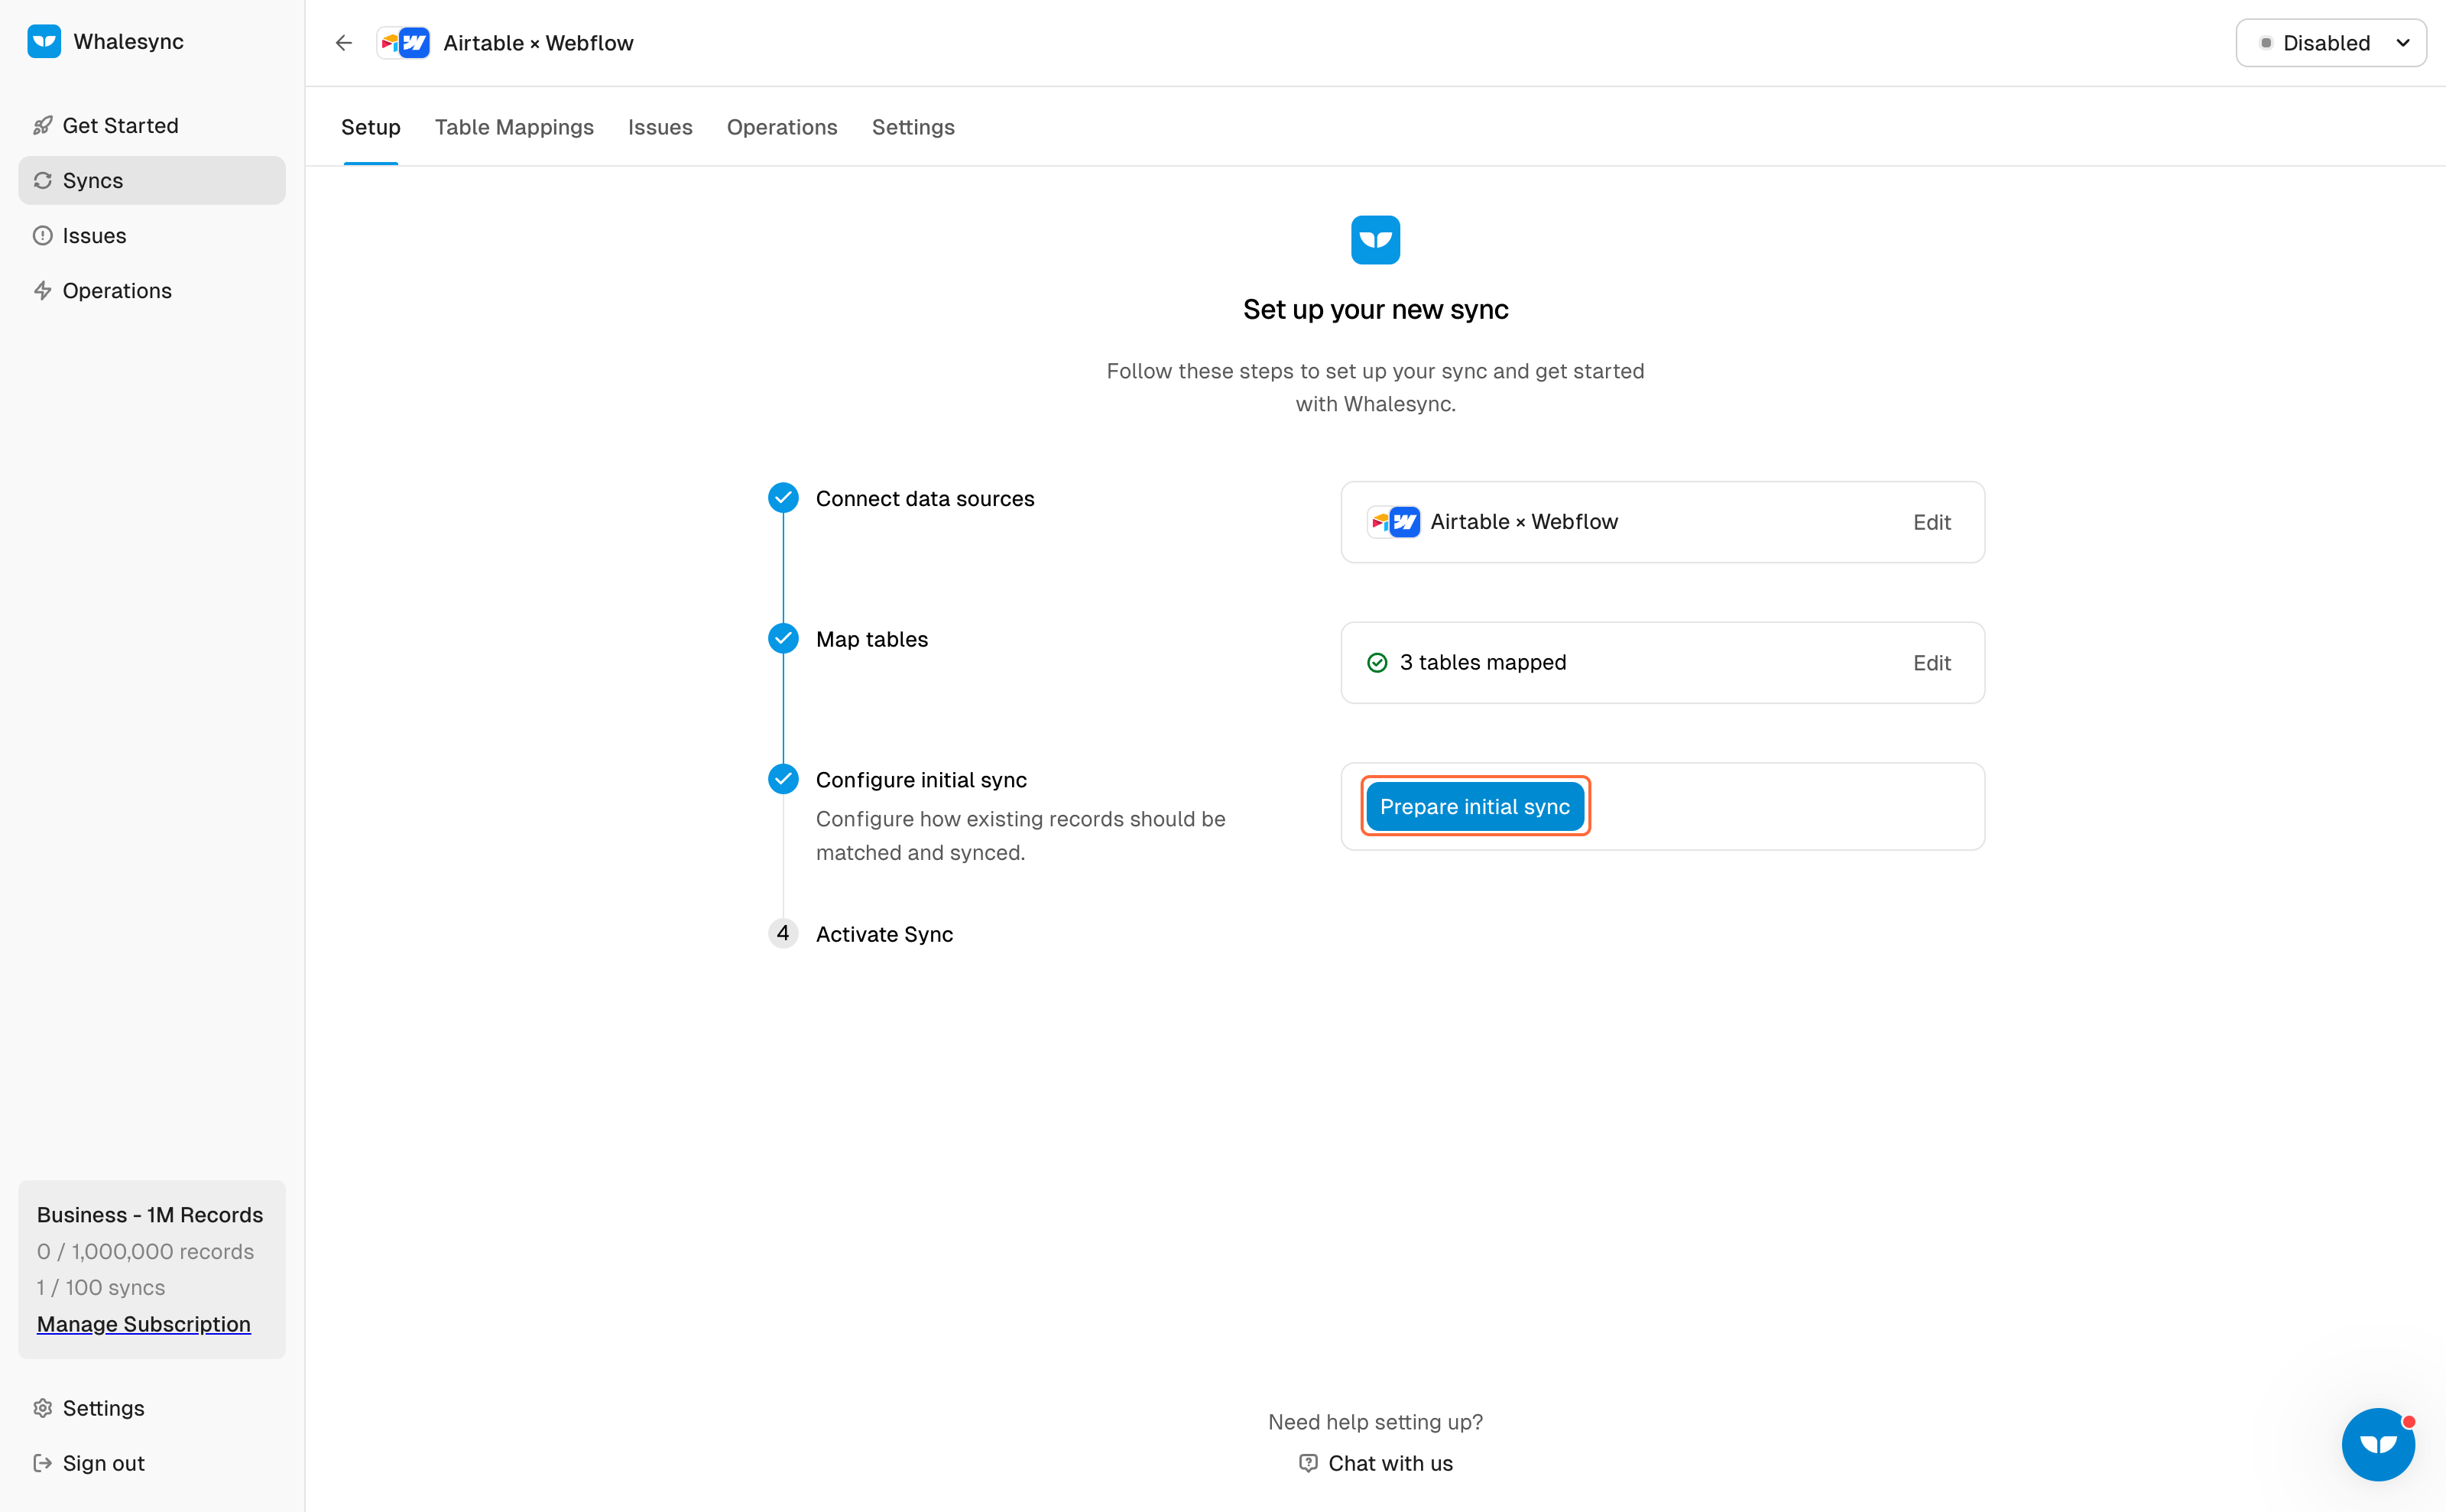
13. Start your Initial Sync!
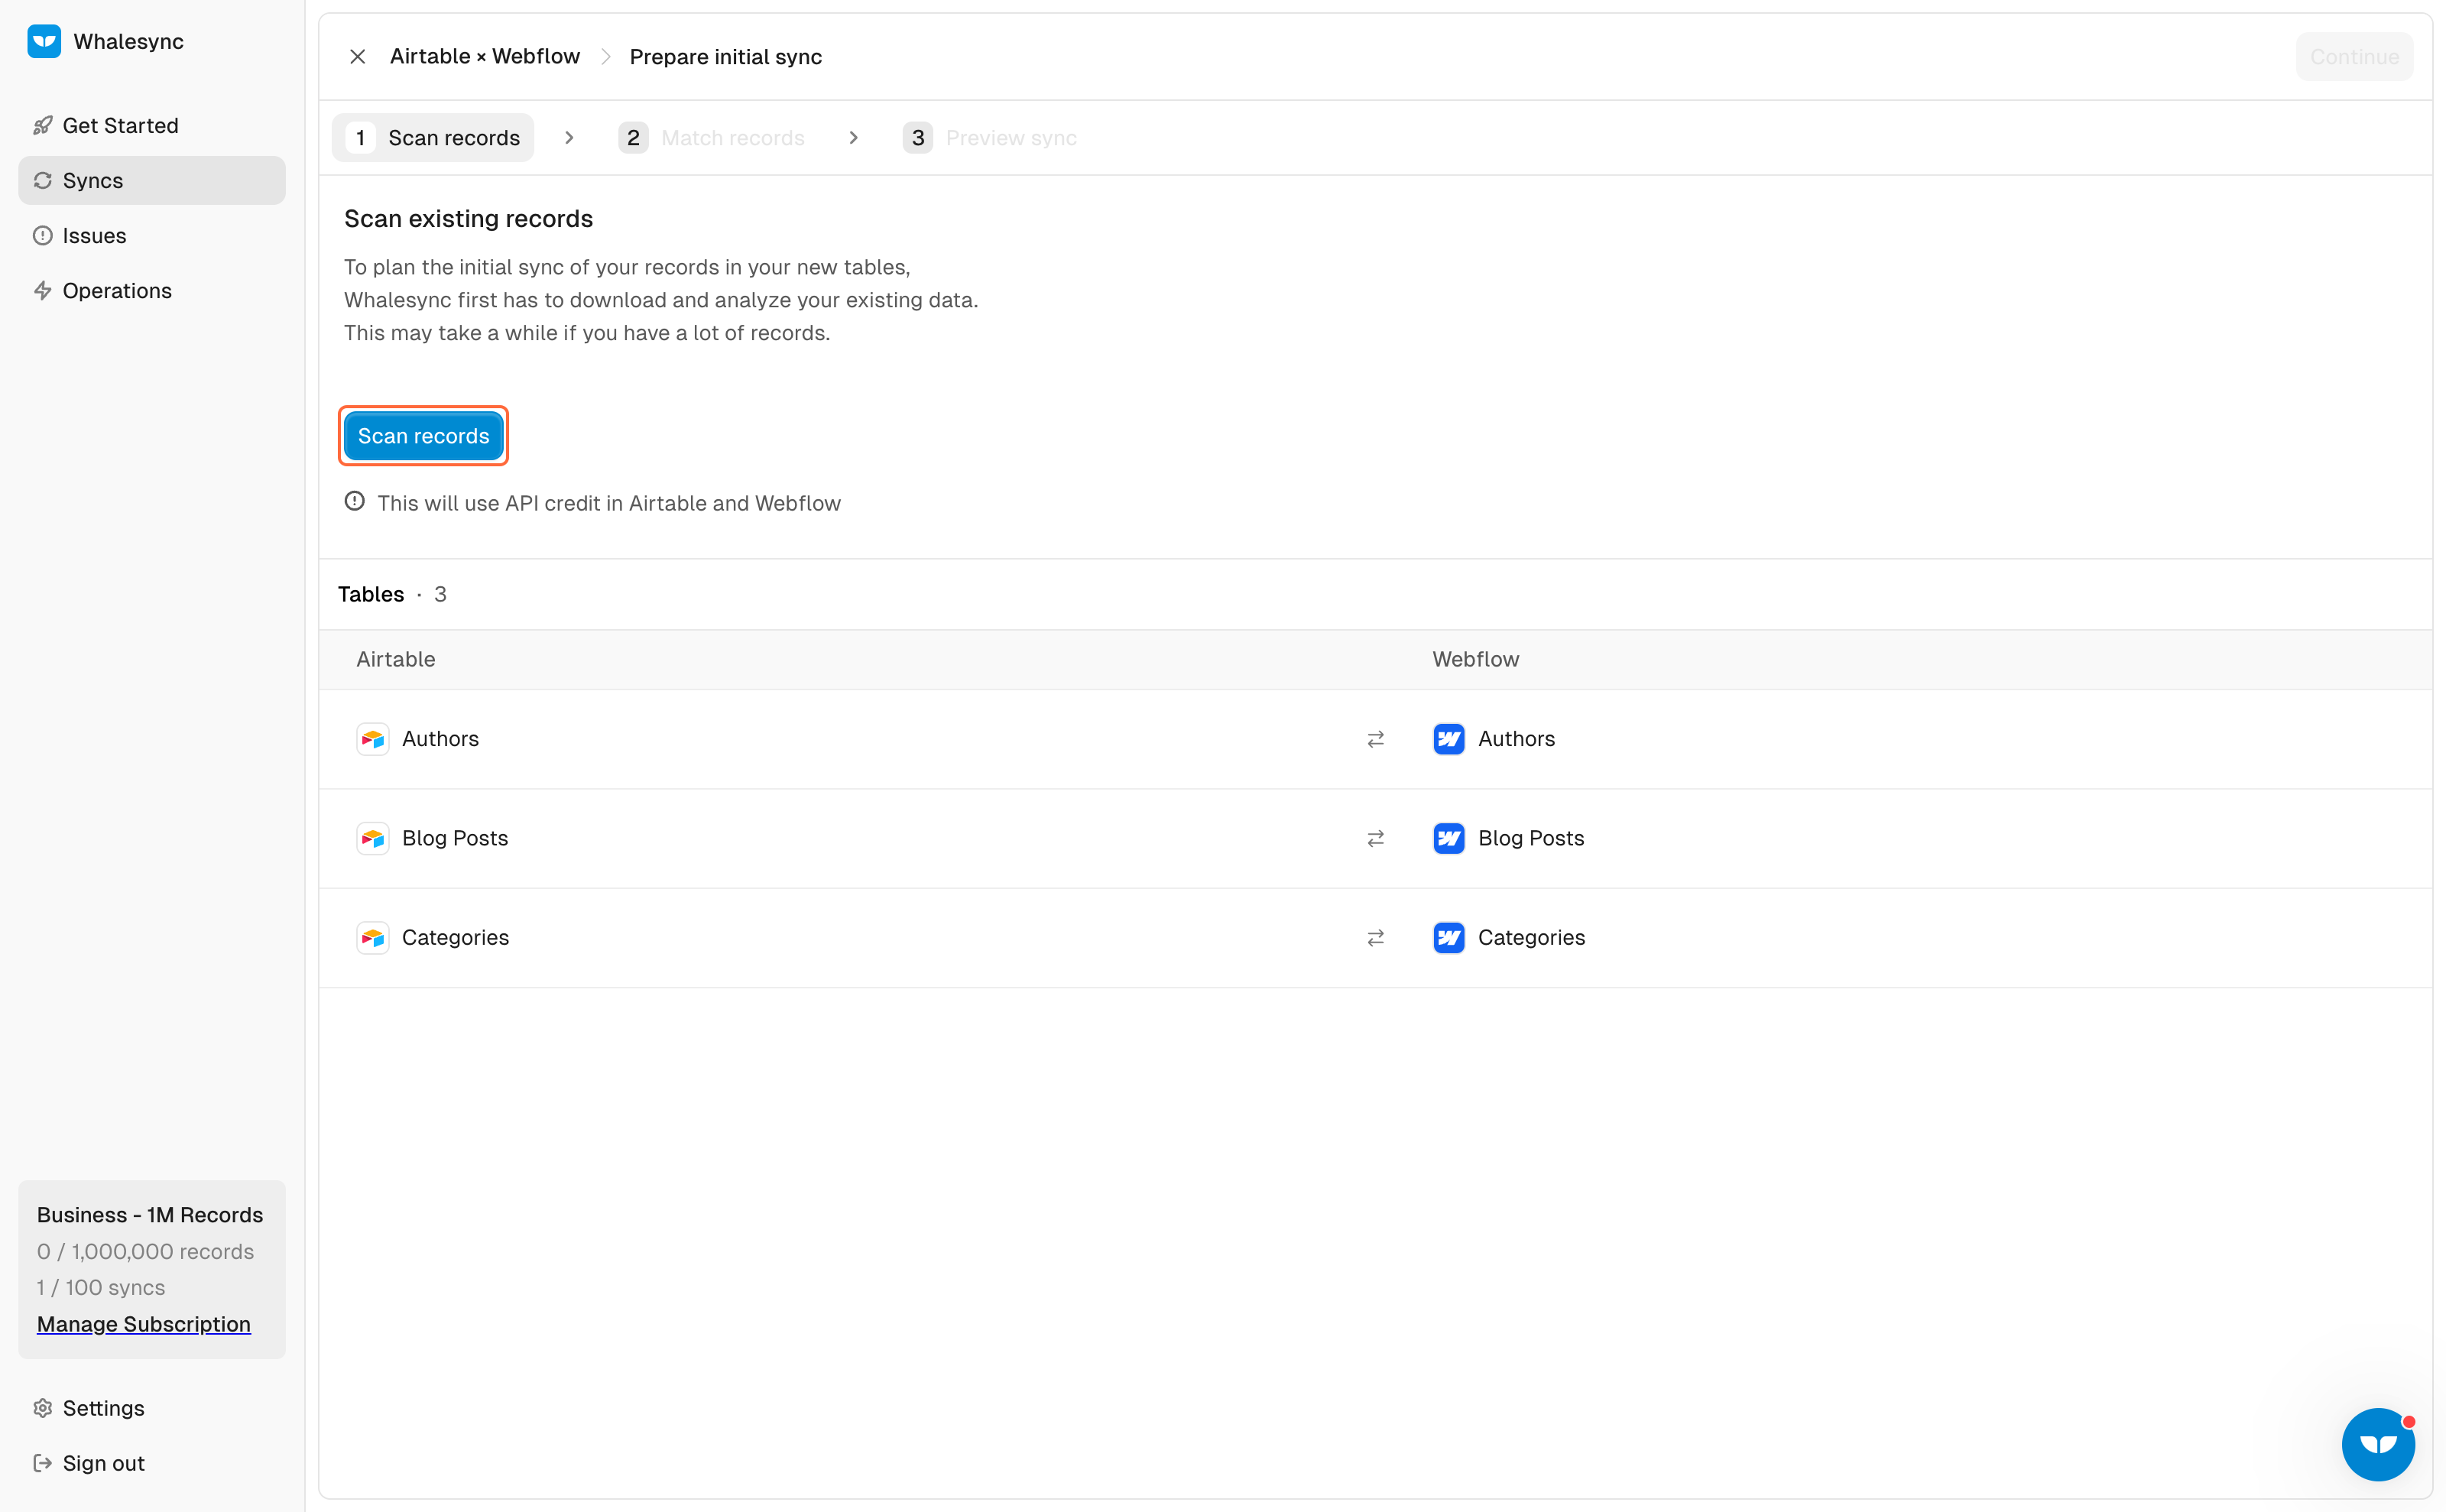
14. Scan your records
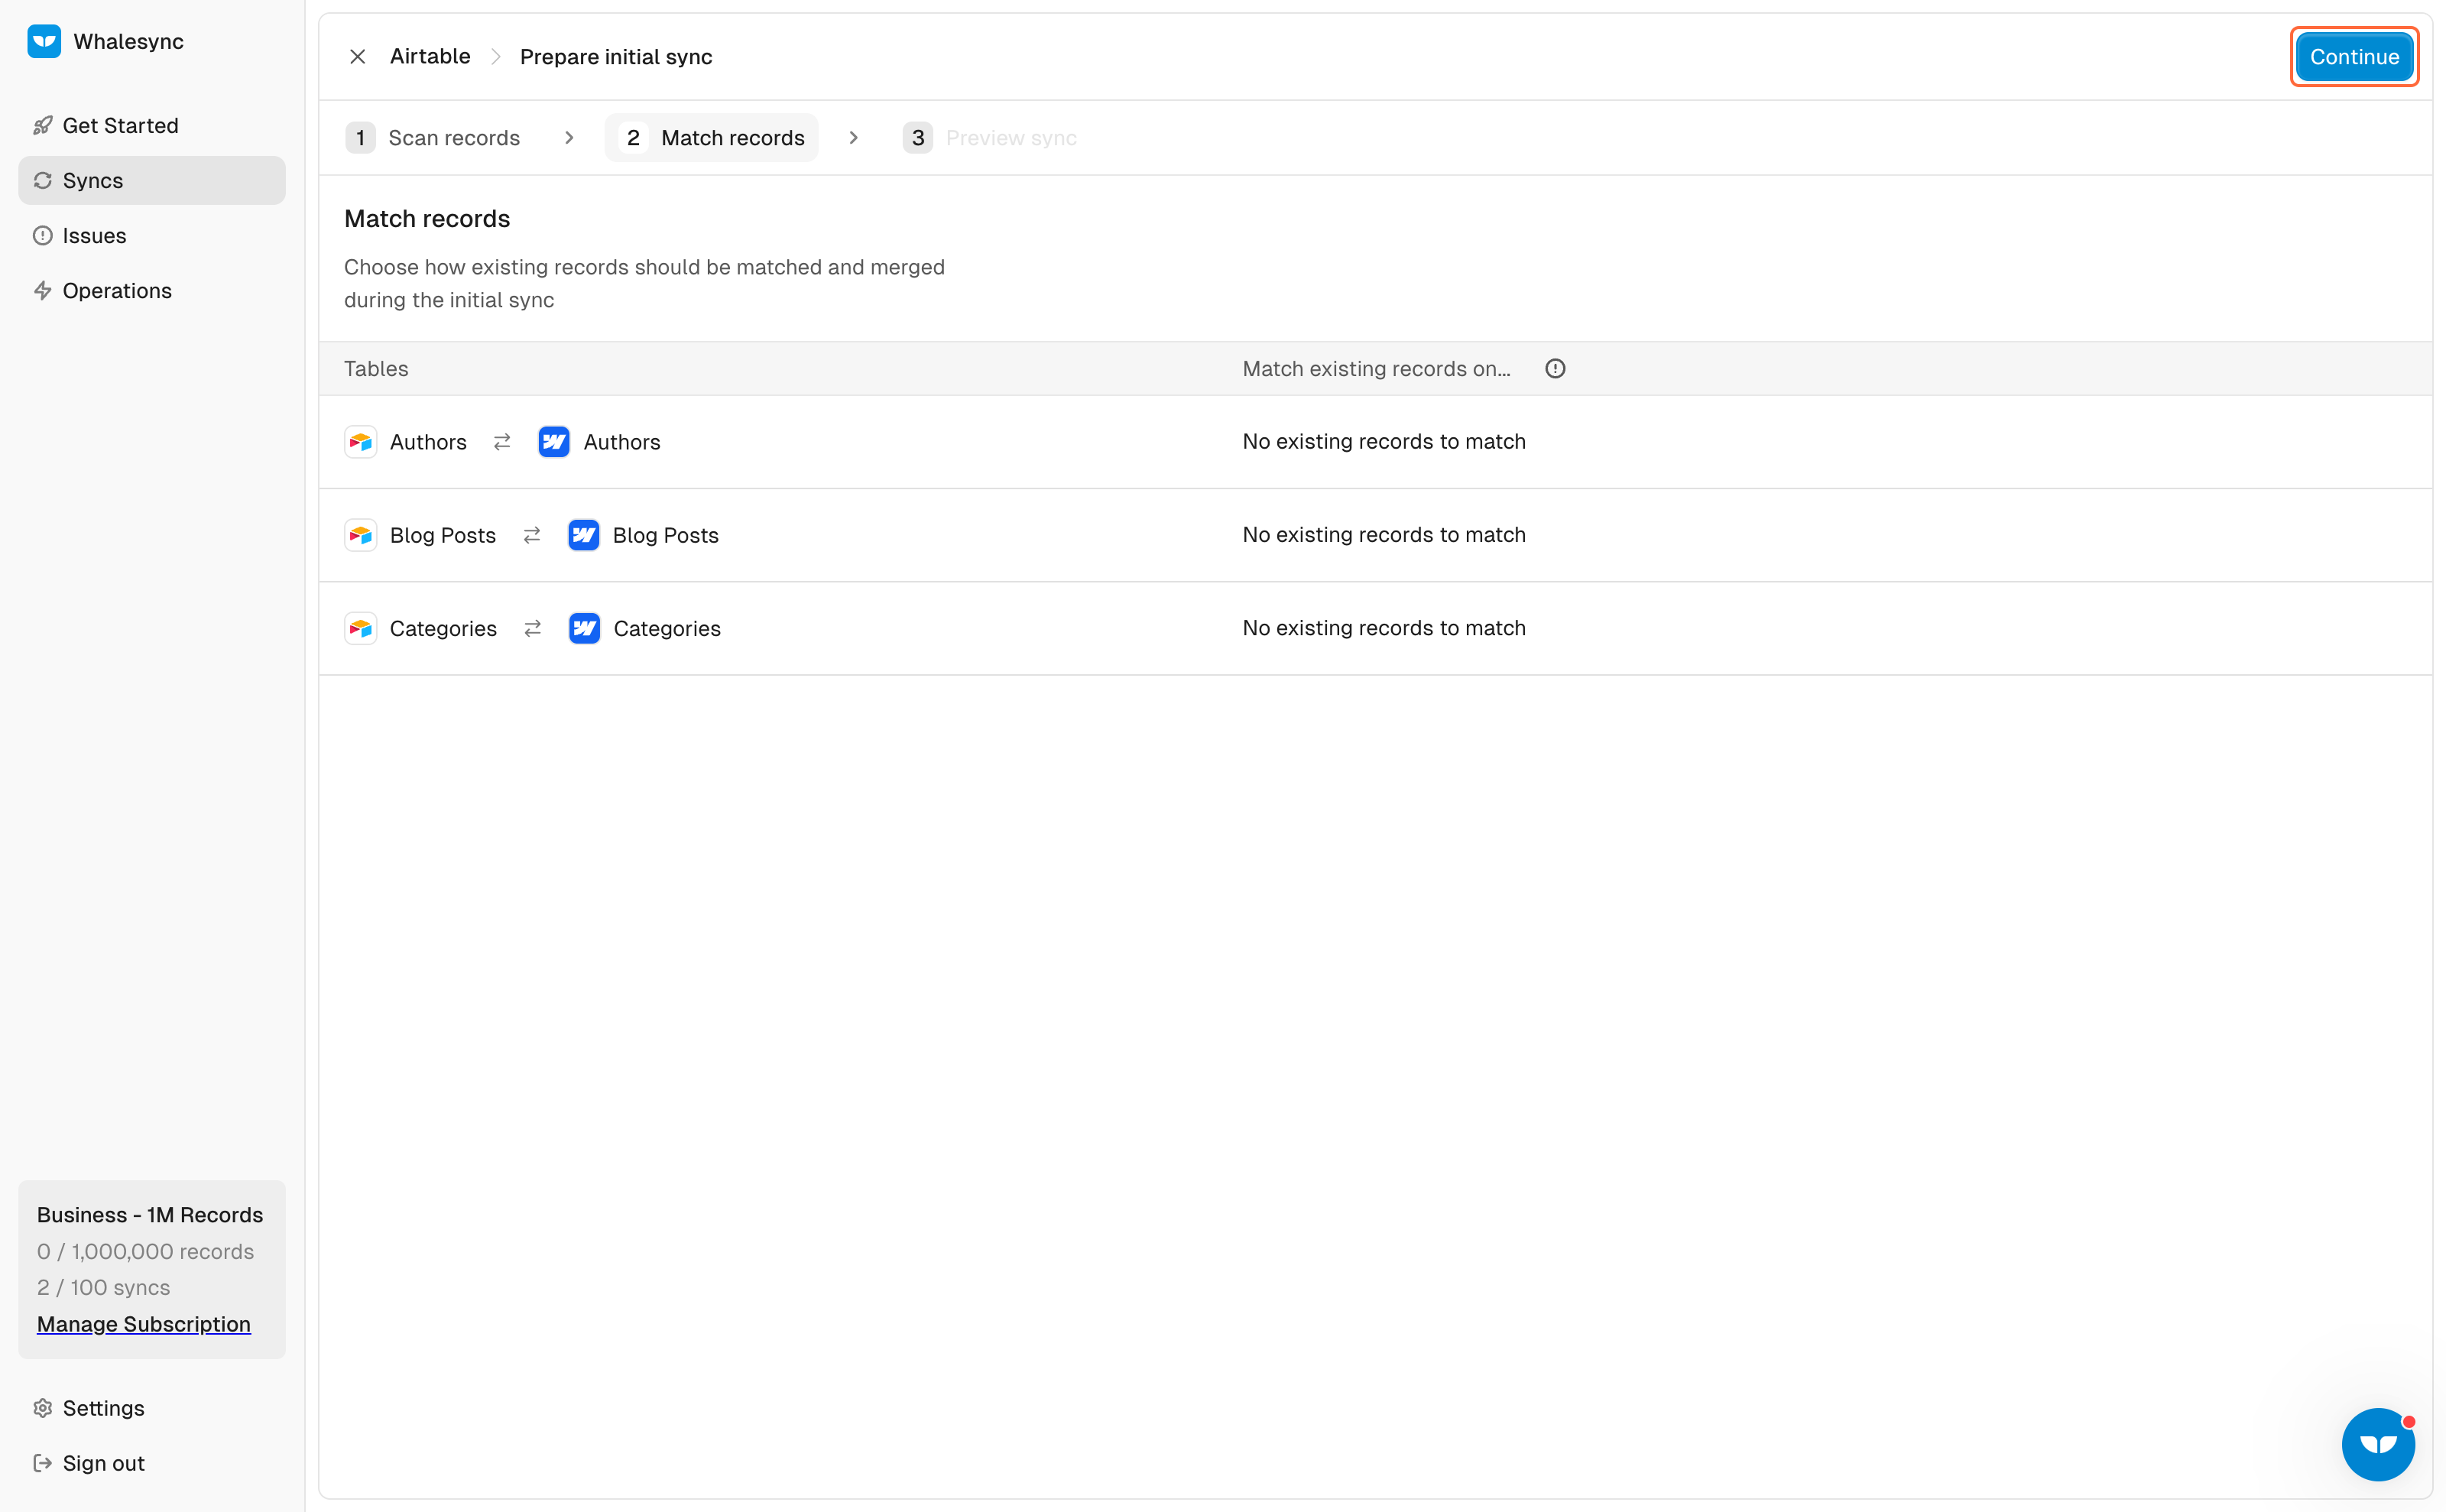
15. Match your records if needed
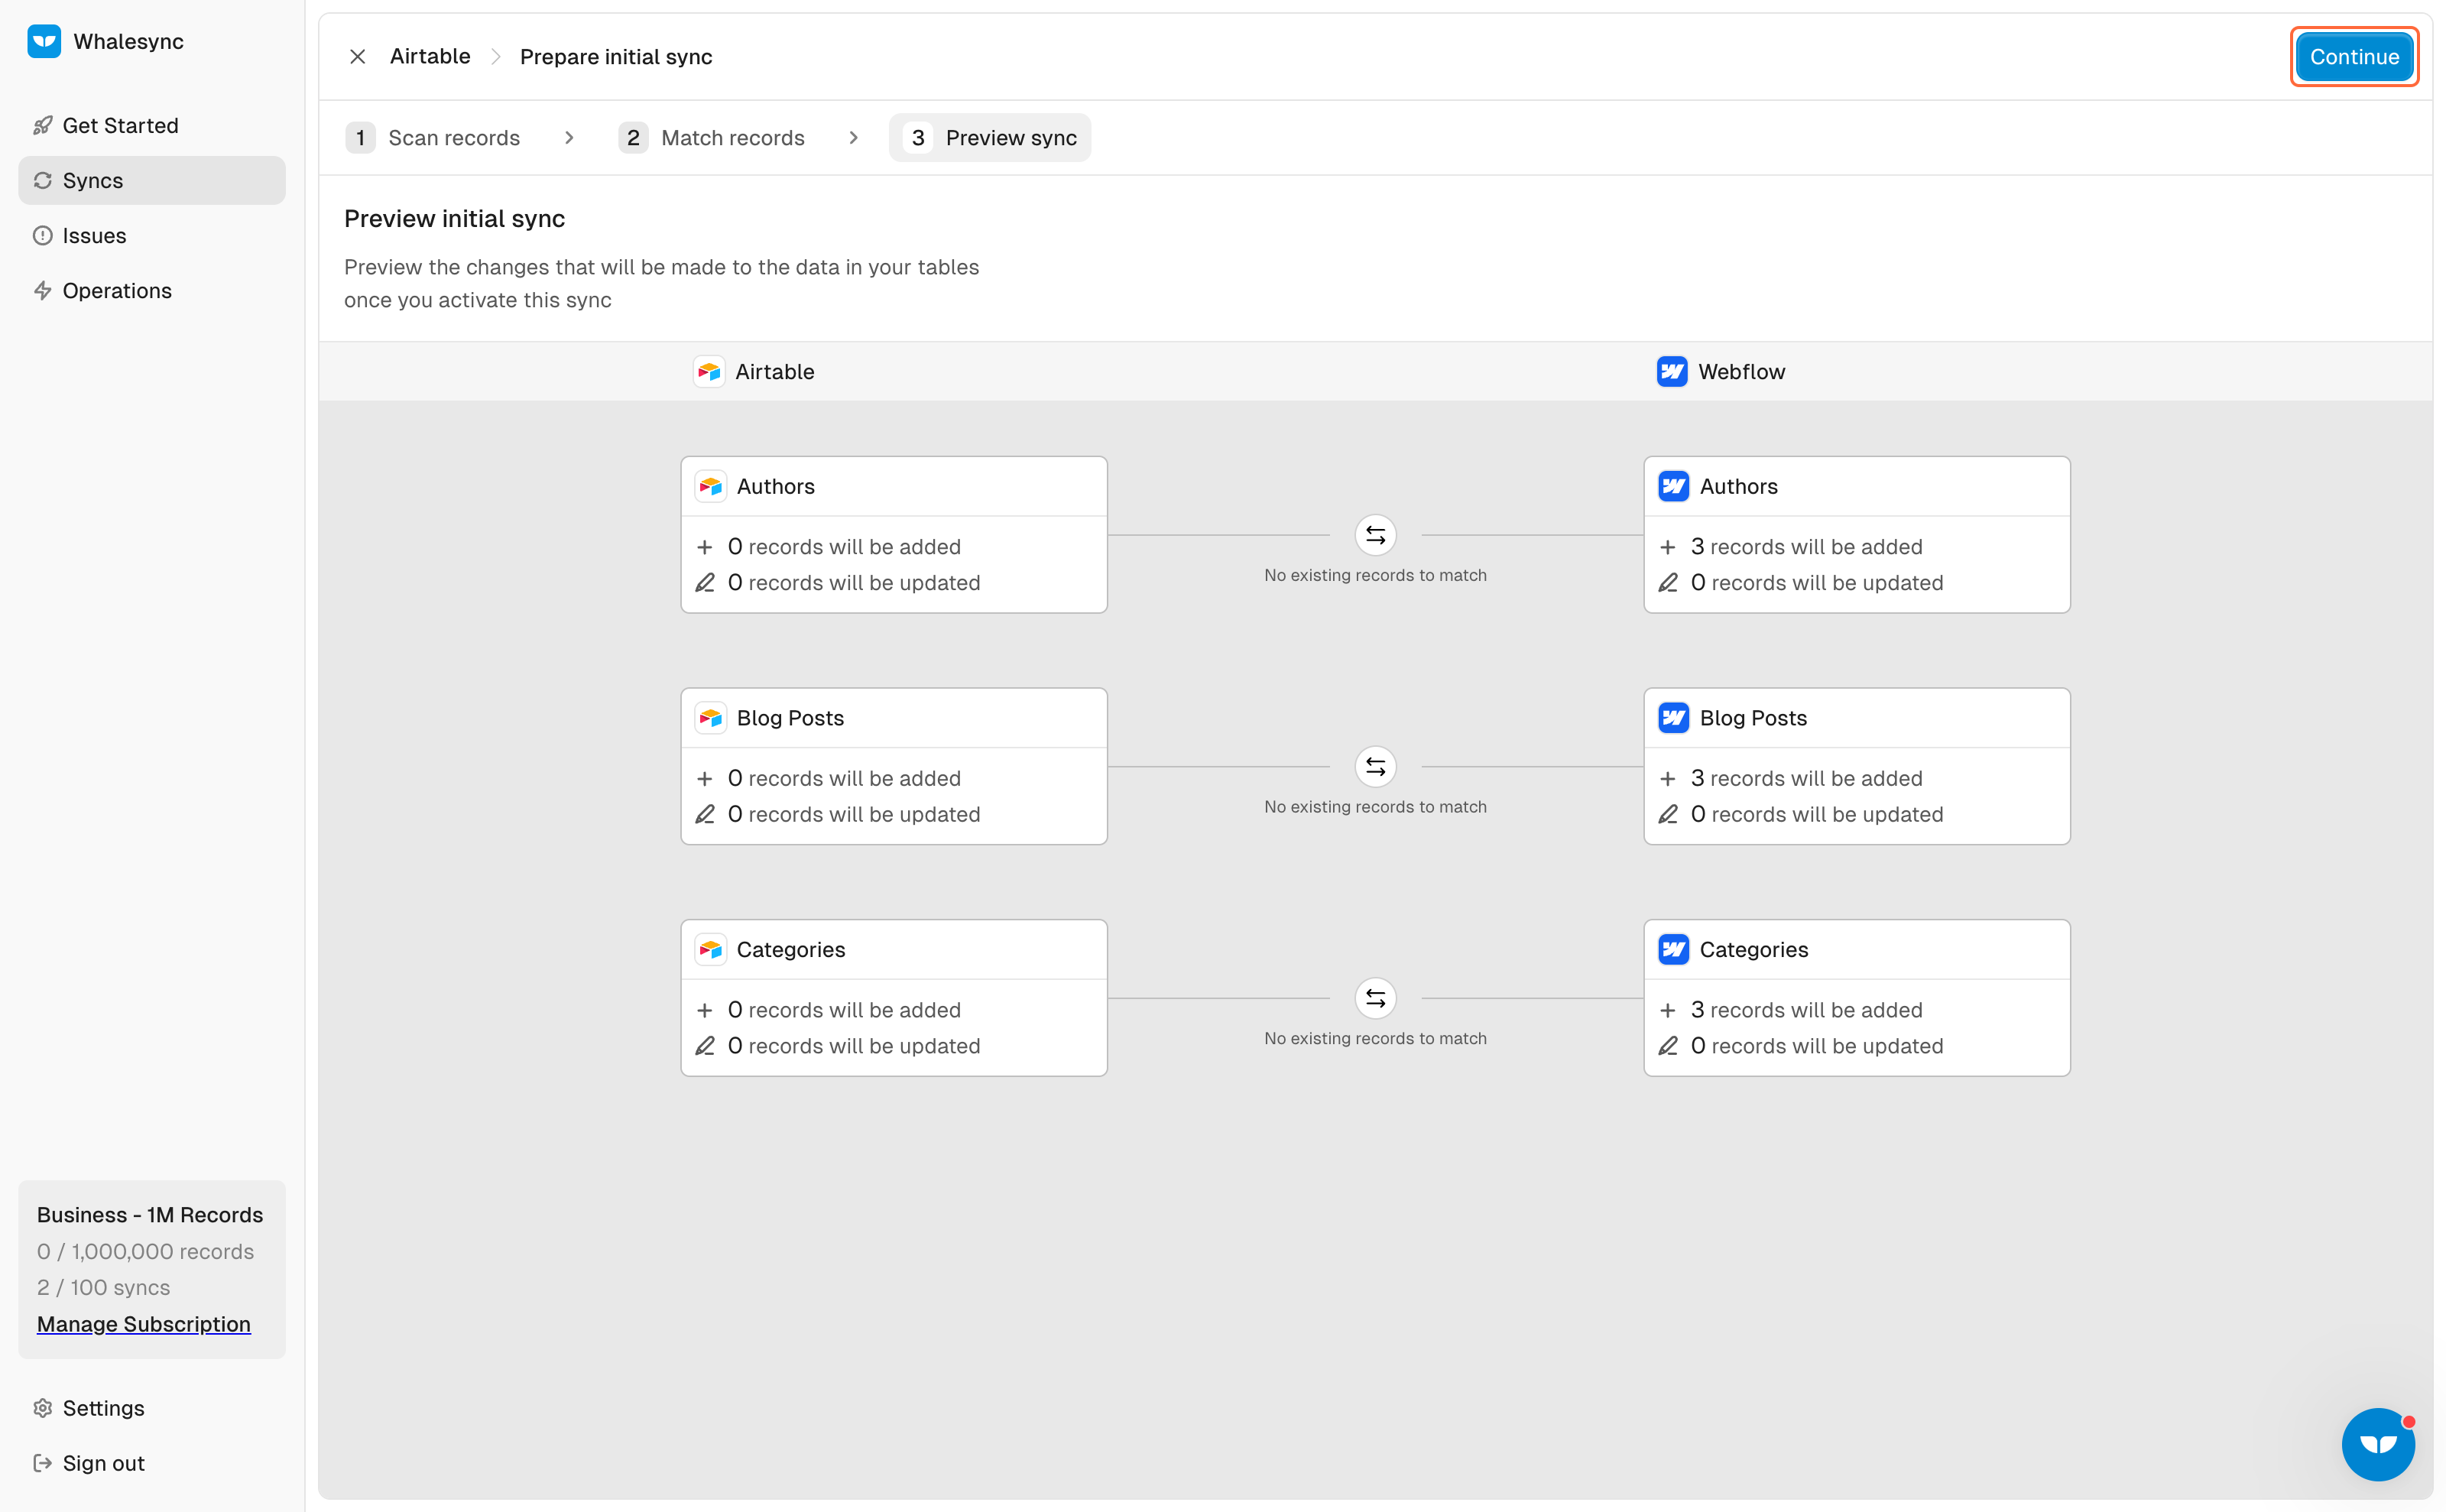
16. Check your sync preview
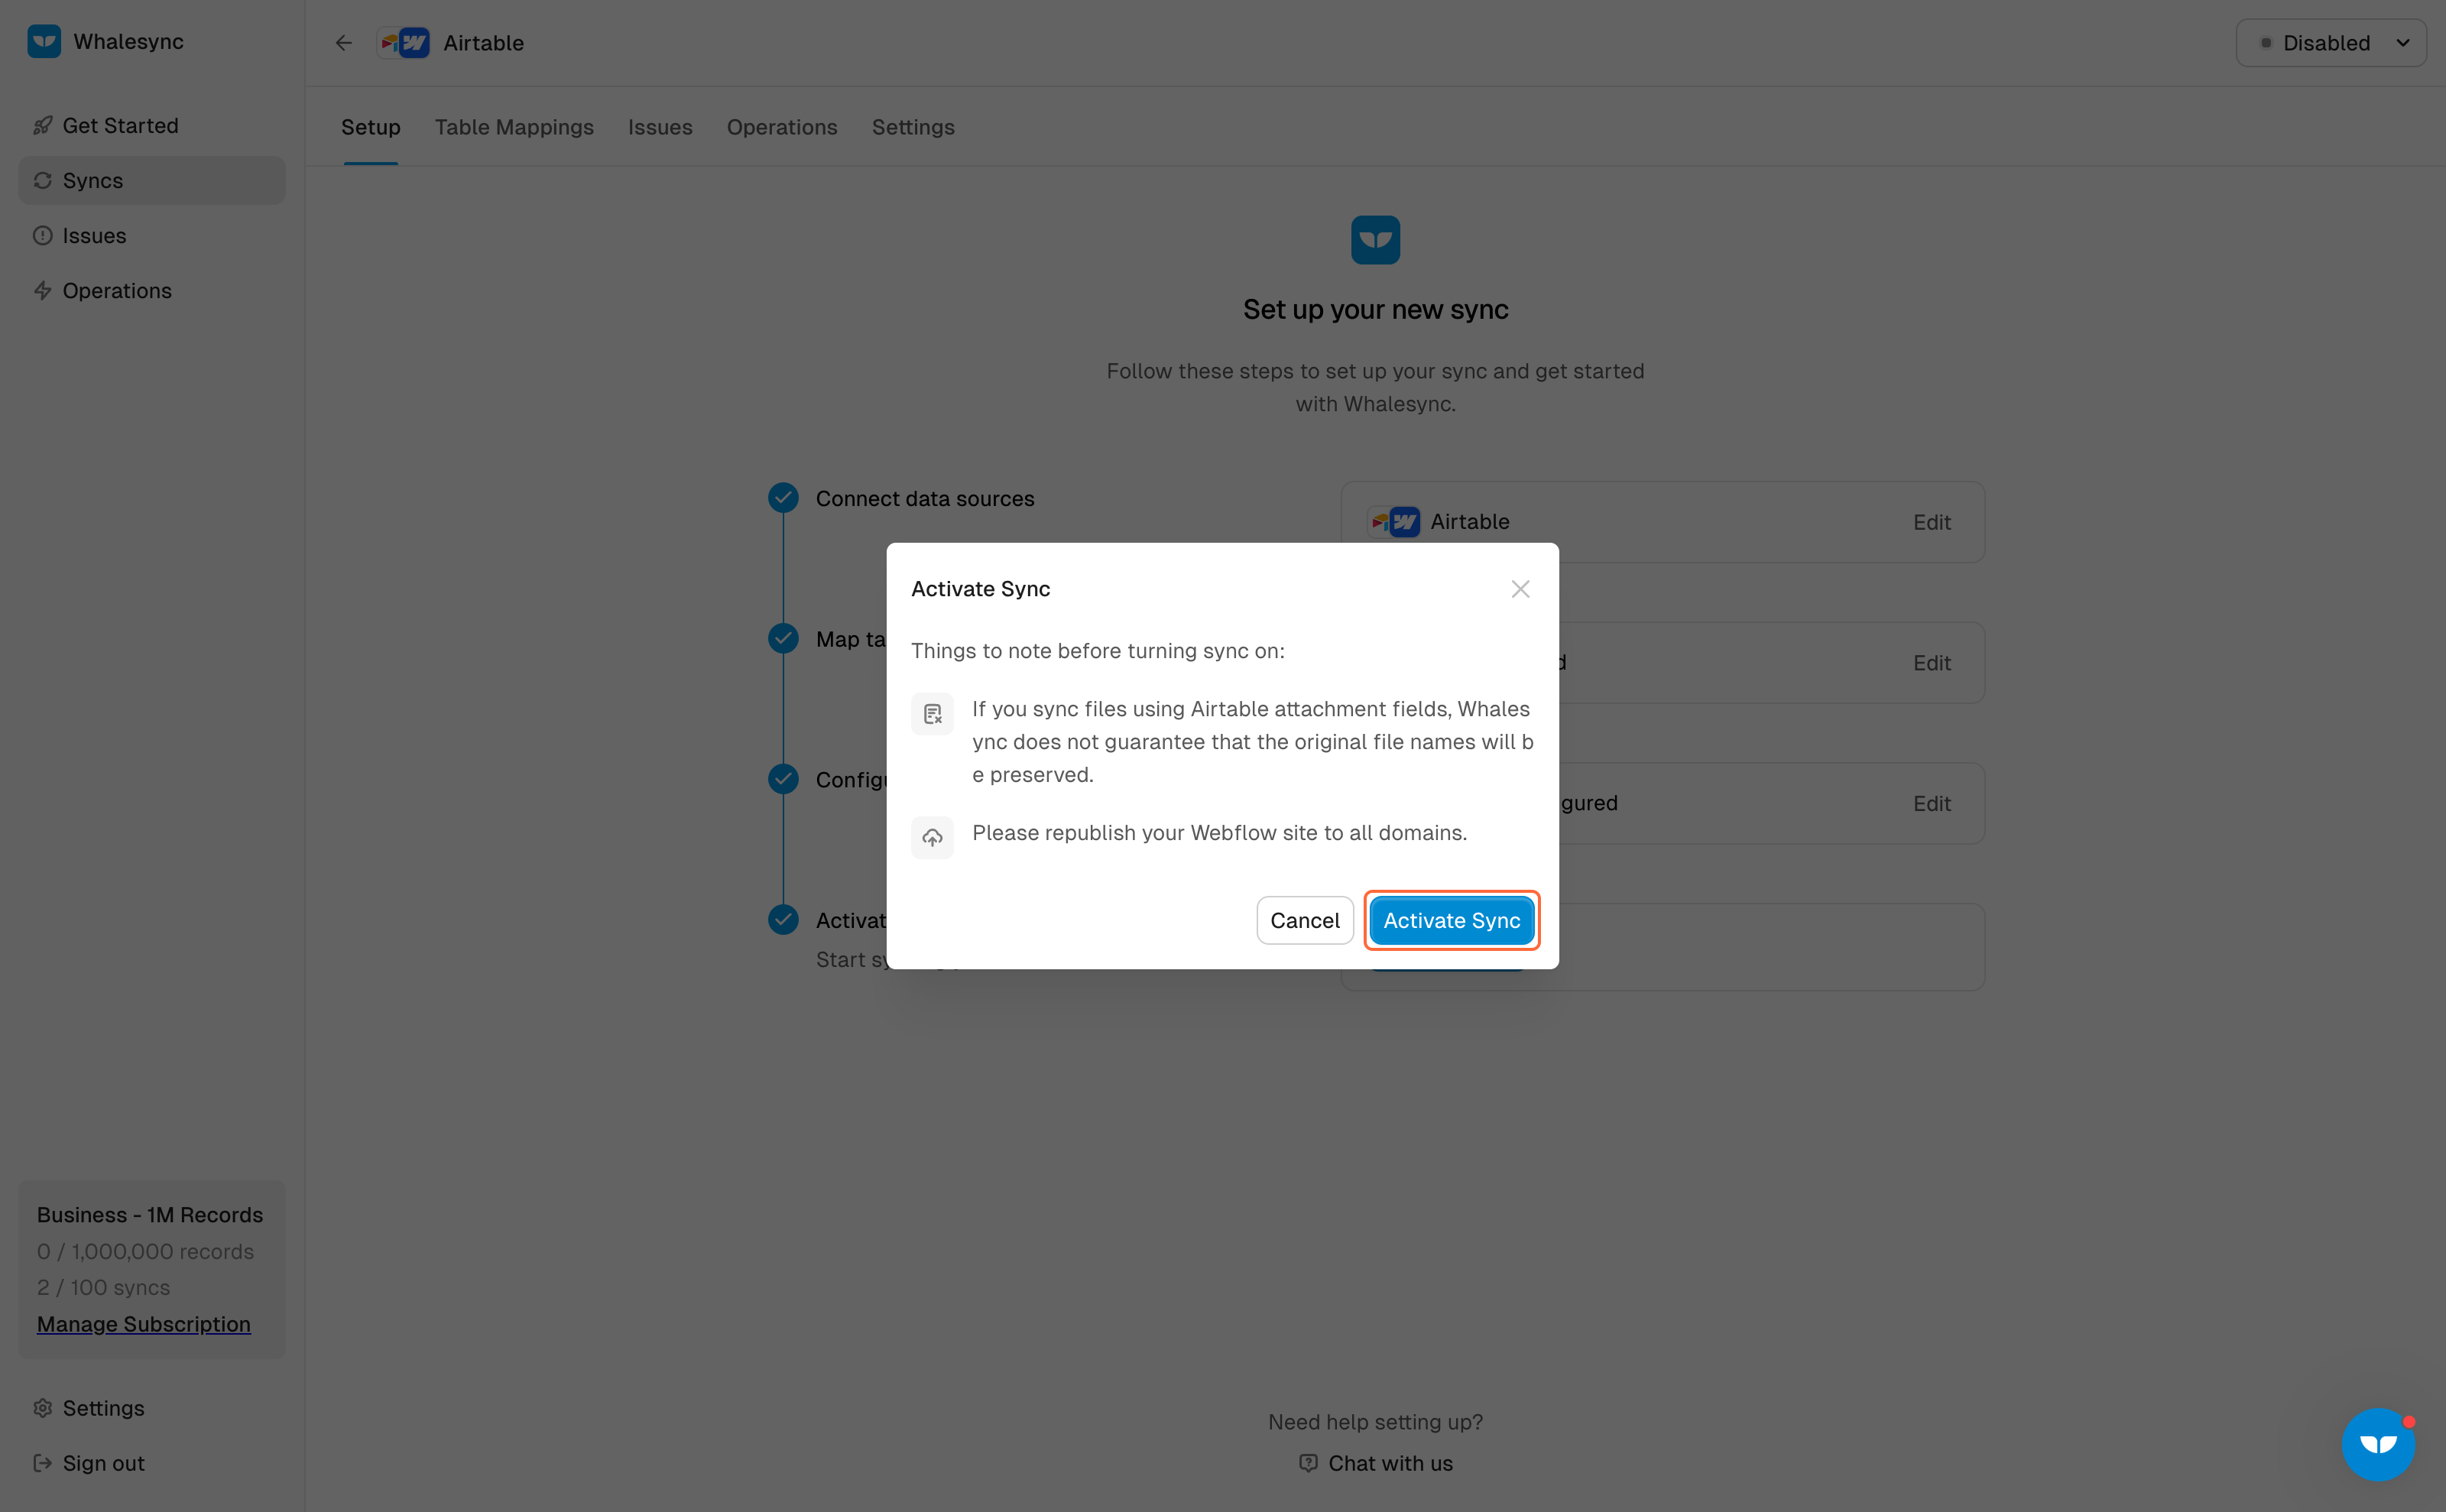
17. Activate your Sync
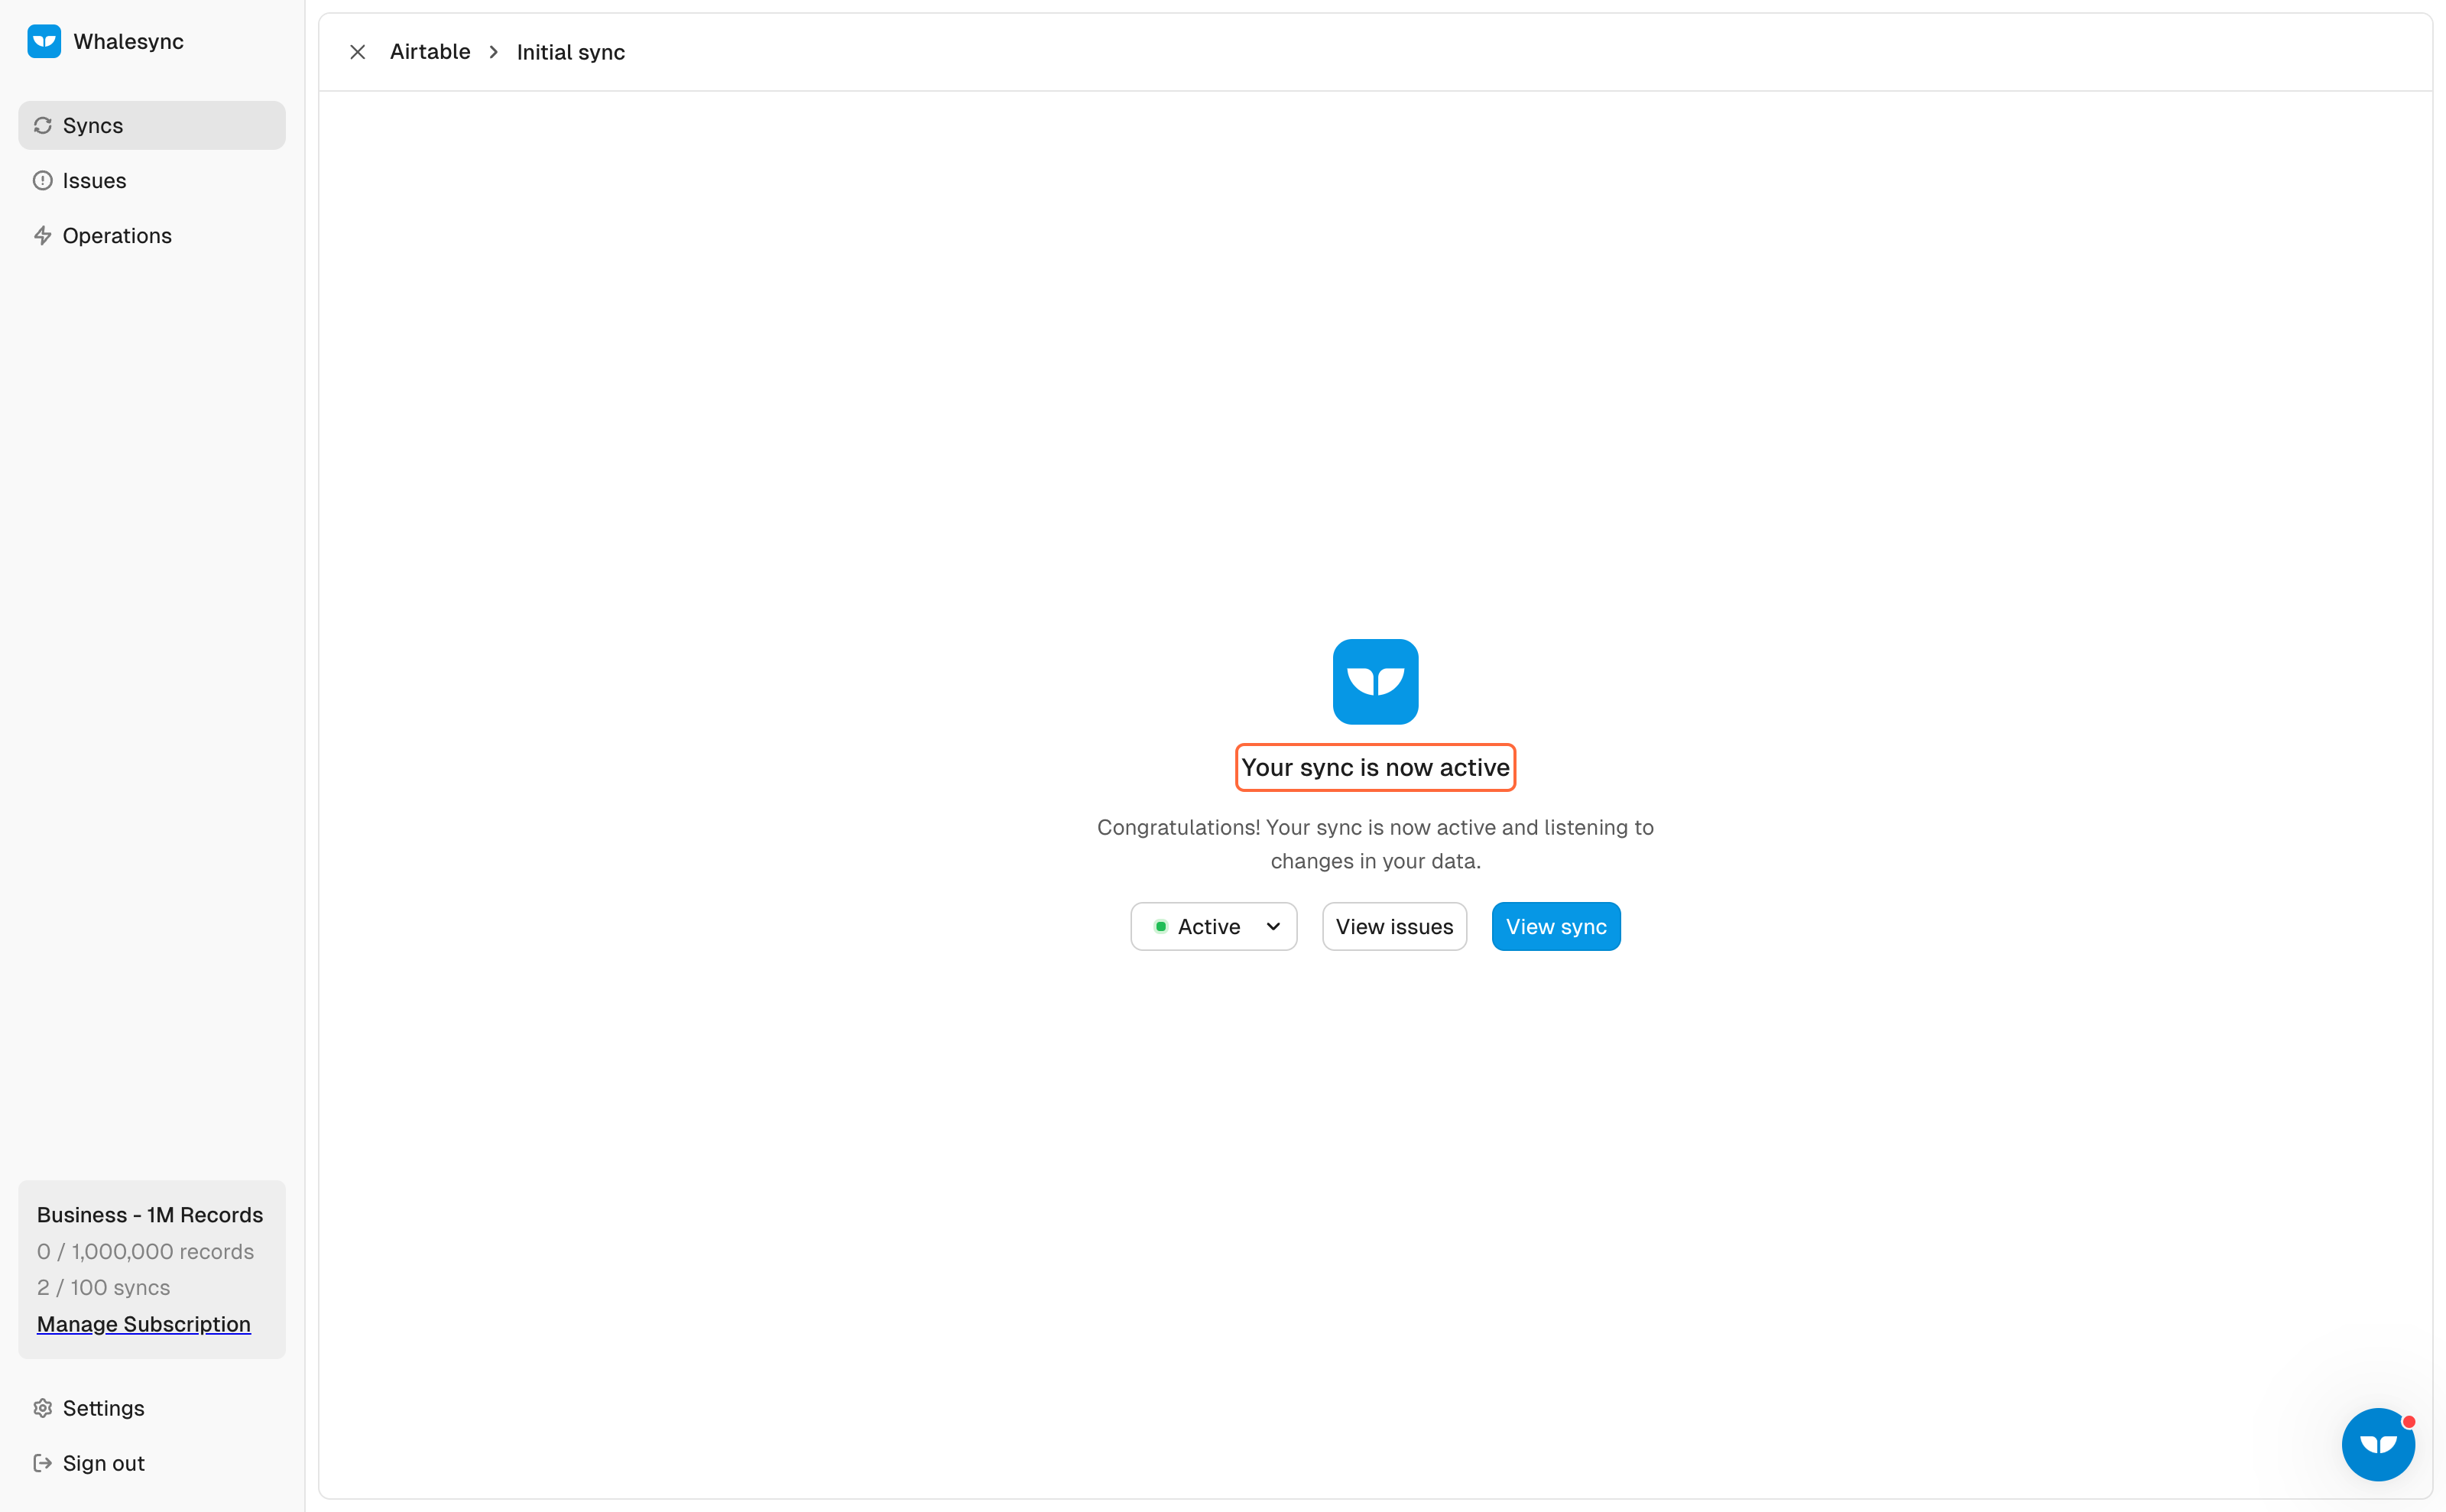
18. Congratulations! You are now syncing your Airtable and Webflow bases
Airtable to Webflow CMS
Whalesync is the easiest way to connect Airtable and Webflow. You can set up a real-time, two-way sync between your favorite tools in a few minutes. Let us know if you have any questions at hello@whalesync.com 🙂 or get started here.
Subscribe for more
Stay up to date with the latest no-code data news, strategies, and insights sent straight to your inbox!
.jpeg)


.svg)


.svg)

