How to Export Shopify Inventory as a CSV
.jpeg)
How to export Shopify inventory as a CSV.

Keeping an up-to-date record of your inventory is essential for managing stock, tracking changes, and planning reorders. Instead of checking each product manually, Shopify allows you to export your entire inventory as a CSV file, giving you a complete snapshot of product quantities across all your locations.
Here’s how to export your Shopify inventory in just a few clicks.
Step 1: Go to your Inventory page
- From your Shopify Admin, go to Products → Inventory.
- Use filters or search to view inventory by product, vendor, or location (if you fulfil inventory from multiple lcoations)
- Choose the location you want to export inventory from
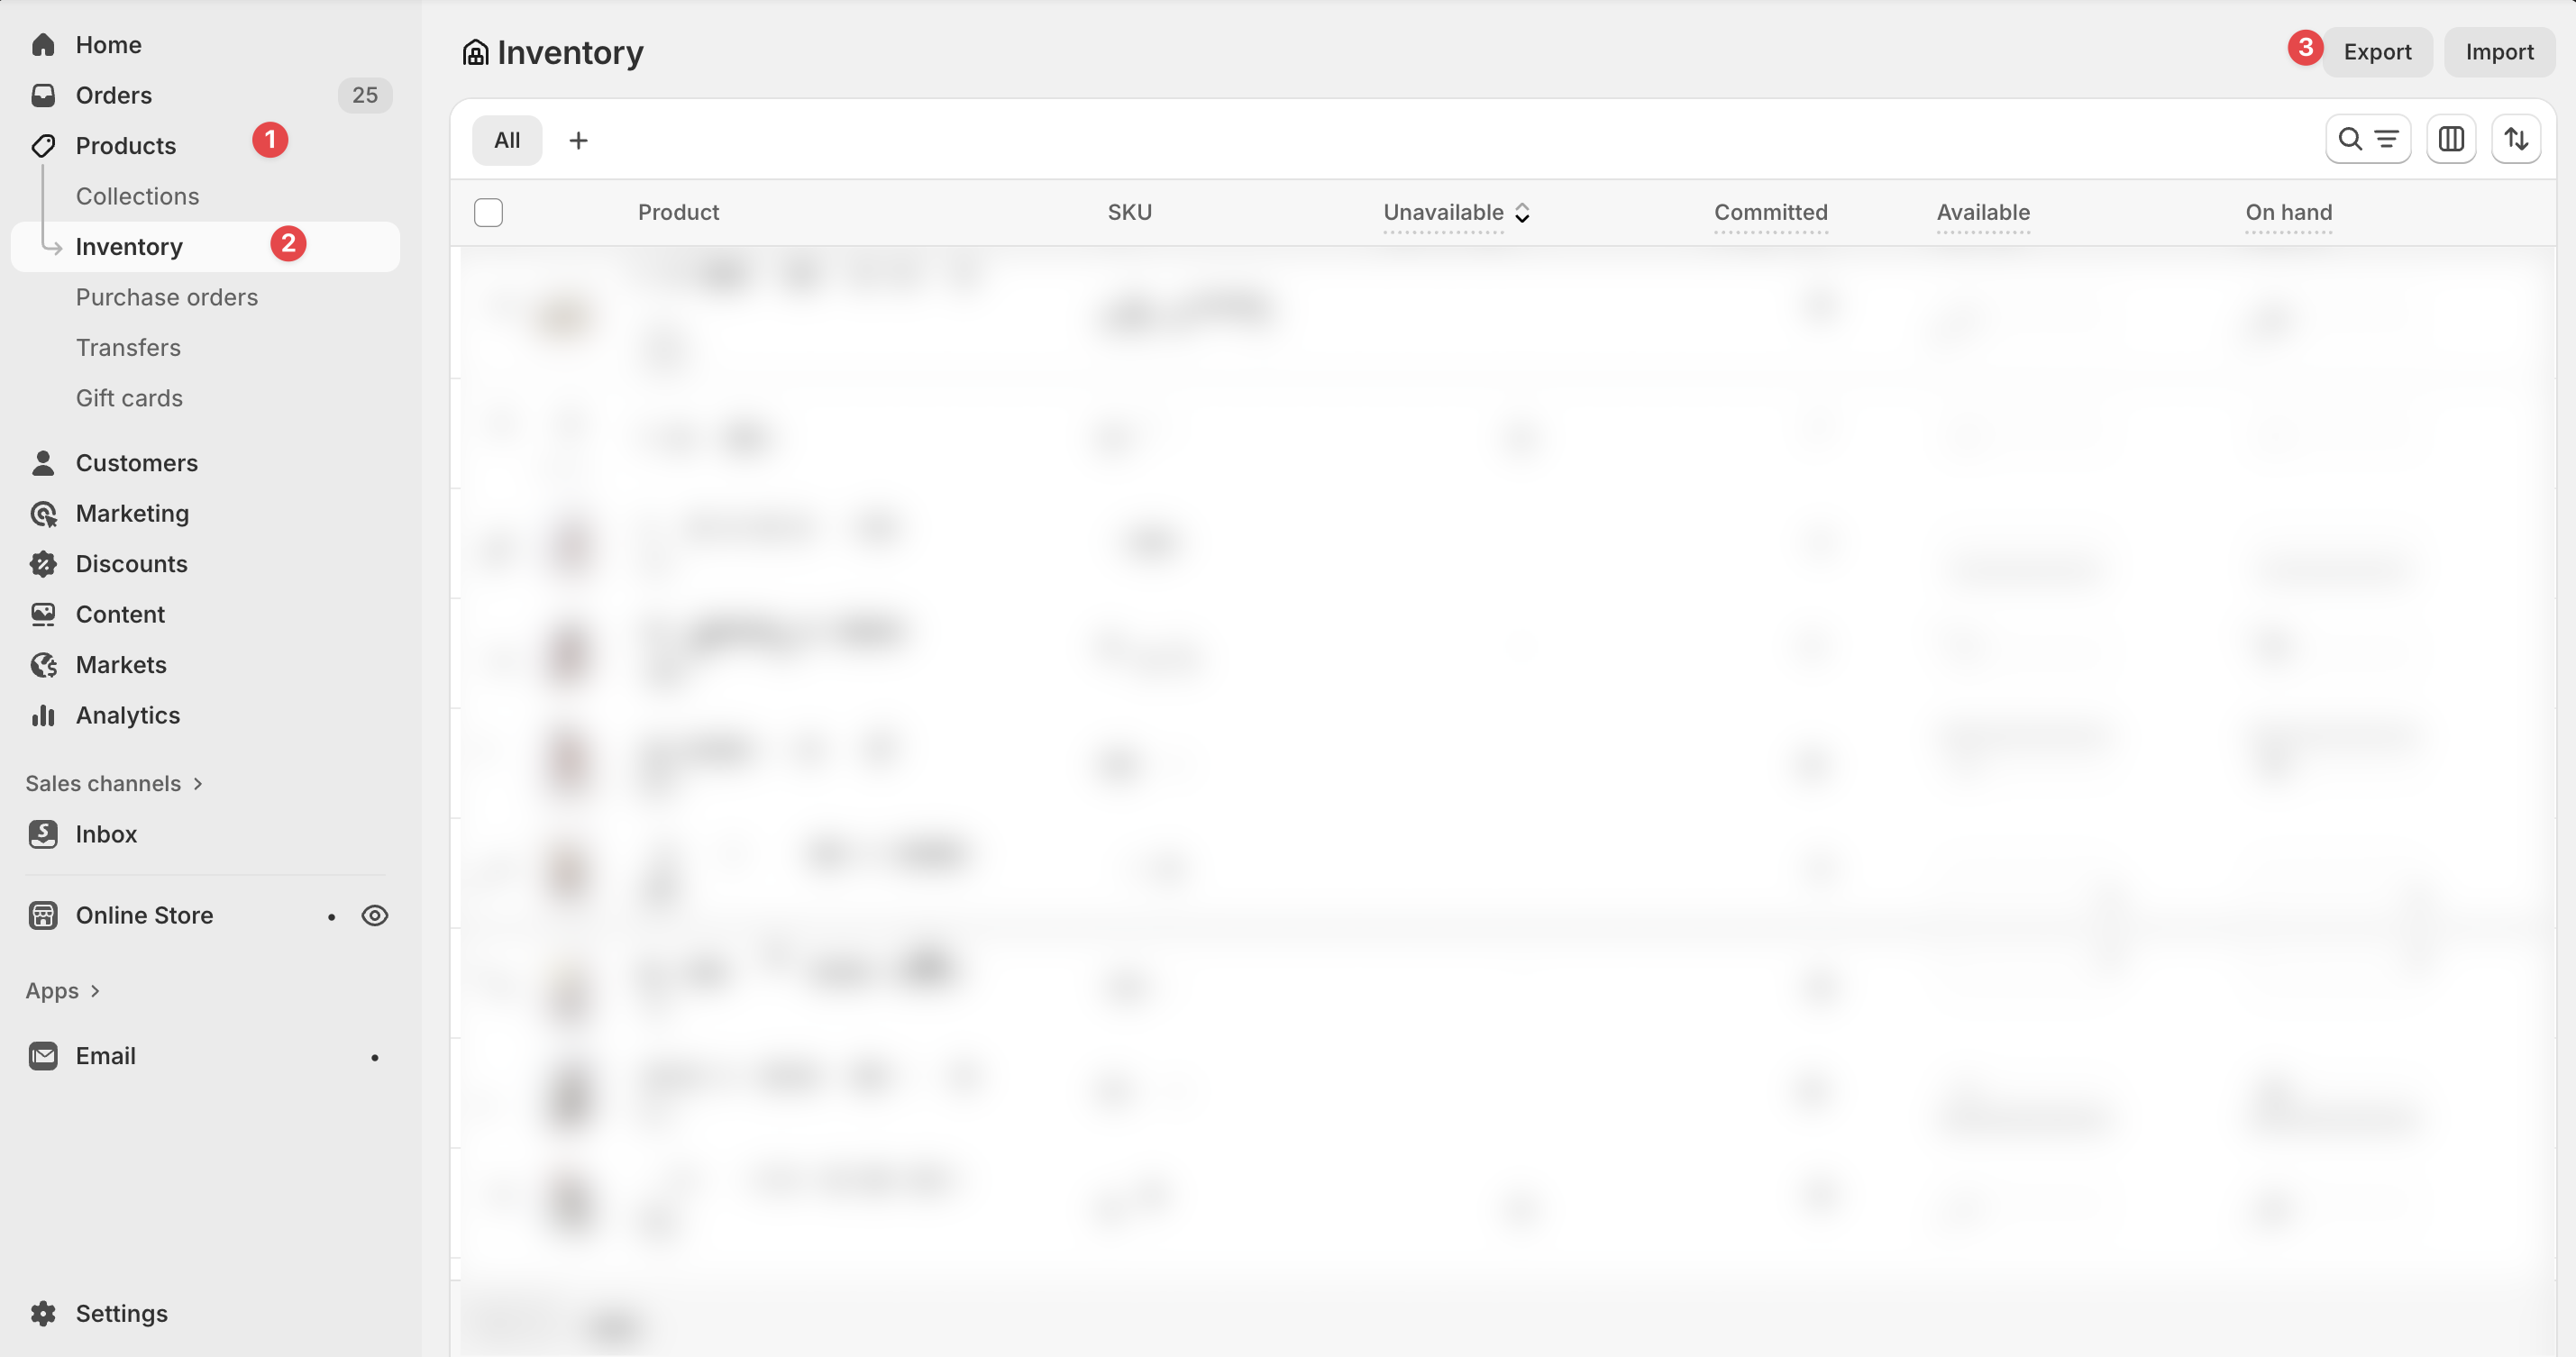
Step 2: Click “Export”
At the top right of the Inventory page, click Export.
A dialog box will appear asking what data you want to include in your export.
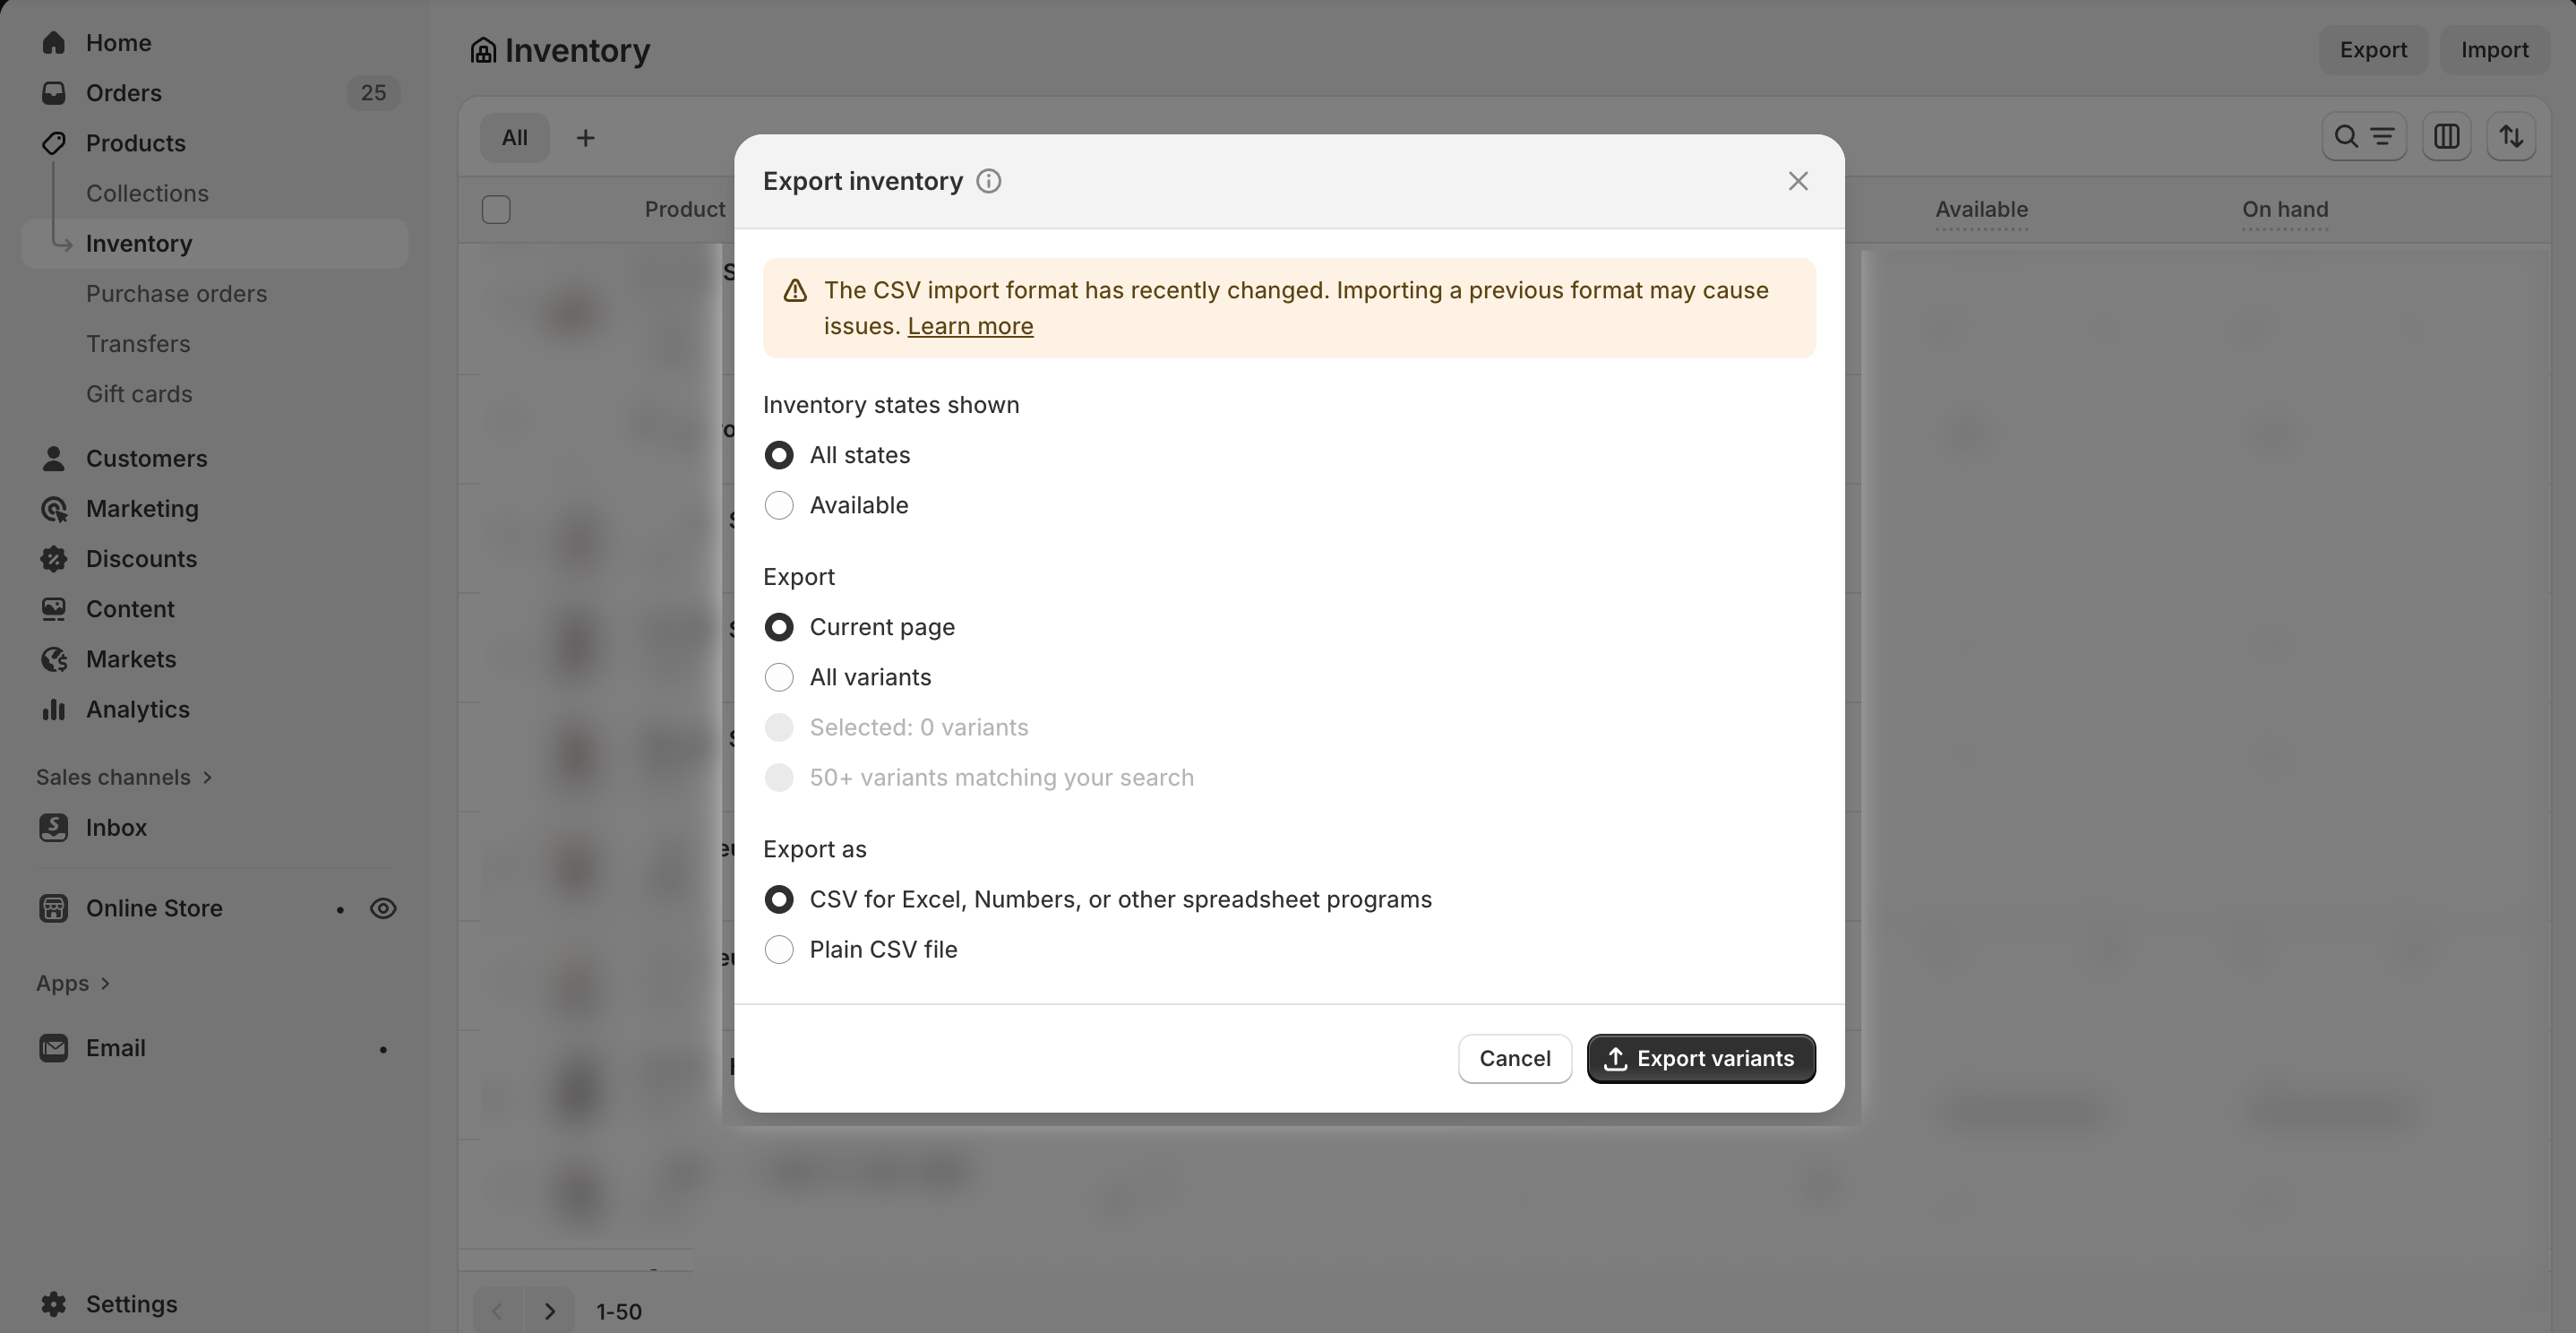
Step 3: Choose your export range
You can export:
- Current page: only the inventory displayed on your screen.
- All products: every product and variant in your store.
- Selected products: only the ones you’ve checked.
Choose your preferred option, then click Export inventory.
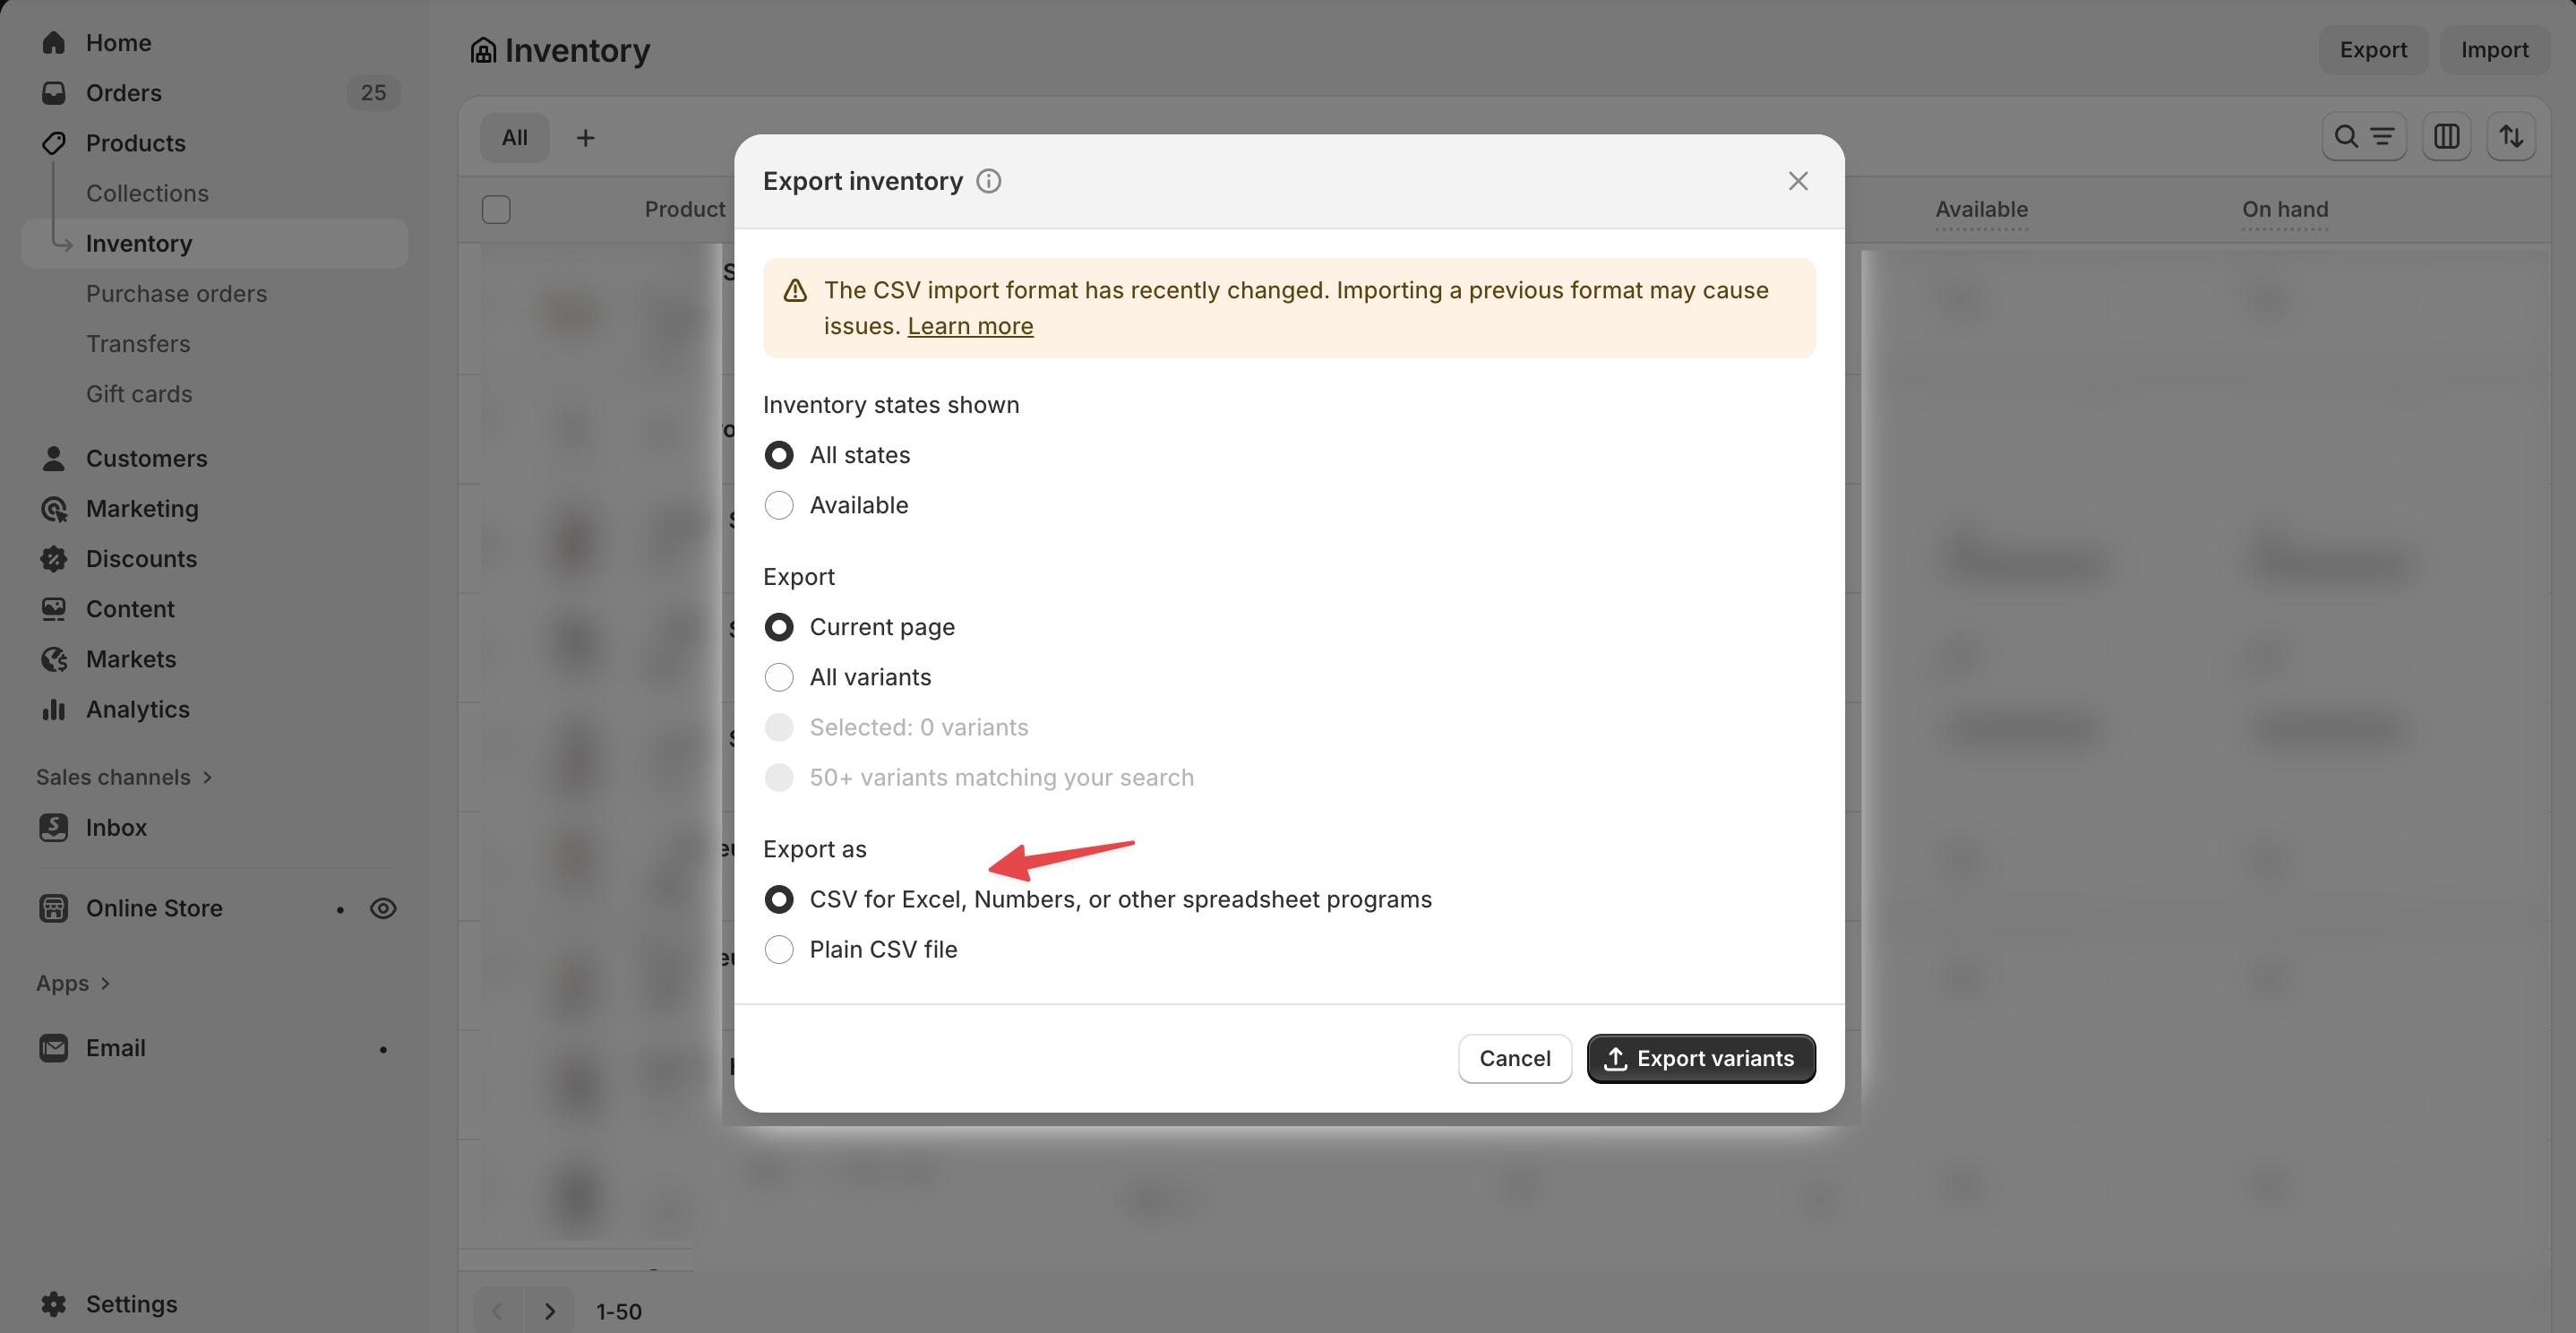
Step 4: Choose your file format
Shopify exports inventory data as a CSV file, which can be opened in Excel, Google Sheets, or any spreadsheet program.
You’ll see two file options:
- CSV for Excel, Numbers, or other spreadsheet programs, which is the most common choice.
- Plain CSV file, which is the best option if you plan to import the data into another system.
After selecting your format, click Export inventory again.
Step 5: Download your inventory CSV
- For smaller inventories, the CSV file will download immediately.
- For larger datasets, Shopify will email you a download link once the export is ready.
You can then open your file in a spreadsheet editor to view, sort, and analyze your inventory quantities.
What’s included in your Shopify inventory CSV
Your exported file includes the following columns:
- Handle: the unique identifier for each product.
- Title: product name.
- Option1/2/3 Name and Value: variant options (e.g., Size, Color).
- SKU: stock-keeping unit for each variant.
- Location name: the location tied to that inventory count.
- Available: number of units in stock.
If your store uses multiple locations, each product-variant-location combination appears on its own row.
Limitations of Shopify’s inventory export
- Exports include stock levels but not incoming inventory or inventory history.
- You can’t customize the CSV columns or field order.
- For very large catalogs, the export may take a few minutes to generate.
Tips for working with your inventory CSV
- Use exports as a backup before making bulk updates.
- Filter by location if you only need data for one warehouse or retail outlet.
- Save the CSV as UTF-8 to preserve special characters in product names or SKUs.
- Combine exports with your supplier or sales data to forecast restocks more accurately.
FAQs
Can I export inventory for only one location?
Yes. Use the Location filter at the top of the Inventory page to choose a specific warehouse or store before exporting.
Will the CSV include product images or prices?
No. The inventory CSV only includes quantity-related data. For prices or descriptions, export your Products CSV instead.
Can I schedule automatic inventory exports?
Not directly in Shopify. You’ll need to export manually or use a third-party app to automate recurring exports.
Can I edit this CSV and re-upload it?
Yes. You can adjust stock levels in the file and re-import it using Shopify’s Import inventory feature, just be careful not to change the column headers or formatting.
Subscribe for more
Stay up to date with the latest no-code data news, strategies, and insights sent straight to your inbox!


.svg)


.svg)

