How to Export Shopify Orders to CSV (5 Steps)
How to export Shopify orders to CSV.

How to Export Shopify Orders to CSV
If you run a Shopify store like me, there will come a time when you need to export your Shopify orders to a CSV file, you might want to analyze order history, or migrate information into accounting or analytics tools. Shopify makes this process simple right from your admin dashboard.
In this guide, I’ll walk you through how to export Shopify orders manually and customize your export to get exactly the data you need.
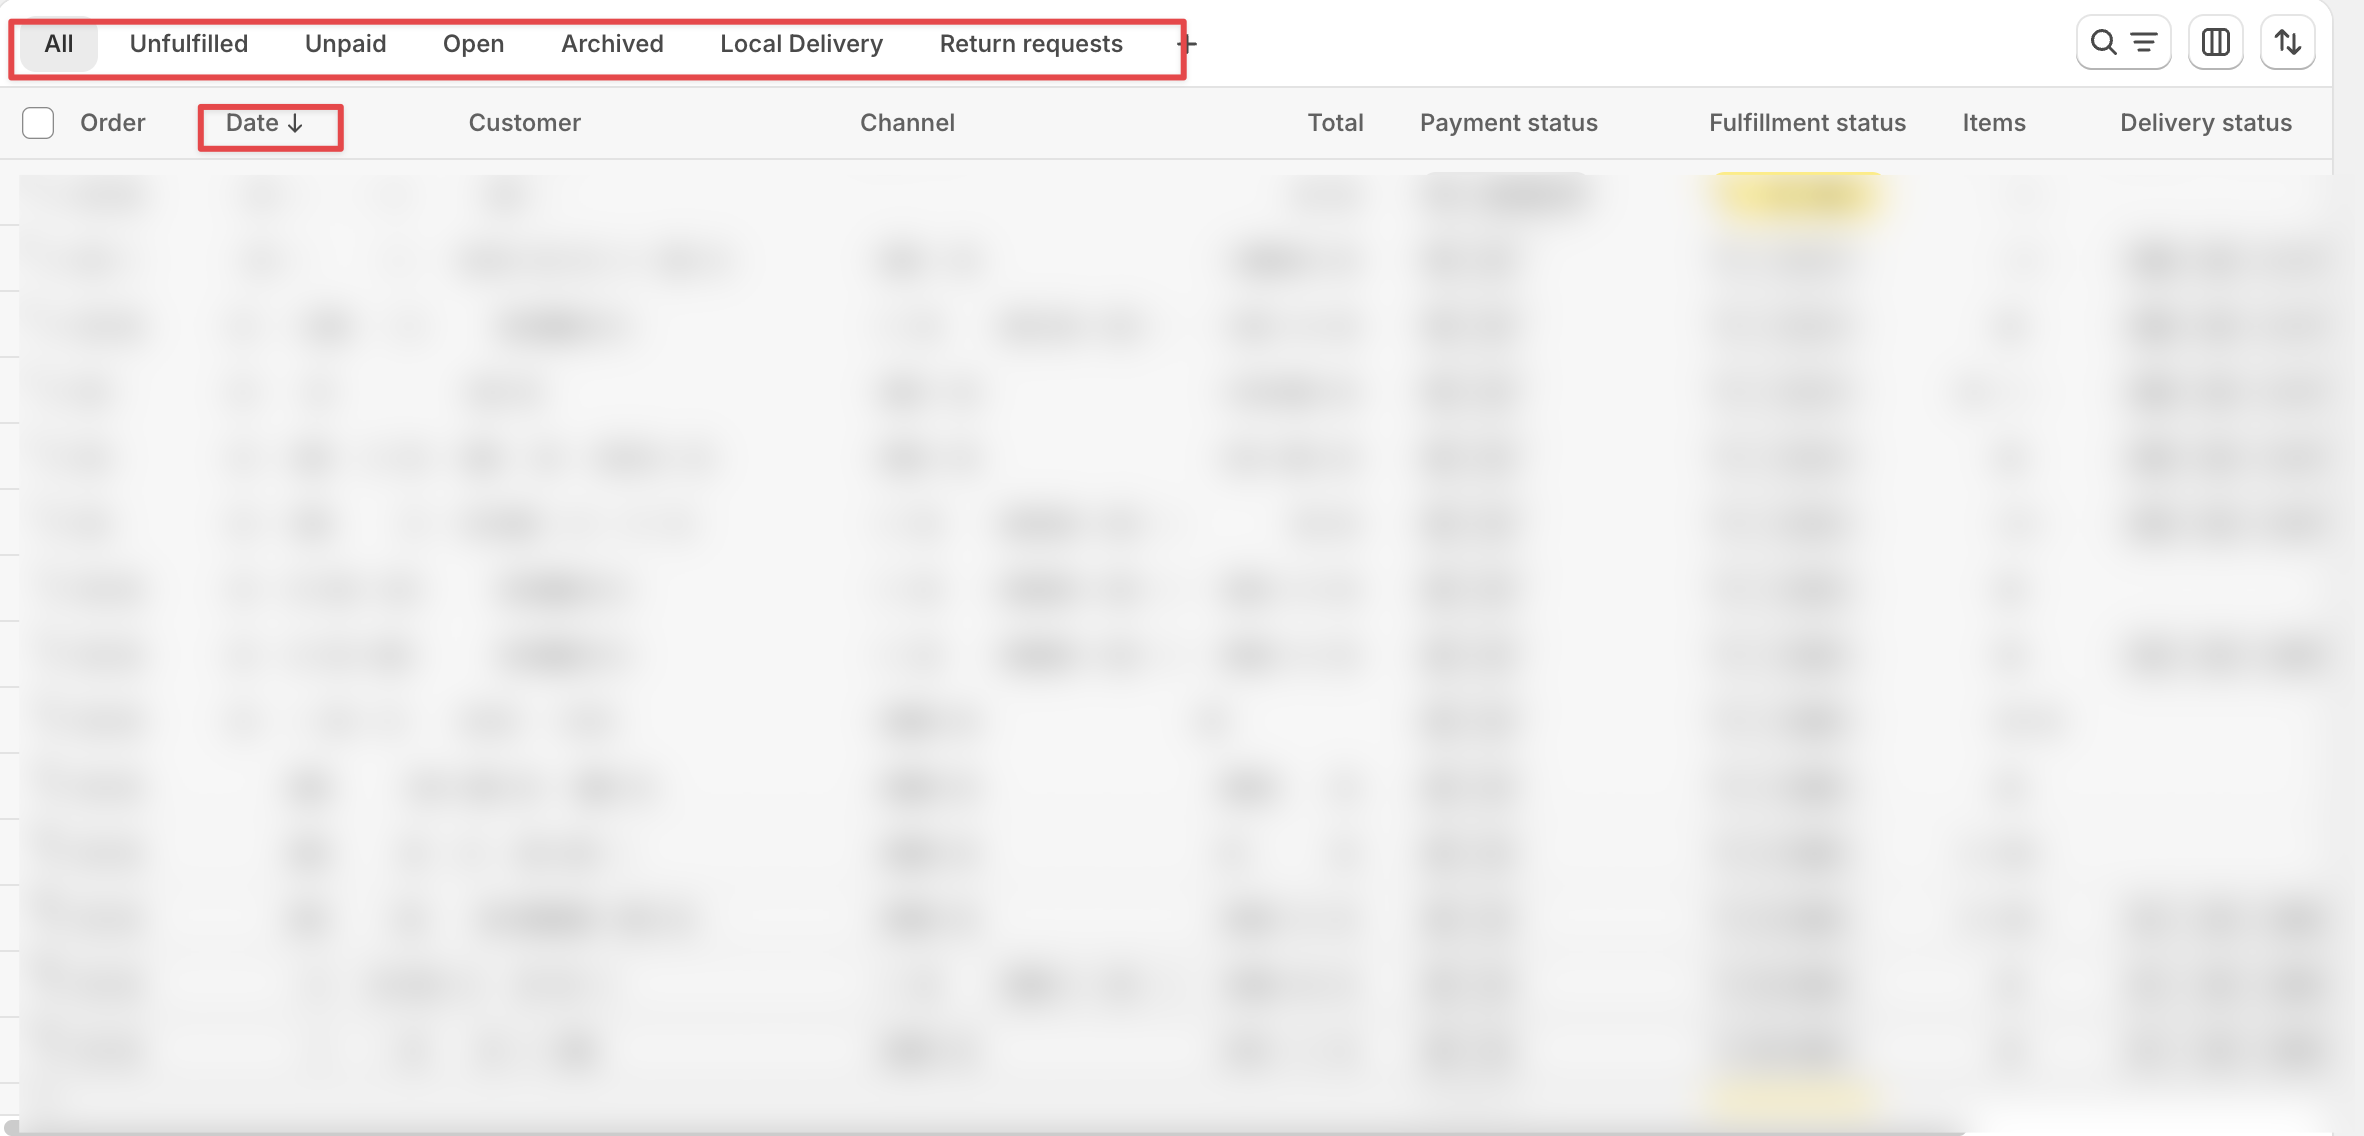
Step 1: Go to your Orders page
- From your Shopify Admin, go to Orders.
- Use filters or search to locate the orders you want to export, for example, by date range, fulfillment status, or payment status.
Step 2: Click “Export”
At the top right of the Orders page, click the Export button.
A dialog box will appear allowing you to choose which orders and file type you’d like to export.

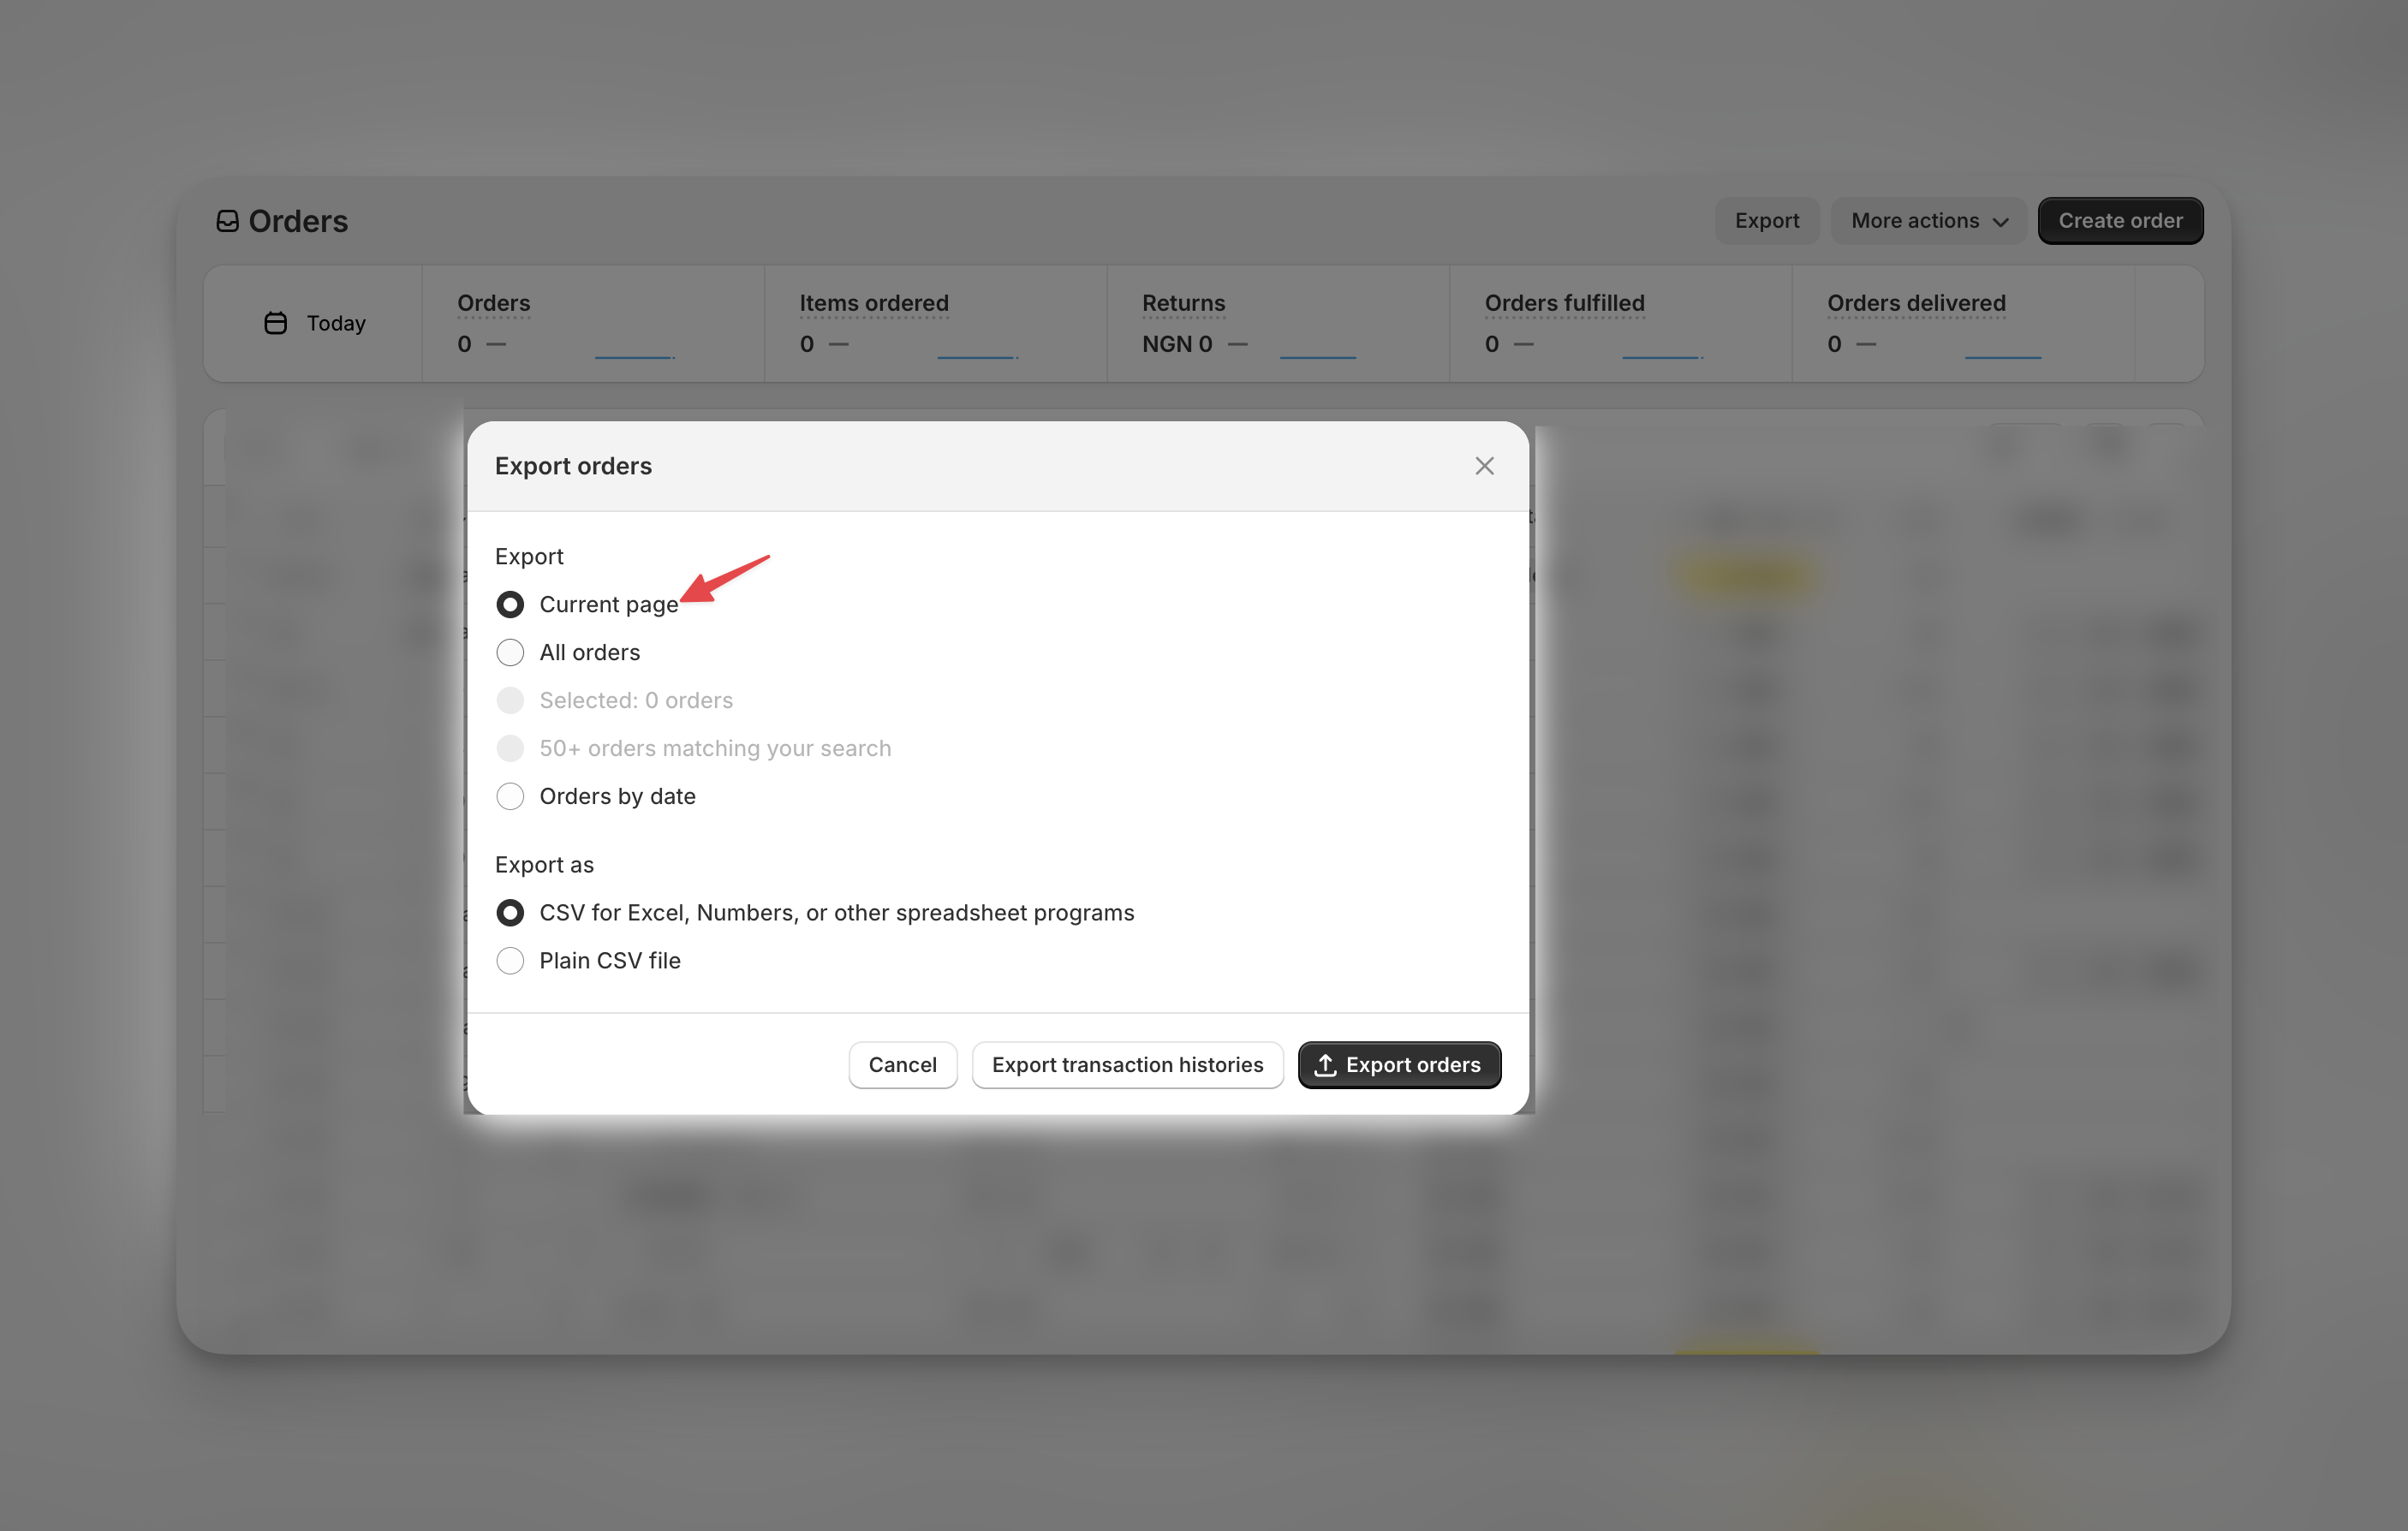
Step 3: Choose what to export
You can choose to export:
- Current page: only the orders visible on your current screen.
- All orders: every order in your store’s history.
- Orders by date: only orders created within a specific time range.
- Selected orders: only the orders you’ve manually checked.
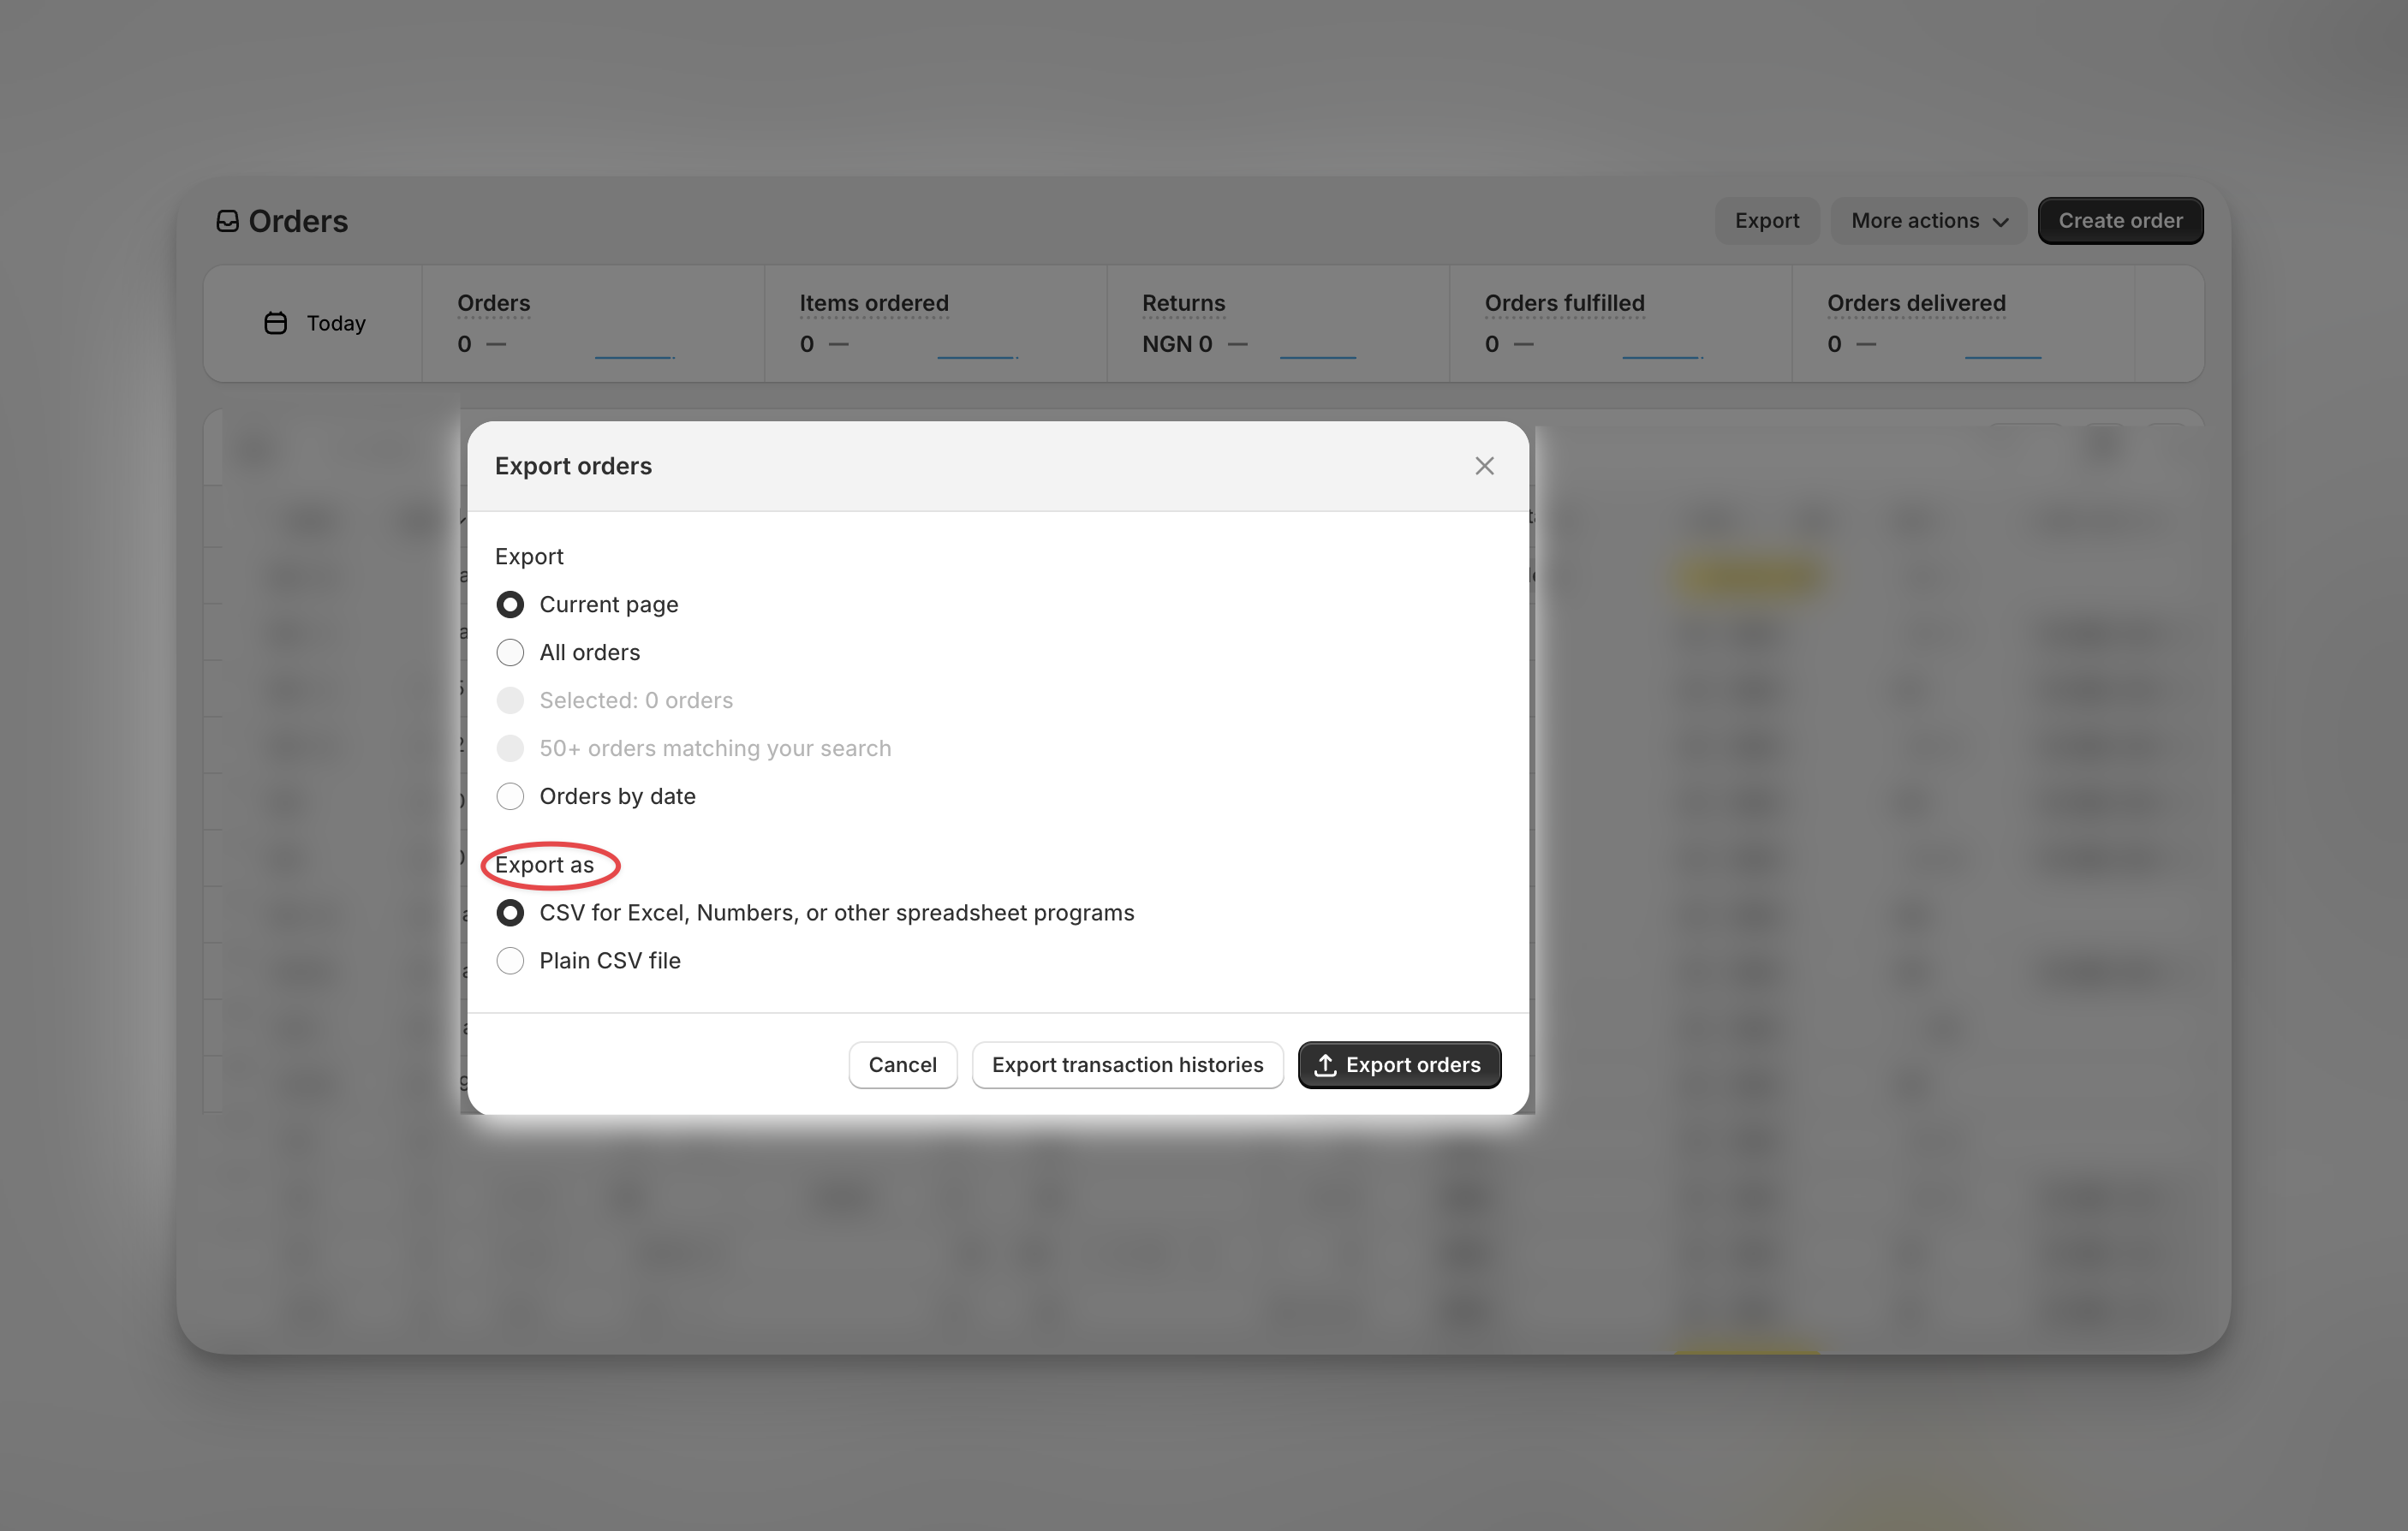
Step 4: Choose your file format
Shopify provides two file format options for your export:
- CSV for Excel, Numbers, or other spreadsheet programs: ideal for most users.
- Plain CSV file: suitable for importing into databases or third-party tools.
After choosing your preferences, click Export orders.
Step 5: Download your CSV file
- For smaller exports, the CSV file will download immediately to your computer.
- For larger datasets, Shopify will email you a download link once the export is ready.
What’s included in your Shopify orders CSV
Your exported CSV file will contain detailed order data, including:
- Order ID and creation date
- Customer information (name, email, phone number)
- Shipping and billing addresses
- Product titles, SKUs, quantities, and prices
- Order status (paid, pending, fulfilled, refunded)
- Taxes, discounts, and shipping costs
- Total order value
You can open the CSV file in spreadsheet software like Excel or Google Sheets to analyze, filter, or organize your data.
Limitations of Shopify’s order export
While exporting to CSV is simple, there are a few things to keep in mind:
- You can’t schedule recurring exports or automate delivery to external tools.
- CSV exports don’t include product images or fulfillment tracking links.
- File size limits apply for very large stores, you may receive your file via email instead of direct download.
FAQs
Can I export only paid or fulfilled orders?
Yes. Use the filters on your Orders page to select orders by payment or fulfillment status, then click Export.
How often can I export orders?
There’s no limit. You can export orders as often as you like.
Will the CSV include my product images?
No. Shopify exports text-based data only. Product images and attachments aren’t included in CSV files.
Can I open the CSV in Google Sheets?
Yes. You can upload your exported CSV file directly into Google Sheets or Excel for editing and analysis.
Subscribe for more
Stay up to date with the latest no-code data news, strategies, and insights sent straight to your inbox!


.svg)


.svg)

